Documentation
Let's get started.
Thank you for your purchase. This documentation file will serve as a general introduction to Skola, covering topics such as theme installation and configuration, content creation, and general how-tos.
Enjoy the product!
—Team Cocoon
- theme: Skola
- platform: Moodle
- updated: December 2021
The following instructions will show you how to install a fresh instance of Moodle, complete with Skola installed, all modules pre-configured, and extensive demo content with placeholder images.
1. Create database
Unless you plan on using an existing database, you must create a new database for your Moodle installation.
The database can be named however you wish. The database can be created via phpMyAdmin (as shown below), or via another database manager such as cPanel or Parallels Plesk.
(You may also need to create a new database user, unless you plan on using an existing one.)
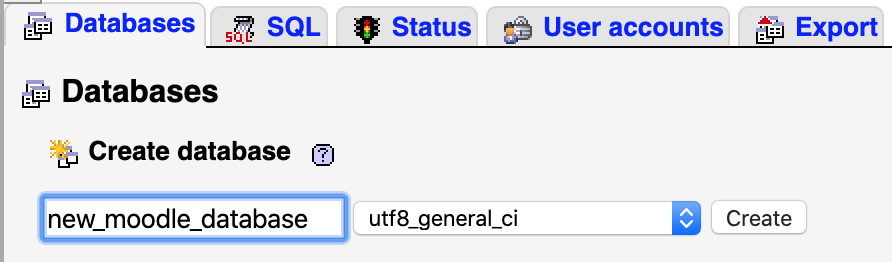
Immediately proceed to step 2, below.
2. Populate database
Import the SQL file, named cocoon_skola.sql (located in the 'Demo Installation' folder in your theme download package), into your new database. This can be accomplished via phpMyAdmin, as shown below.
Ensure that your server is configured to allow uploads of at least 5.4 MB, so that the SQL file can be fully imported.
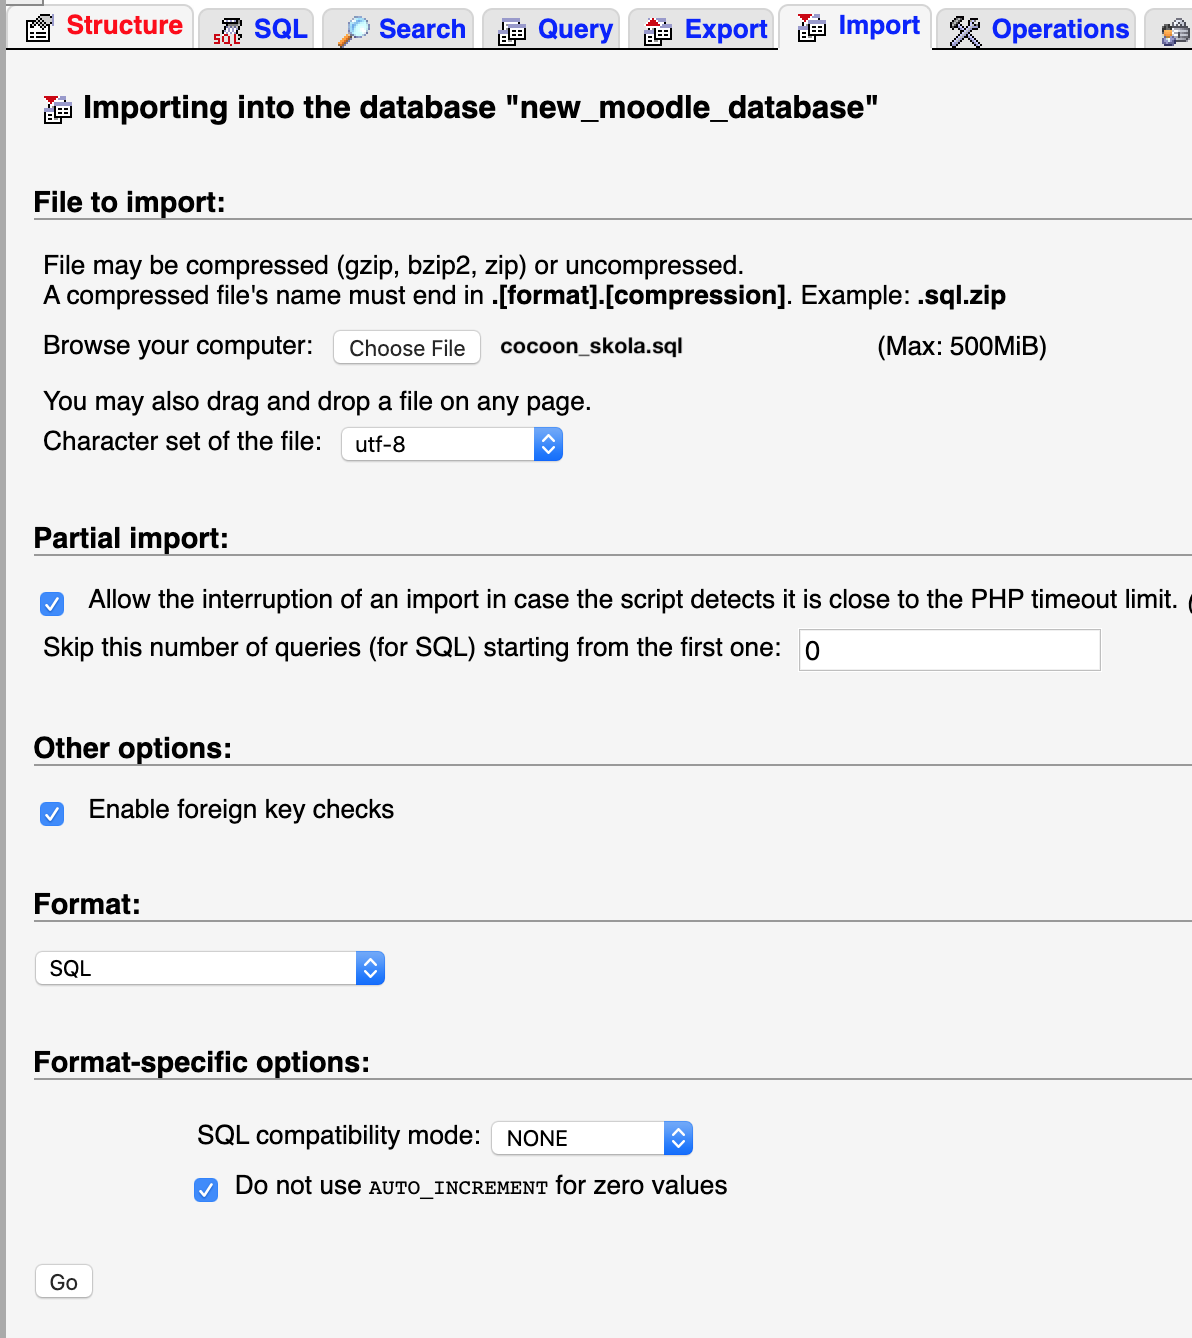
Immediately proceed to step 3, below.
3. Upload files
Upload the demo_files.zip archive (located in the Demo Installation folder) to your web server, and extract it using either cPanel, another administration interface, or command line.
Alternatively, you can manually upload the entire contents of the uncompressed demo_files folder to your web server. Ensure that all hidden files are also transferred, as these may be hidden in your computer's file browser. We
recommend using an FTP client, such as FileZilla.
Immediately proceed to step 4, below.
4. Upload moodledata
Upload the moodledata.zip archive (located in the Demo Installation folder) to your web server, outside your web root. Moodle requires that the moodledata folder is not publicly accessible.
Once uploaded, extract the archive using either cPanel, another administration interface, or command line.
Alternatively, you can manually upload the entire contents of the uncompressed moodledata folder to your web server. Ensure that all hidden files are also transferred, as these may be hidden in your computer's file browser. We
recommend using an FTP client, such as FileZilla.
Your web server should have read-write permissions to the moodledata directory. For further instructions, please visit Moodle.org.
Immediately proceed to step 5, below.
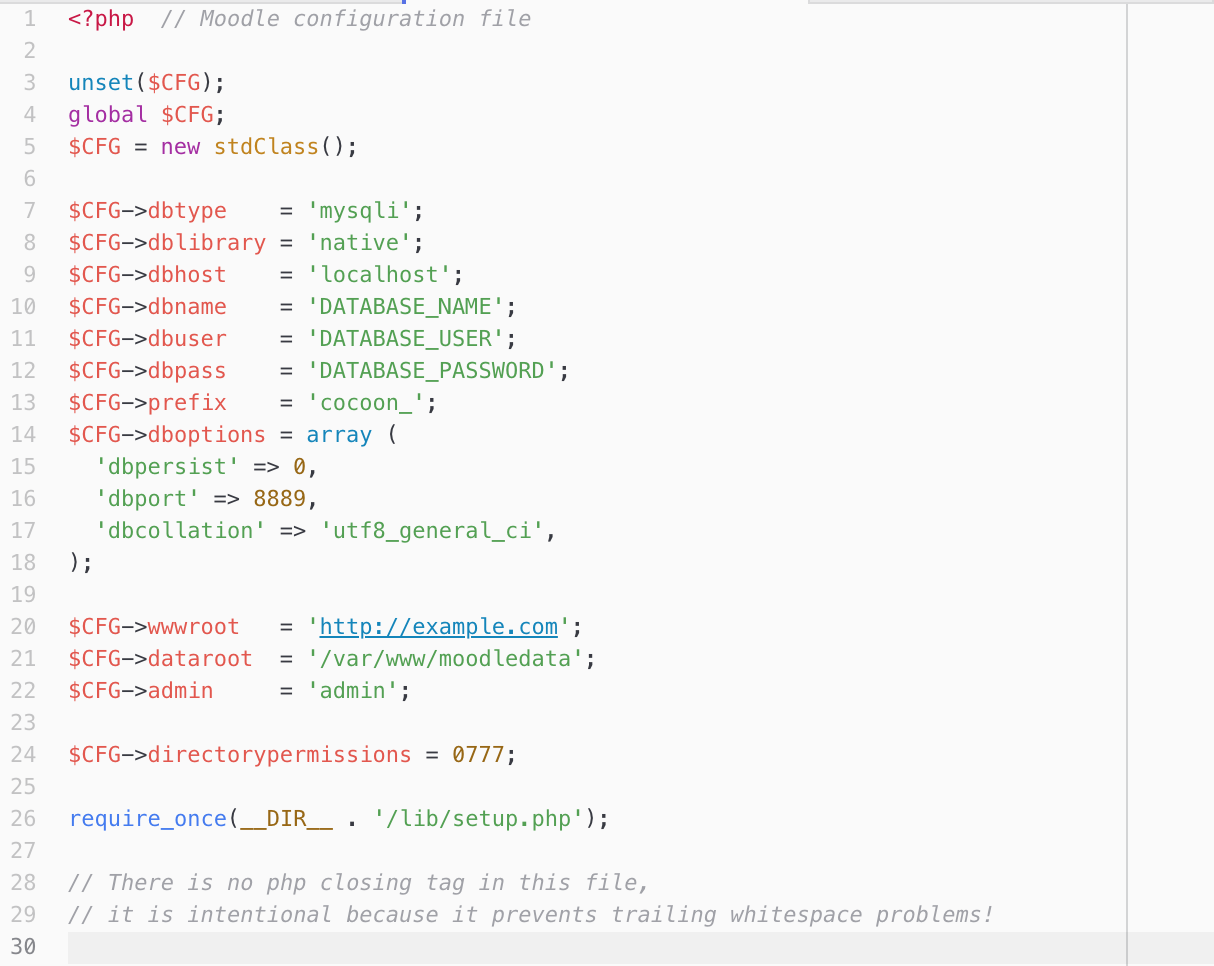
5. Configure config.php
You must now configure Moodle's config.php file to reflect your new database credentials and moodledata directory location, so that Moodle can connect to the database.
It is mandatory to complete all of the following steps, in order for your website to work correctly.
- Open the
config.php file located in the Moodle root on your web server.
- On lines 10 to 12, edit the database name, user, and password to match the new database credentials you set up in Step 1.
- Ensure that the database prefix remains as "cocoon_".
- You may also need to edit the database port and host to match that of your server, and the database collation to match that of the new database you created in Step 1.
- On line 20, change the website root to your website URL, or your localhost address (e.g. http://localhost/moodle, or http://localhost:8888/moodle). Ensure that the HTTP protocol matches the domain that loads your website.
This step is important. If you specify the incorrect web address your website will not display correctly.
Ensure that the correct HTTP protocol is used on the '$CFG->wwwroot' line. Only define the URL with "https://" if your domain is configured to use https and has an appropriate SSL certificate installed. Defining the incorrect HTTP protocol on this line will prevent your Moodle site from loading styling and icons.
If you are installing the Demo Installation on your localhost, use 'http://' unless you have a valid SSL certificate installed and available on the local server.
- On line 21, change the "dataroot" to match the location of the moodledata directory you uploaded in Step 4. This path should be relative to your server root.
- On line 24, adjust the "directorypermissions" to the directory permissions set for your moodledata directory (in Step 4). By default, these are 0777. However, they may also be 0775 or 0755, depending on your server configuration. For
further guidance on setting the appropriate permissions, visit Moodle.org
Immediately proceed to step 6, below.
6. Login
Your Skola demo installation is now complete. You can now login to your new Skola website with the following administrator credentials.
→ Navigate to {yoursite.com}/login/index.php to login directly.
USERNAME: admin
PASSWORD: admin123
Immediately proceed to step 7, below.
7. Purge the Moodle cache
After logging in, navigate directly to {yoursite.com}/admin/purgecaches.php via your web browser's address bar and click the 'Purge all caches' button.
Wait for the page to refresh and reload completely. Once the page has refreshed and loaded completely, the caches have been succesfully purged.
This process may take several minutes.
Immediately proceed to step 8, below.
8. Complete!
Your installation of Skola is officially complete! Happy site building! (Please don't forget to change the administrator password first.)
Skola can be installed on existing Moodle installations, and the process is quick and easy. You'll be up and running in no time.
Ensure that you have a fresh, working backup of your existing Moodle instance (files and database) before proceeding.
1. Upload the theme
The standalone theme is located in the 'Existing Installations/theme' folder.
Manually upload the 'skola' folder to the /theme directory in your Moodle root.
You should now have the standalone Skola theme at this location on your web server: /theme/skola
Immediately proceed to step 2, below.
2. Upload required plugins
The following premium plugins are included within your download package, within the folder 'Existing Installations/local':
- Cocoon Course Designer
- Cocoon Category Designer
- Cocoon Form Builder
- Cocoon Essentials
- Cocoon Events
- Cocoon Users
- Cocoon Wishlist
Manually upload these plugins to your Moodle local directory, located at /local in your Moodle root.
Immediately proceed to step 3, below.
3. Upload required blocks
Skola ships with over 100 custom blocks to help you create feature-rich pages on your Moodle site. It is recommended that all custom blocks are installed.
The blocks you must install are located in the 'Existing Installations/blocks' folder.
Manually upload the blocks to your Moodle blocks directory, located at /blocks in your Moodle root.
Immediately proceed to step 4, below.
4. Installation
After following the steps above, you must install the uploaded theme, blocks, and plugins:
- Log into your Moodle site (as an administrator), and go to Site administration > Notifications (*your_moodle_address*/admin/index.php)
- There should be 100+ new installations pending your attention. Scroll to the bottom of the page and click "Upgrade Moodle Database now".
- Wait for Moodle to install the new plugins. This might take several minutes.
- Follow the on-screen instructions to complete the installation.
You may be prompted to configure new settings during the installation process. You can safely ignore this for now, and proceed by clicking "Continue" at the bottom of the page. You will be able to configure these
settings at a later time.
Upon successful installation, you will be taken to the Site administration > Notifications page.
Immediately proceed to step 5, below.
5. Activation
Everything you need to build or extend your Moodle site with Skola is now installed.
But first, let's activate your new theme:
→ Navigate to Site administration > Appearance > Themes > Theme selector, and change the default theme to Skola.
Upon successful activation, a "New theme saved" page will be displayed. Click Continue.
Immediately proceed to Theme Settings, below.
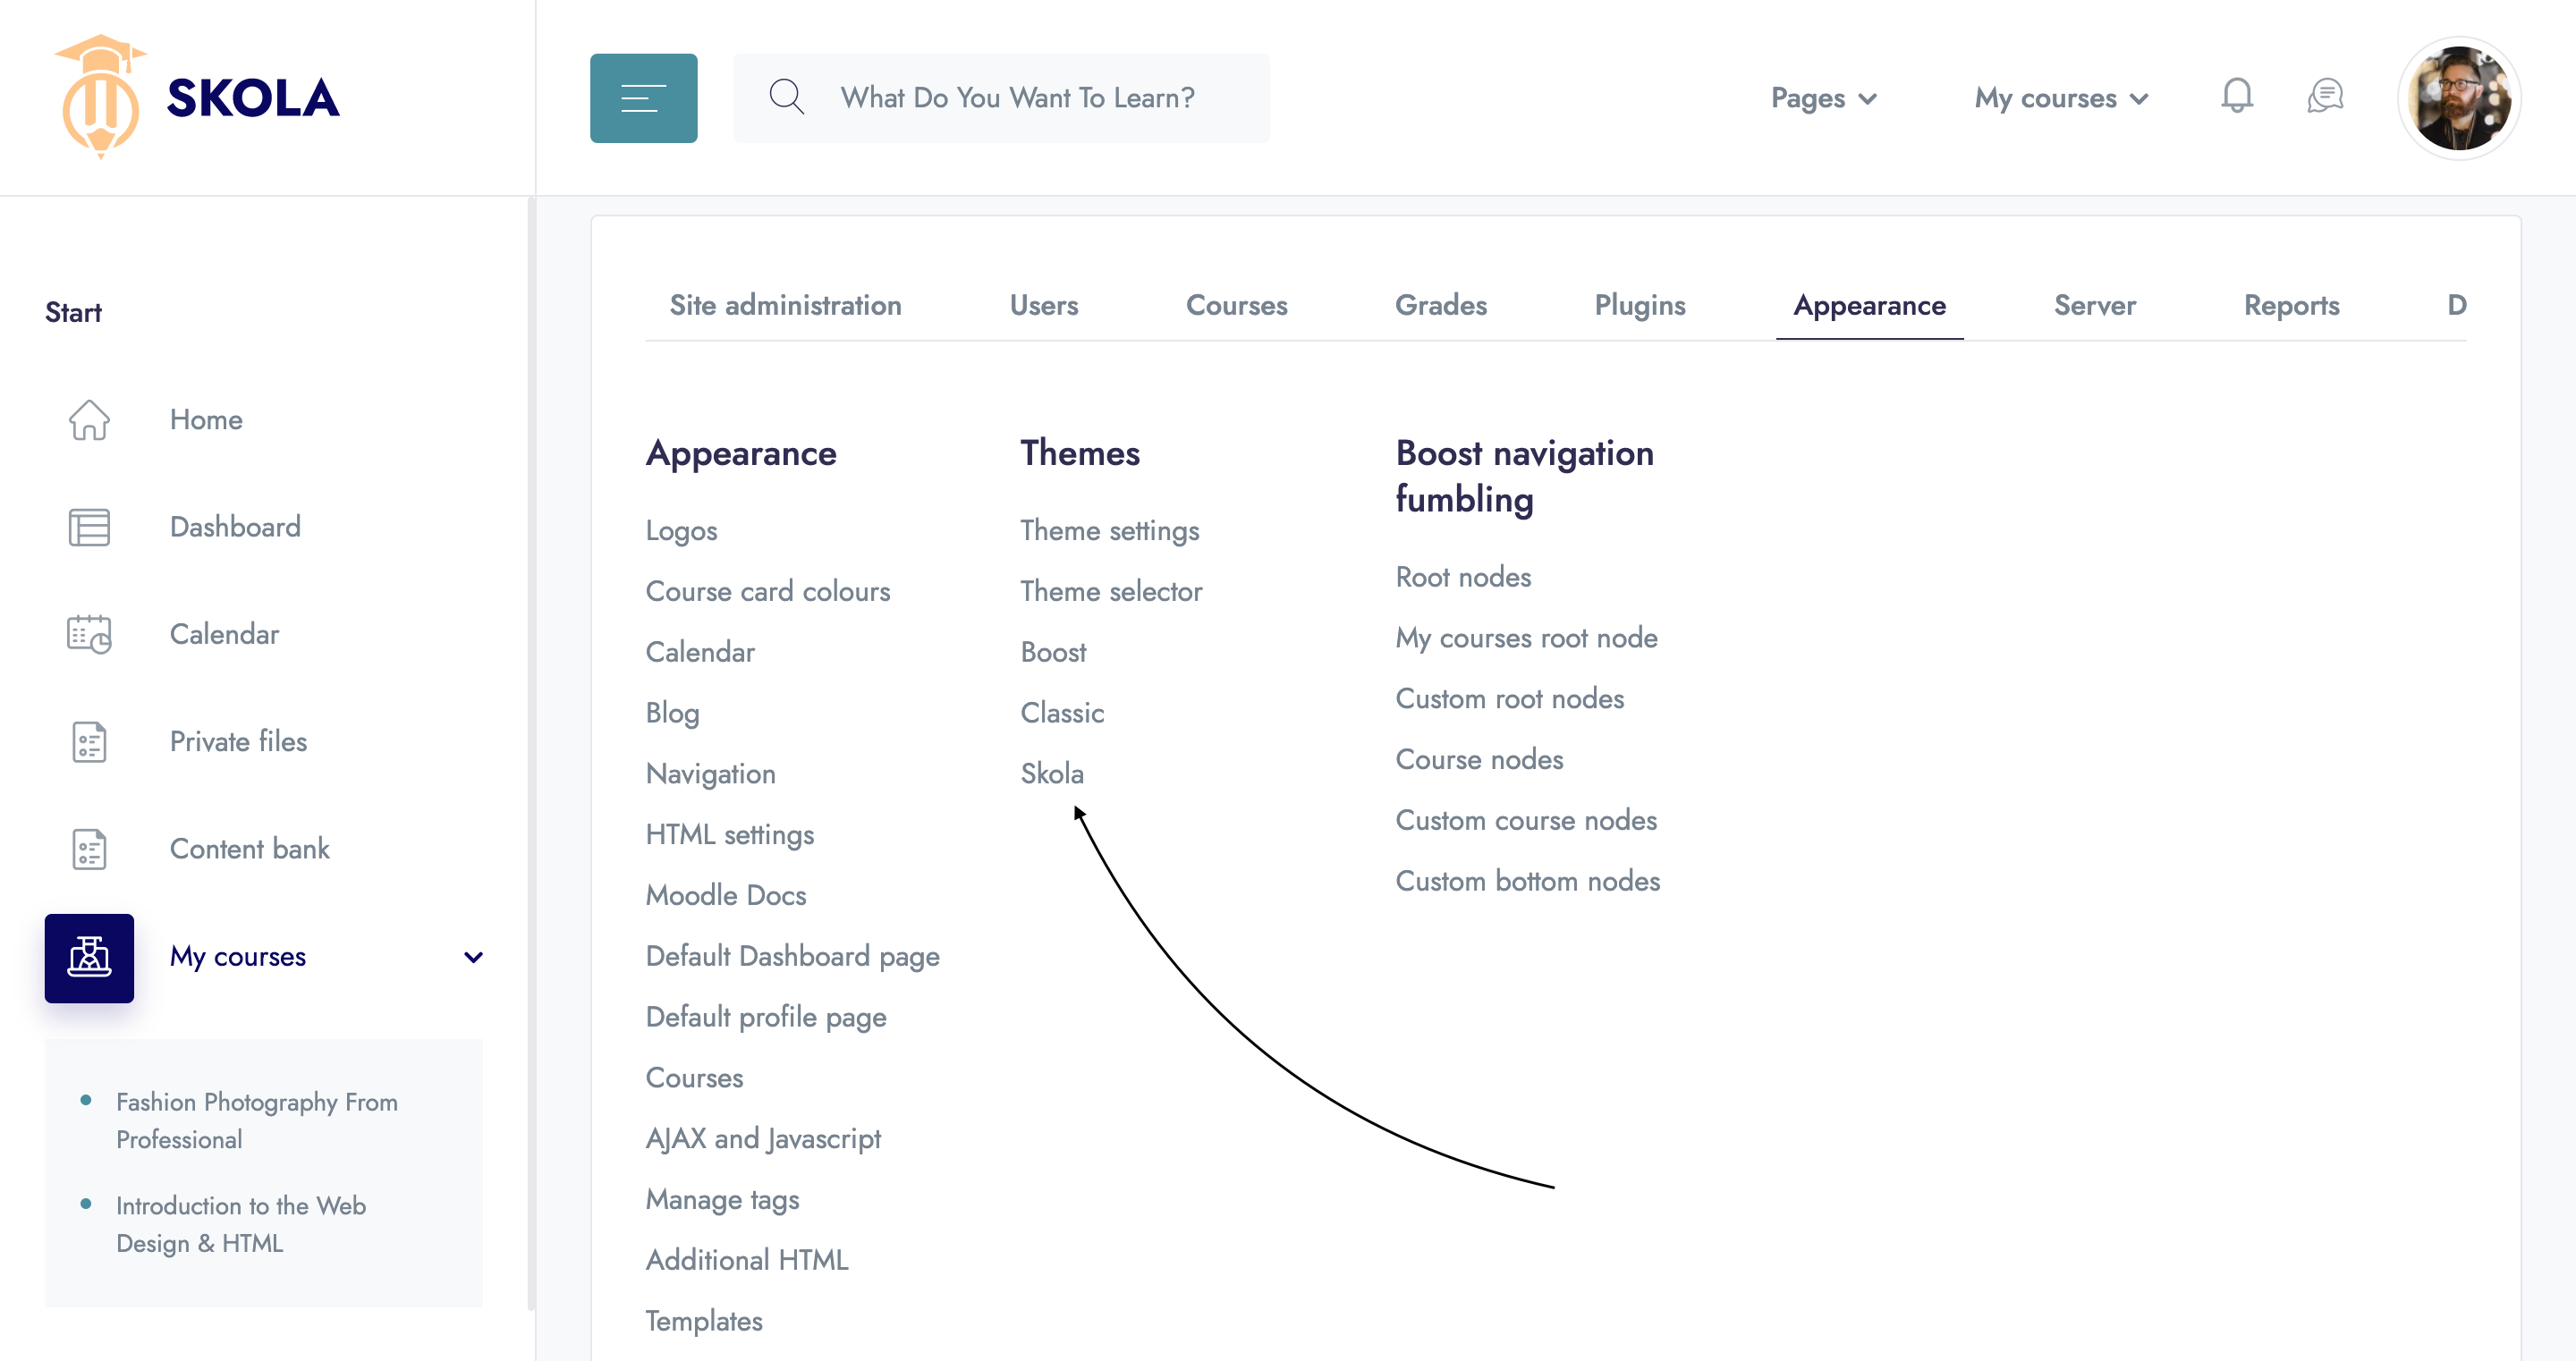
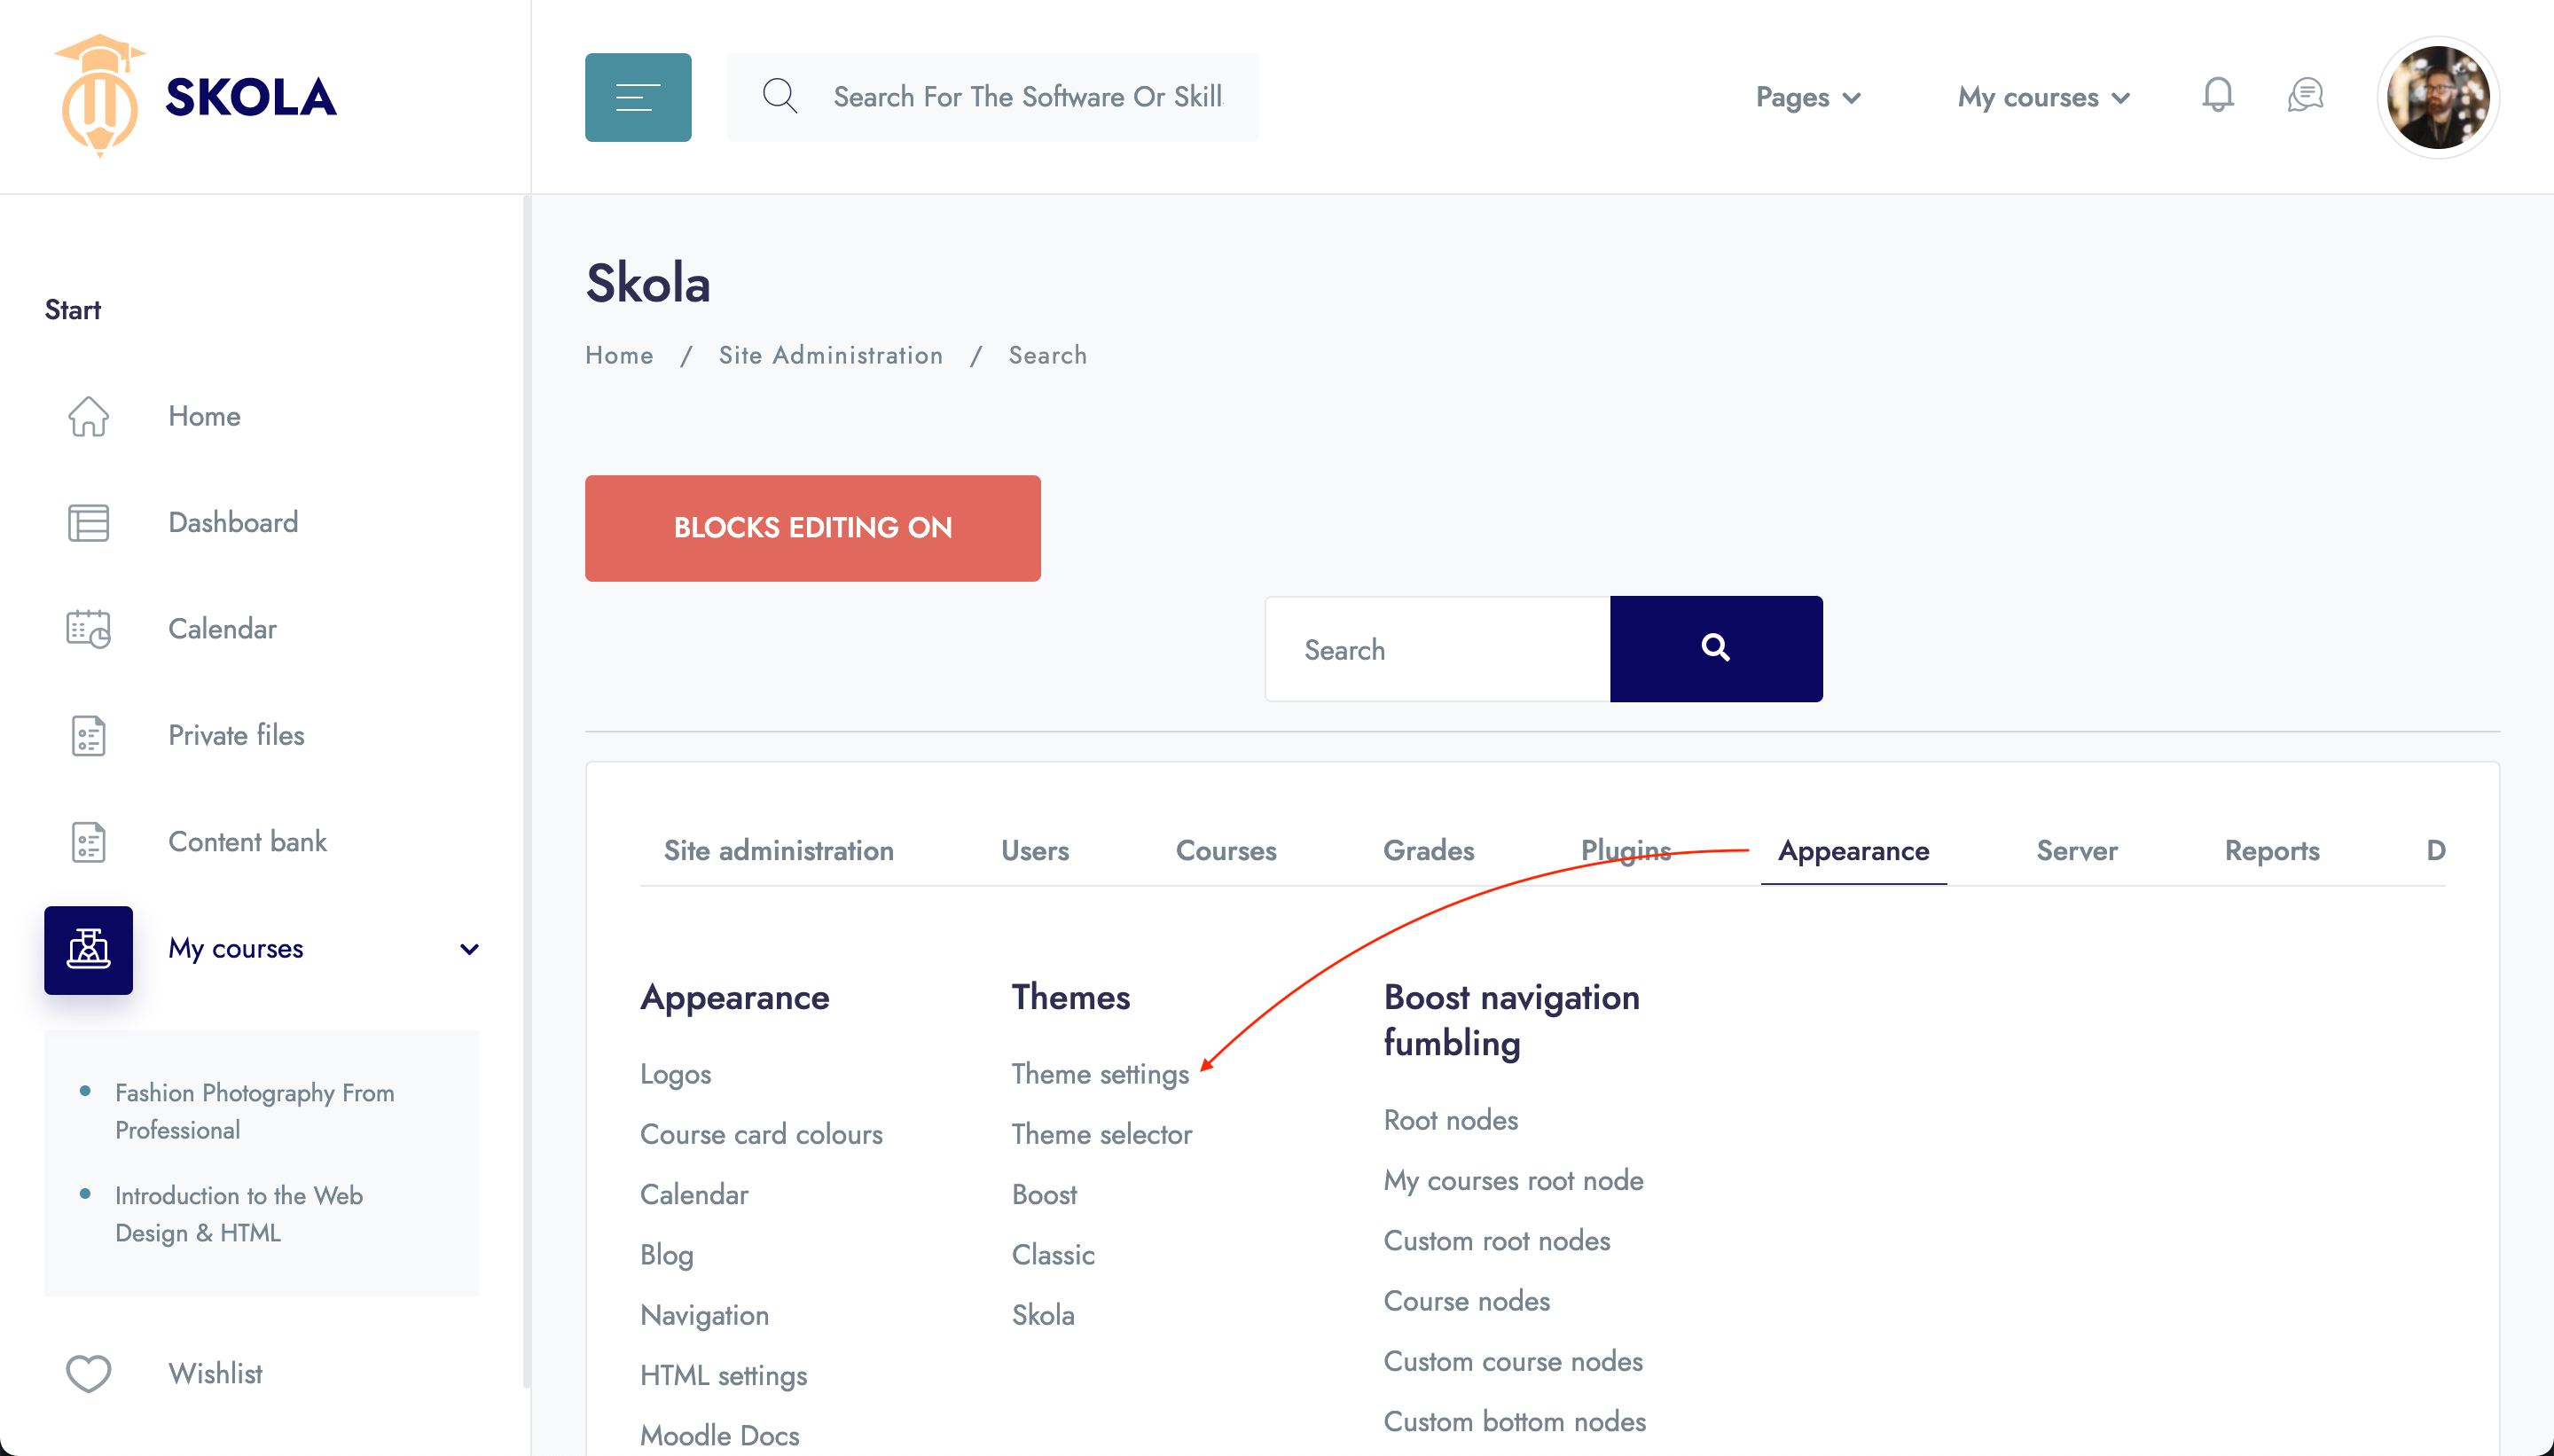
Skola's Theme Settings are important to your website's functionality, as they dictate how the theme will look and behave.
→ Navigate to Site administration > Appearance > Themes > Skola
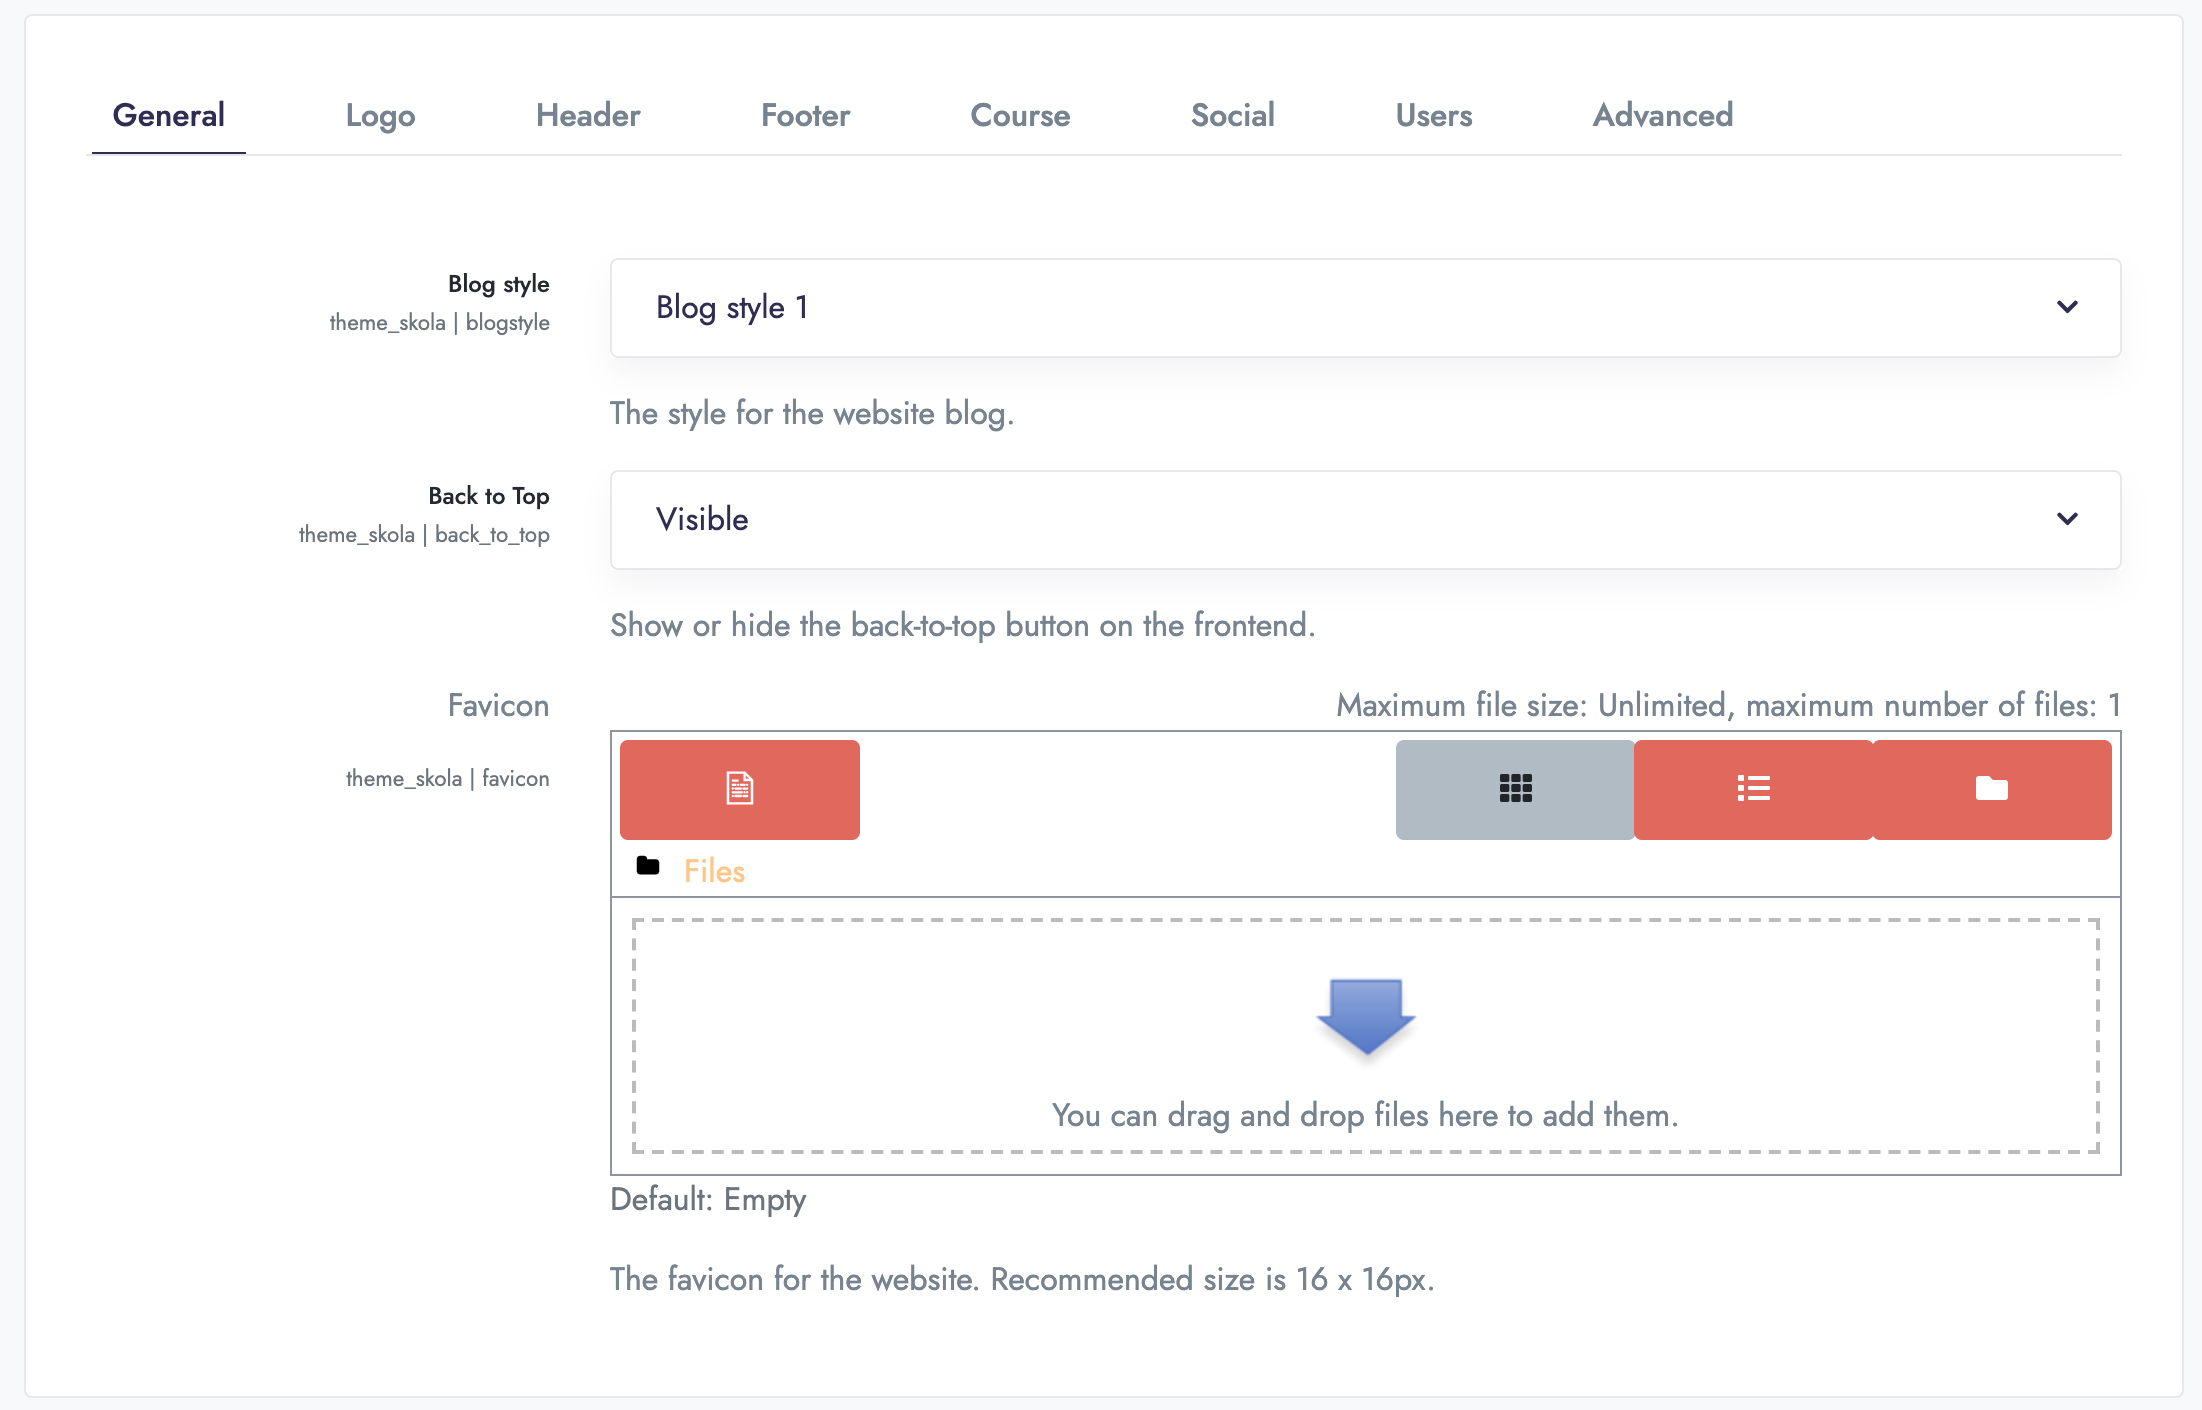
General settings
The General settings panel allows you to configure basic settings for the theme, such as the Blog Style, Back to Top, and Favicon.
List of settings
Blog Style
The style/layout used for the blog listing page.
Back to Top
Toggle the "back to top" button on or off.
Favicon
Upload a custom favicon to be used in the browser bar. We recommend the image be 16 by 16px.
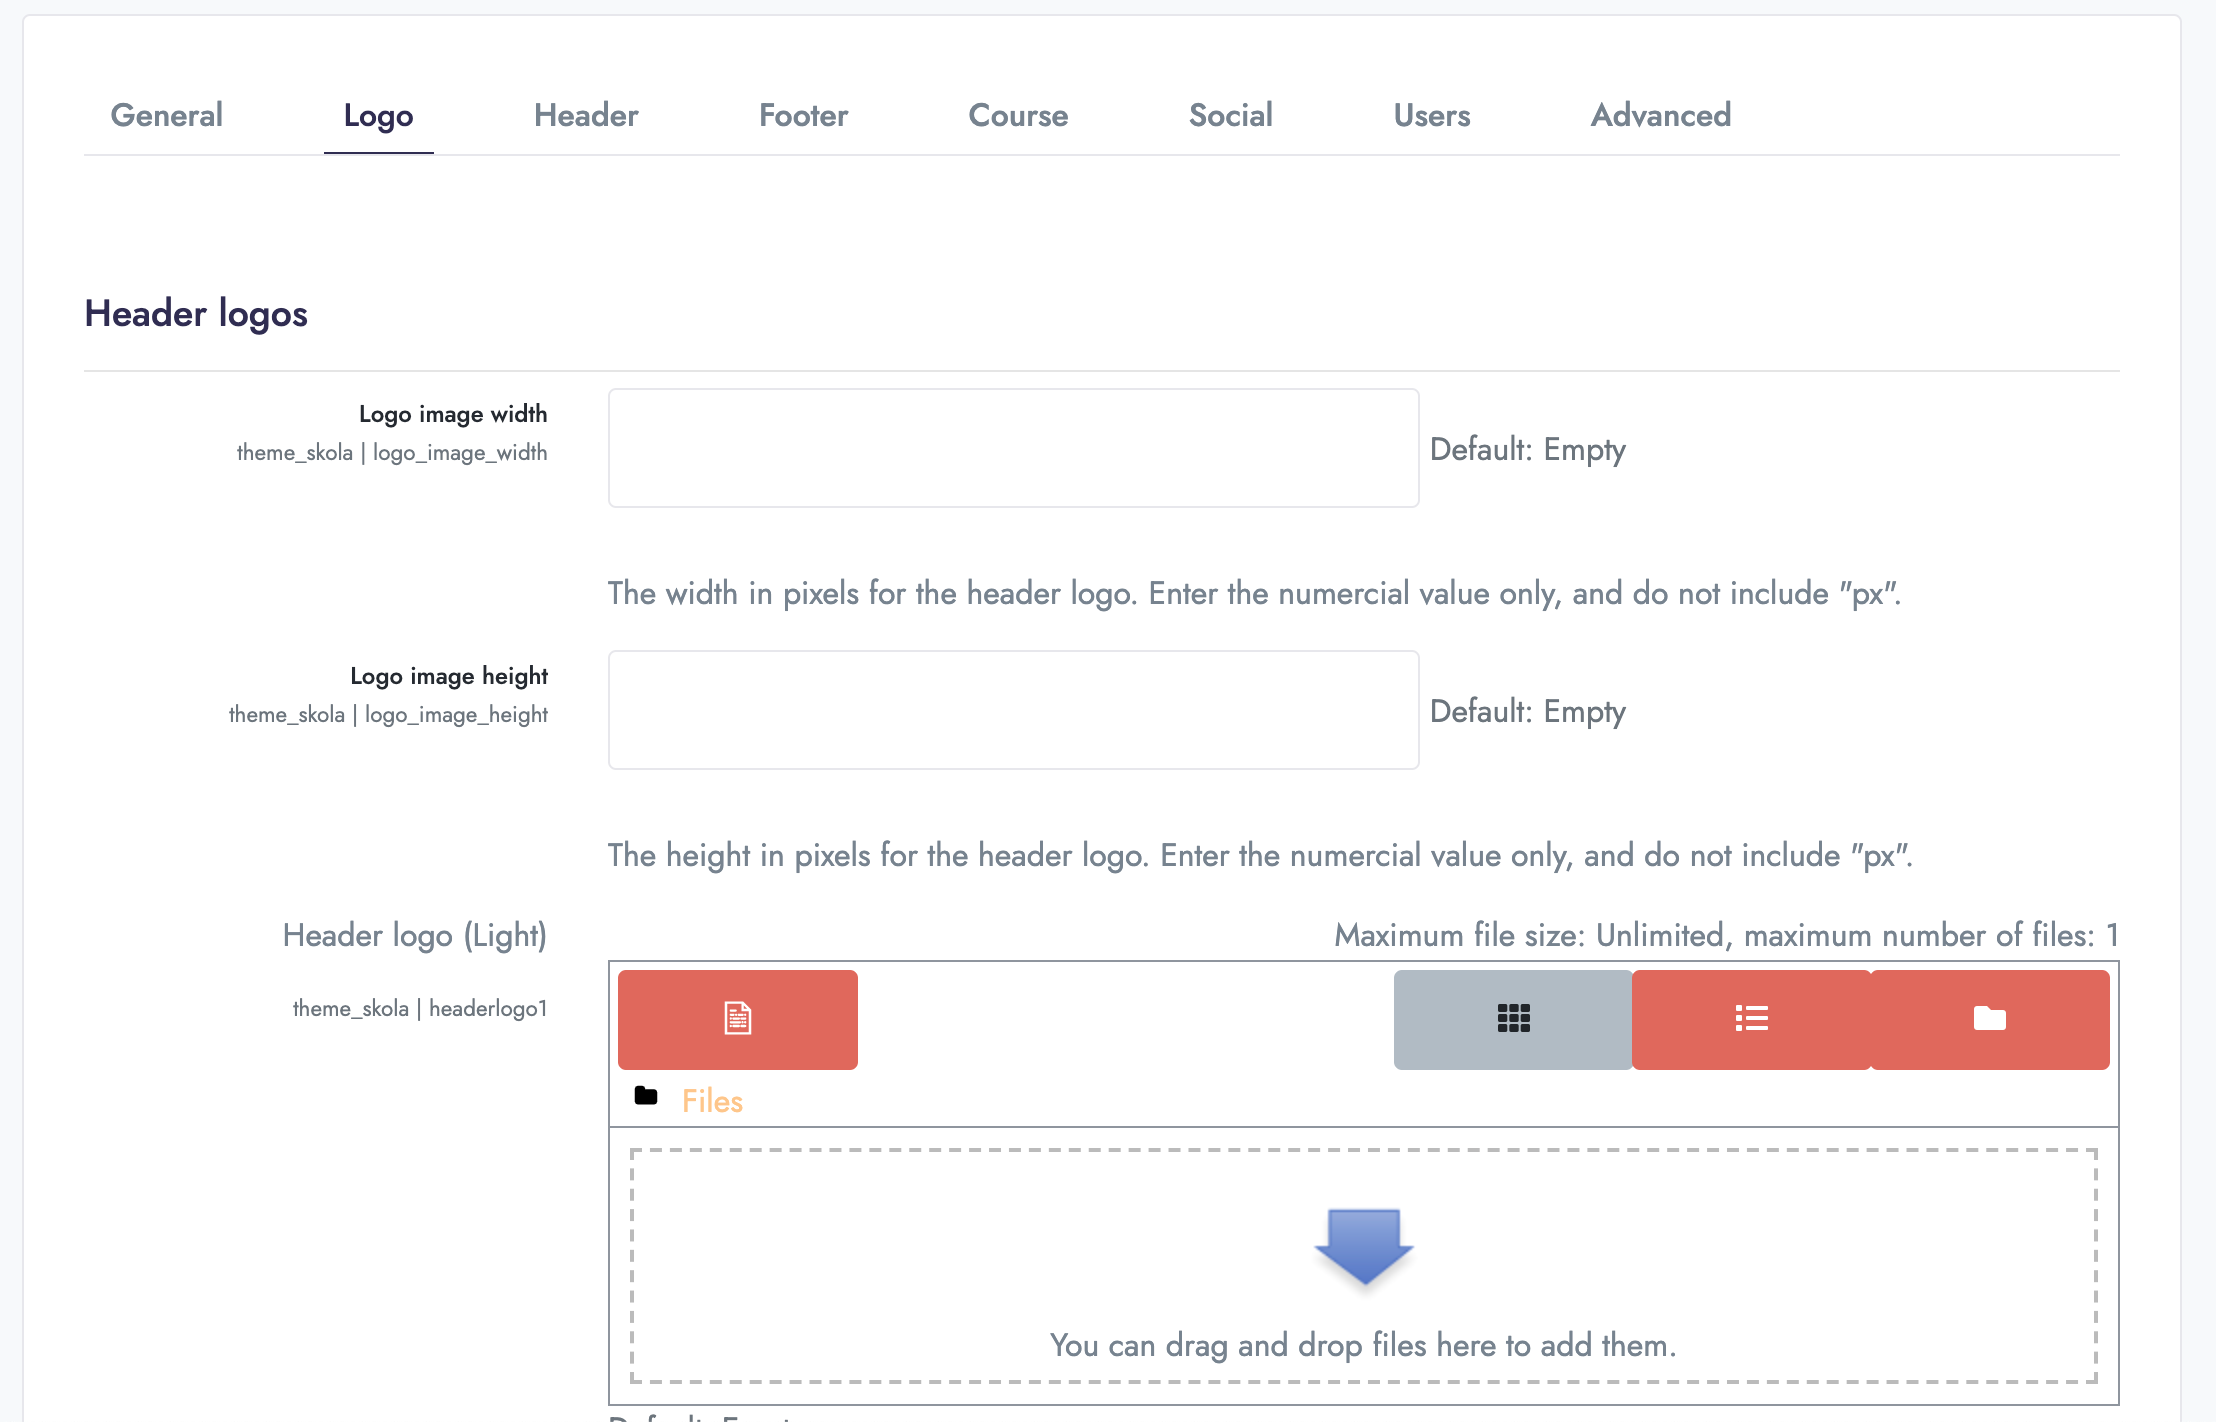
Logo settings
The Logo settings panel allows you to configure and upload the platfom logo.
List of settings
-
Logo image width
Force a fixed width for the logo image in the main navigation menu. If left blank, the image will be displayed at a predetermined maximum width.
-
Logo image height
Force a fixed height for the logo image in the main navigation menu. If left blank, the image will be displayed at a predetermined maximum height.
-
Header Logo 1
The first header logo should be the default, largest variation of your logo.
-
Header logo 2
The second header logo should be a smaller, condensed variation of your logo.
-
Header logo 3
The third logo should be a light variation of your logo, which should contrast well against dark backgrounds.
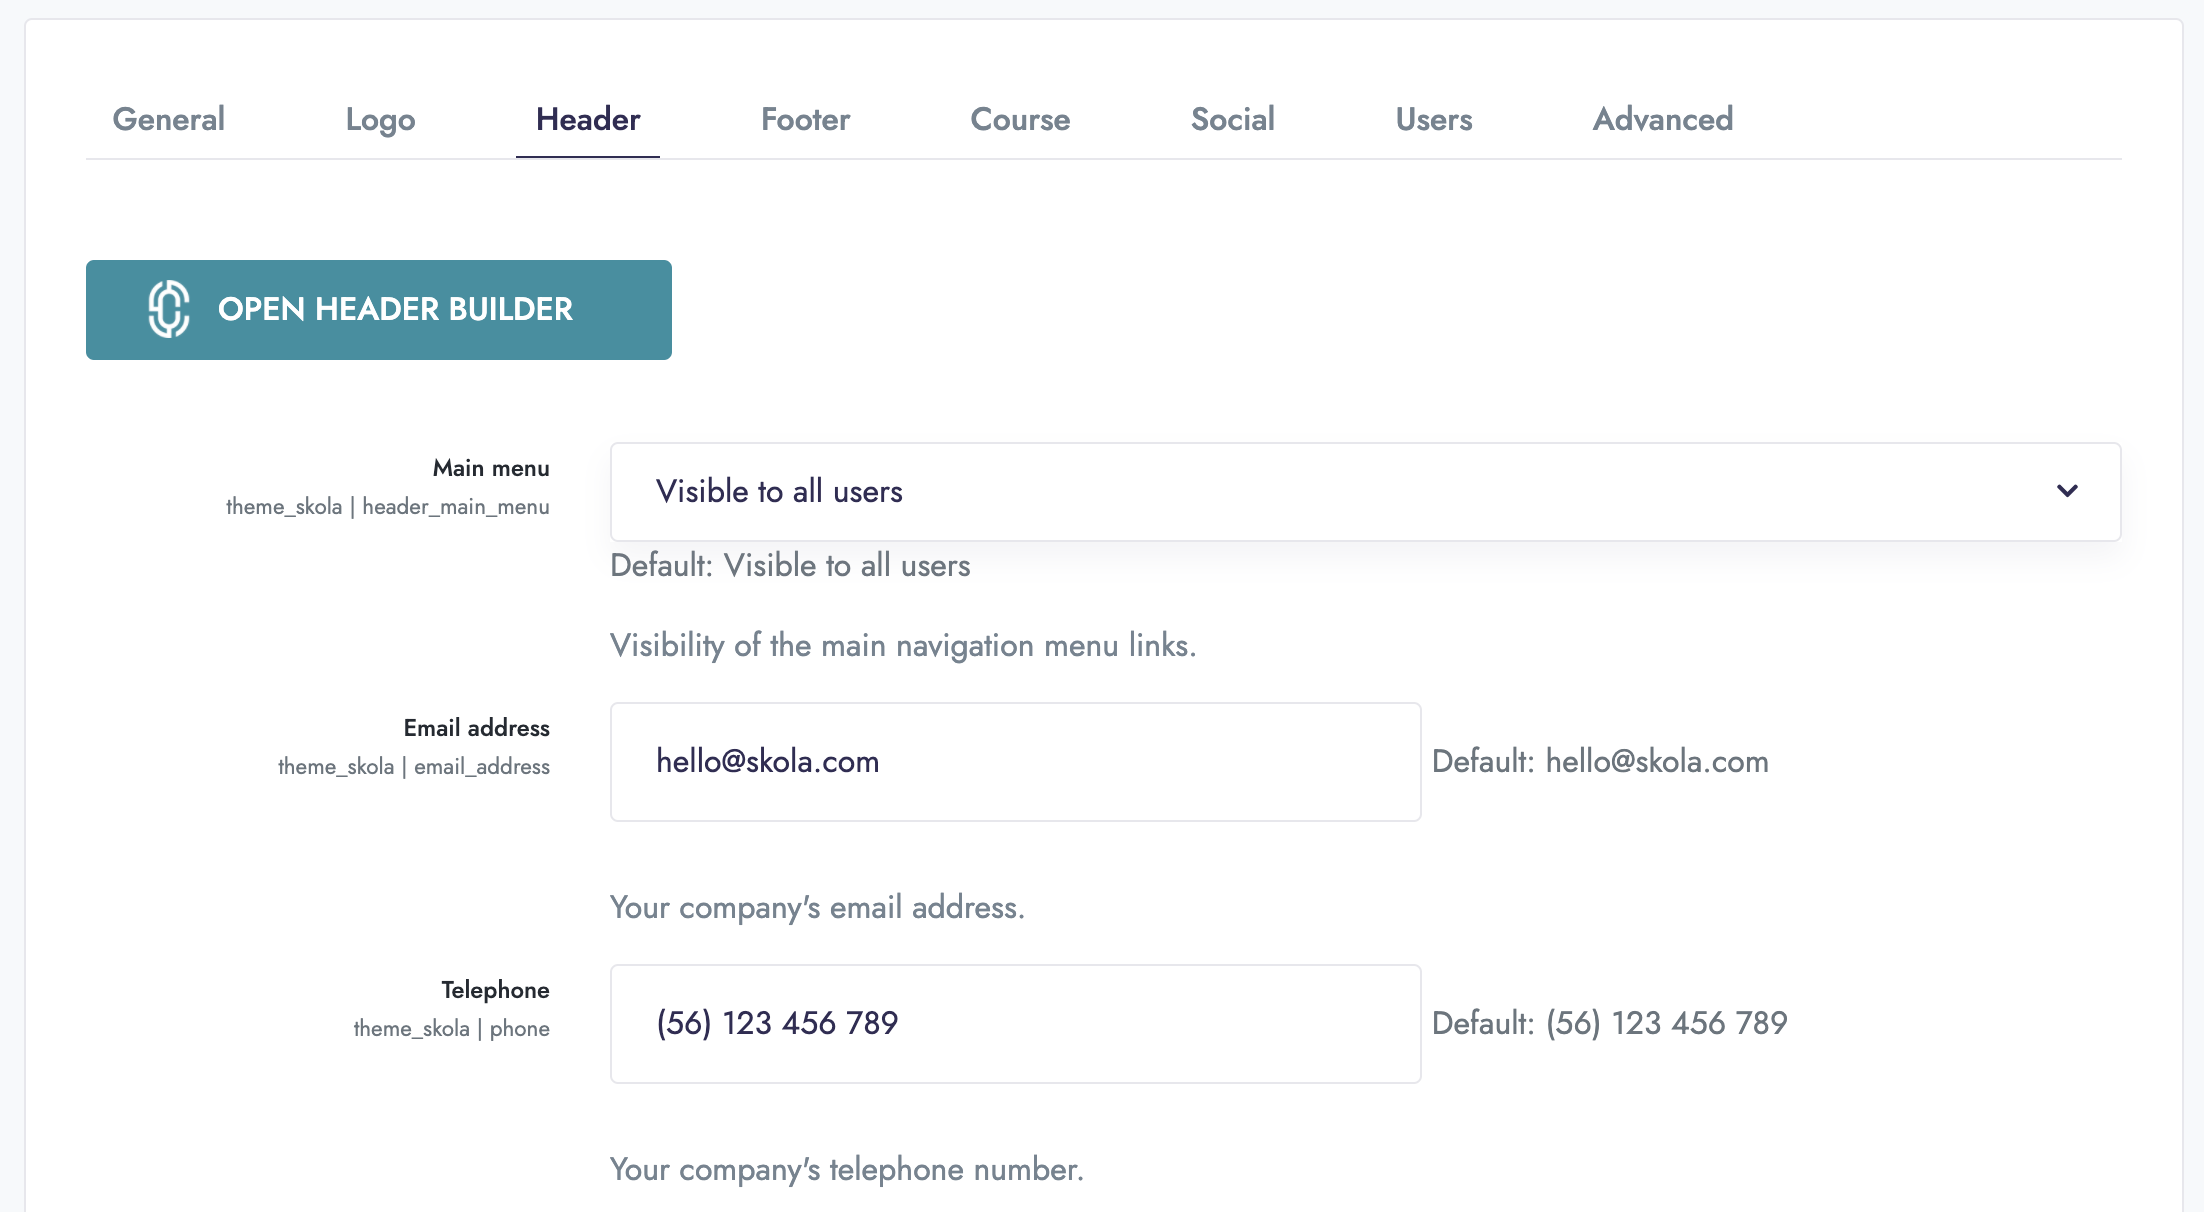
Header settings
The Header settings panel provides general settings for the main navigation menu and mobile navigation. It's important to complete every field.
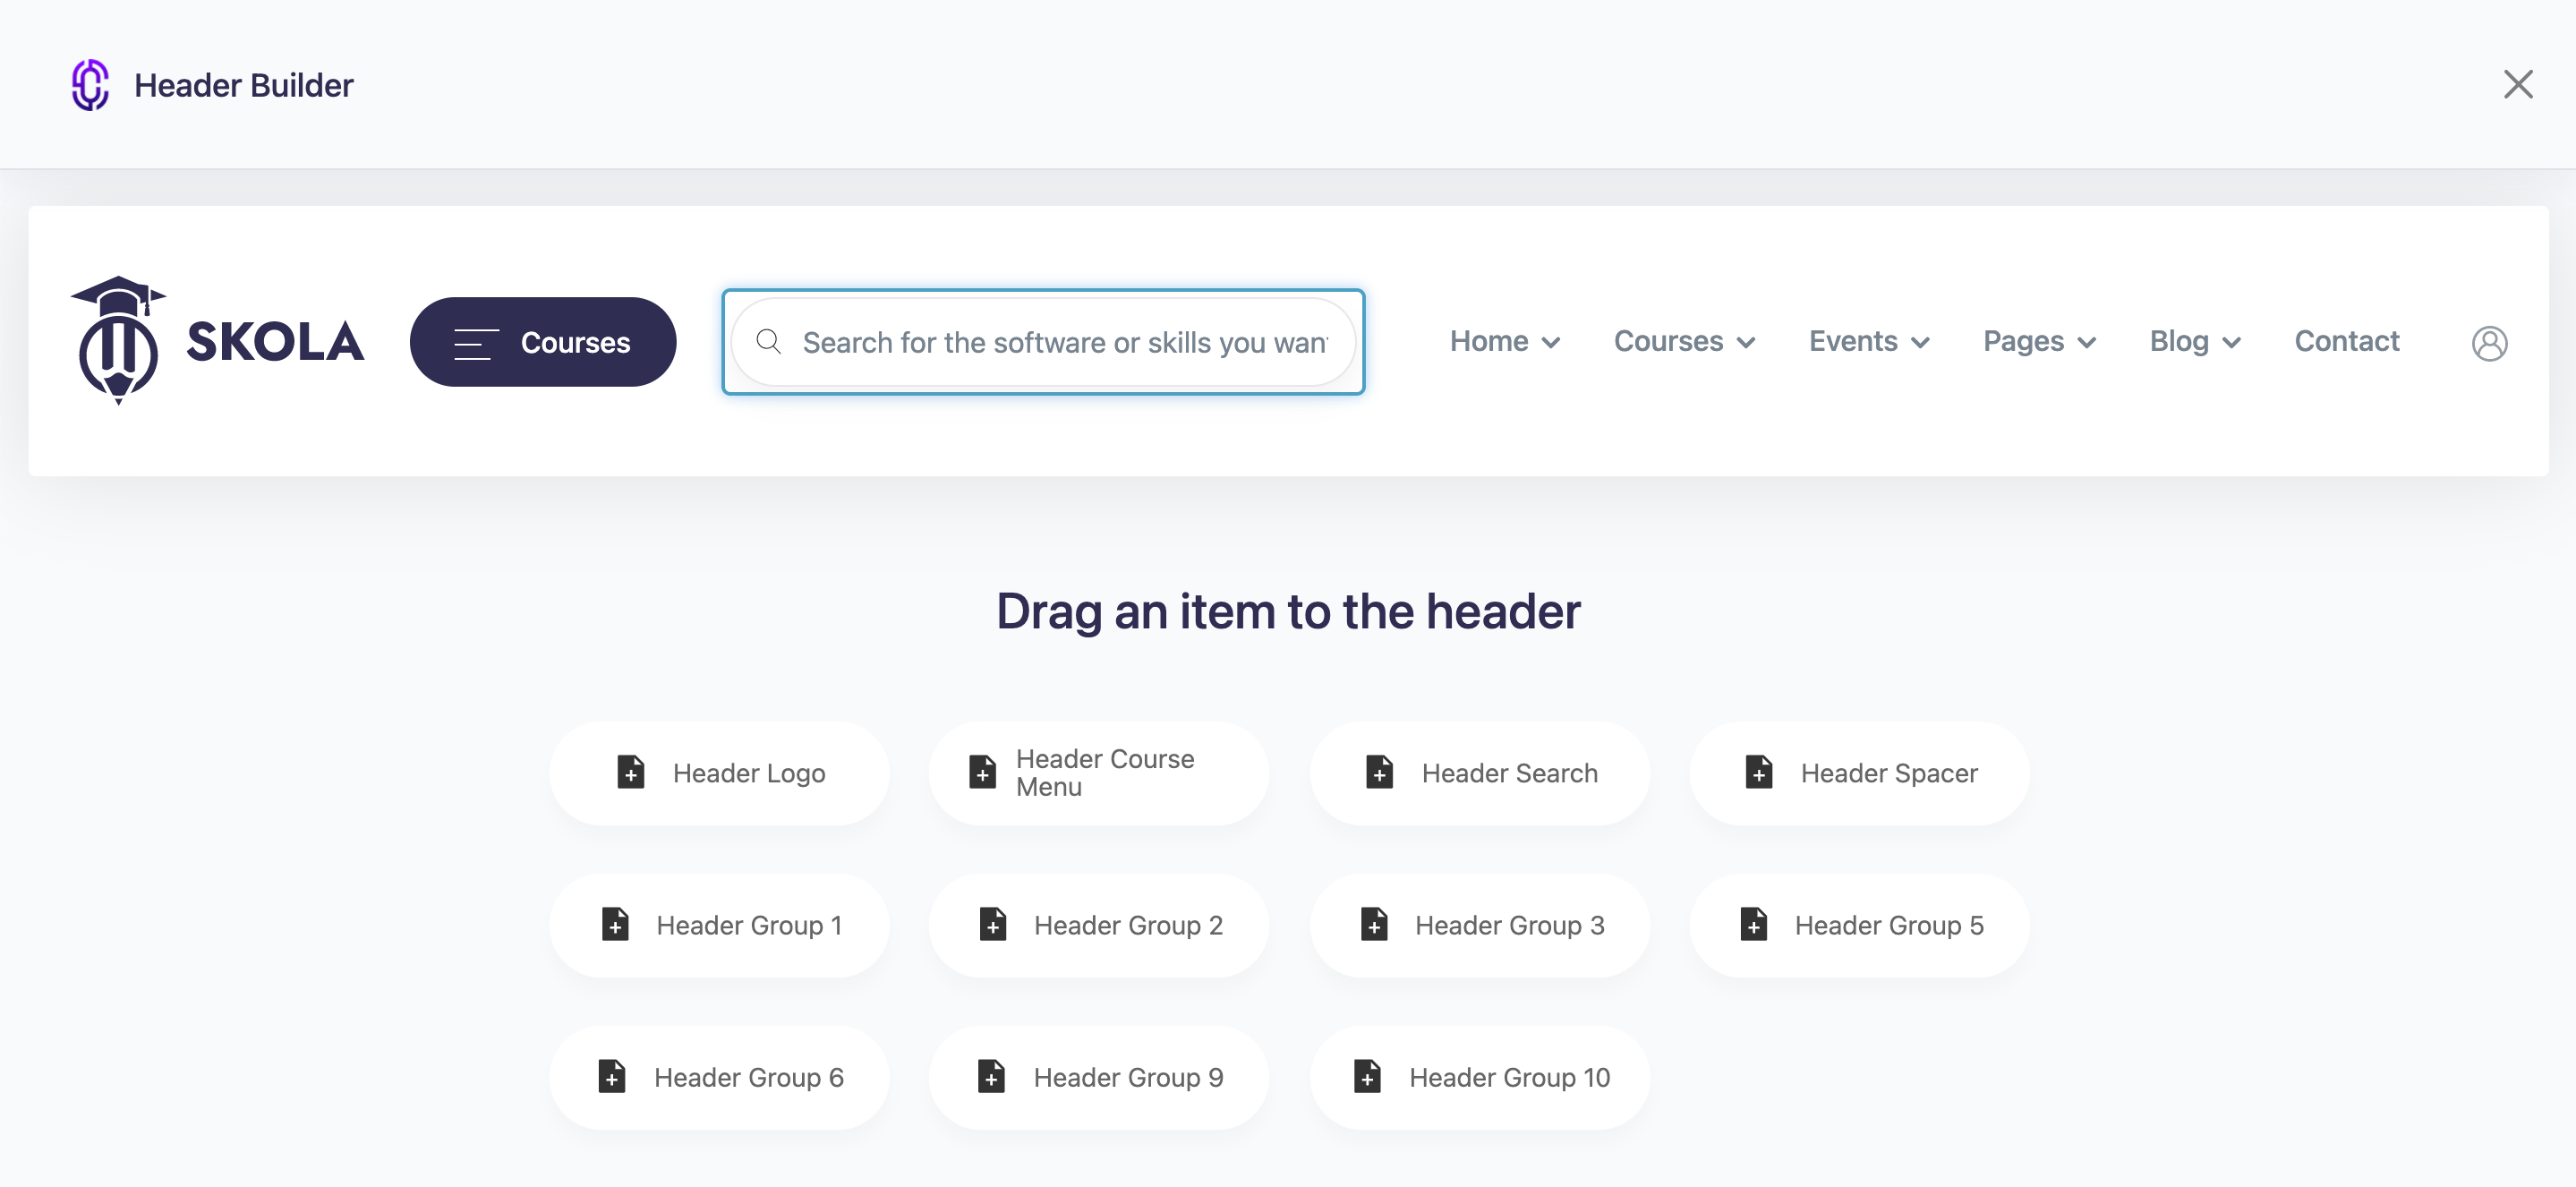
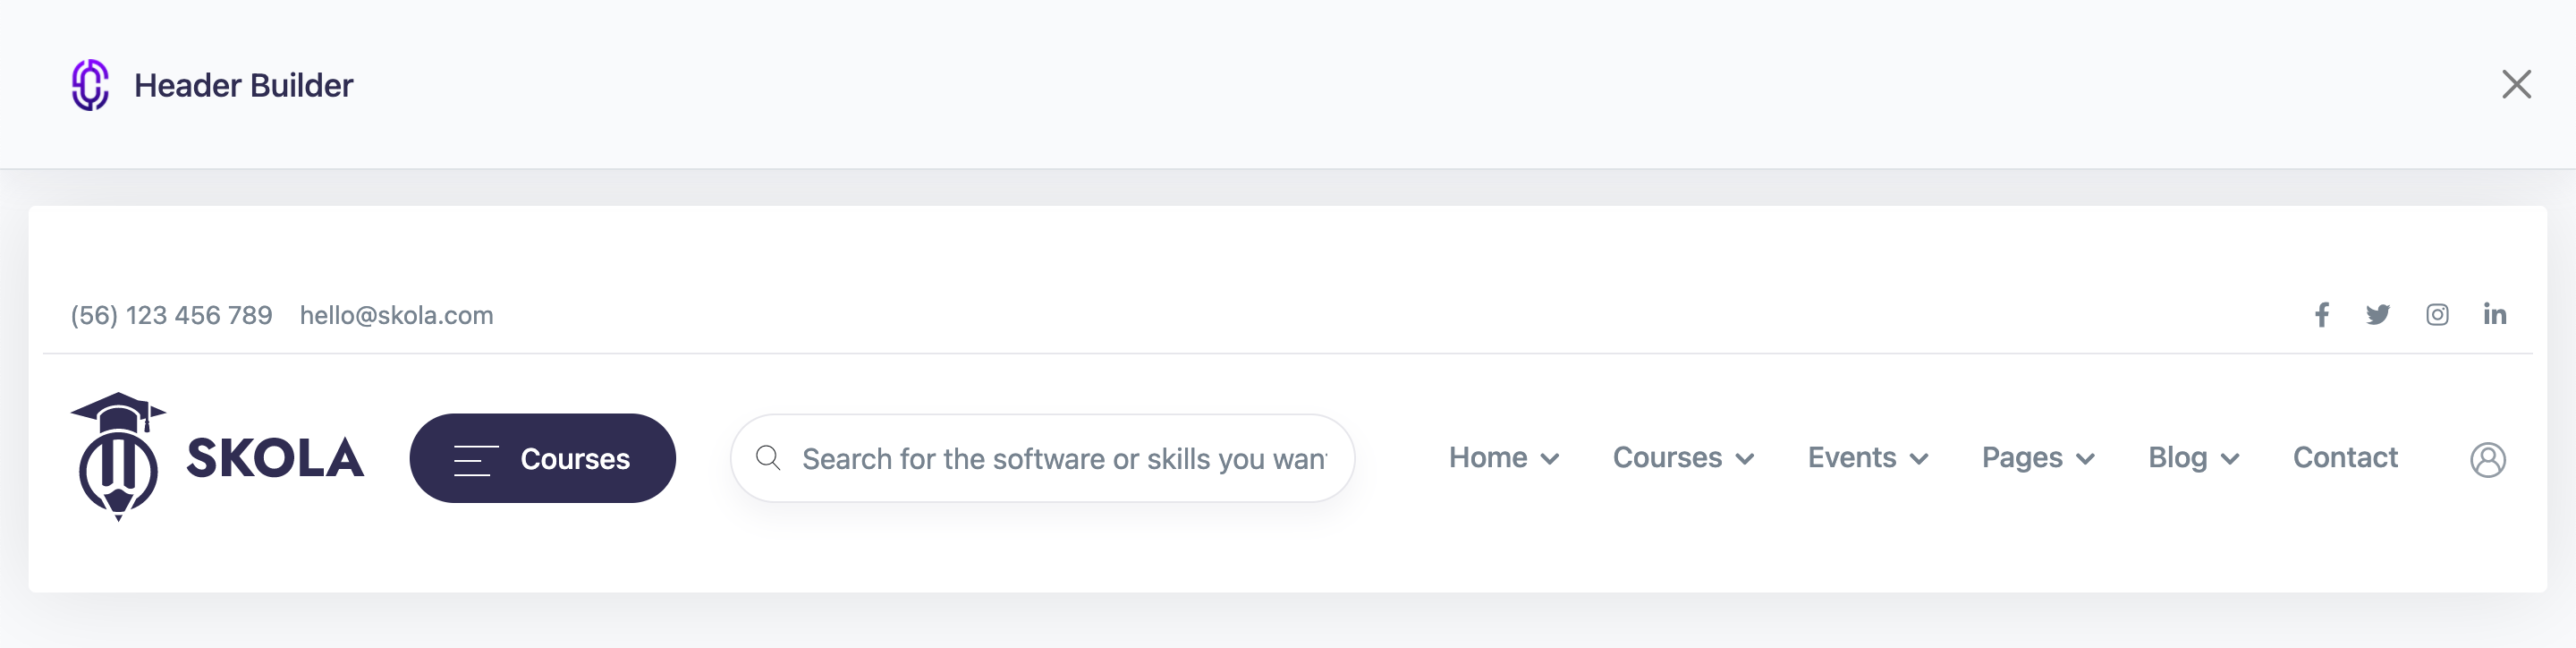
This is also where you can access the Header Builder, in order to build your custom header navigation.
List of settings
-
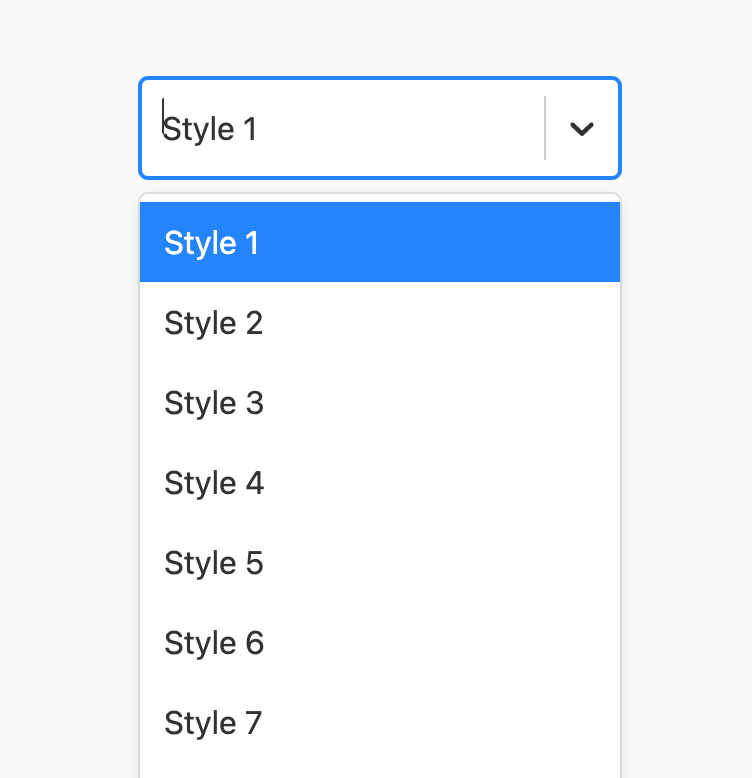
Open Header Builder
Open the Header Builder to select a preset style for the header, or build your own. You can also customize your existing header here.
-
Main menu
Configure whether the website's main menu should be visible to all users, or only authenticated users.
-
Email Address
Input your organization's email address. This value is used in some header or footer variations. If left blank, no email address will be displayed.
-
Telephone
Input your organization's telephone number. This value is used in some header or footer variations. If left blank, no telephone number will be displayed.
-
Address
Input your organization's physical address. This value is used in some header or footer variations. If left blank, no address will be displayed.
-
Call-to-action text
Some header variations display a Call to Action button. Set the text for this optional header element here.
-
Call-to-action link
Some header variations display a Call to Action button. Set the URL for this optional header element here. This should be an absolute URL, not a relative path. Either inbound or external URLs may be used. Be sure to include the HTTP protocol.
-
Call-to-action icon
Some header variations display a Call to Action button. Set the icon for this optional element here.
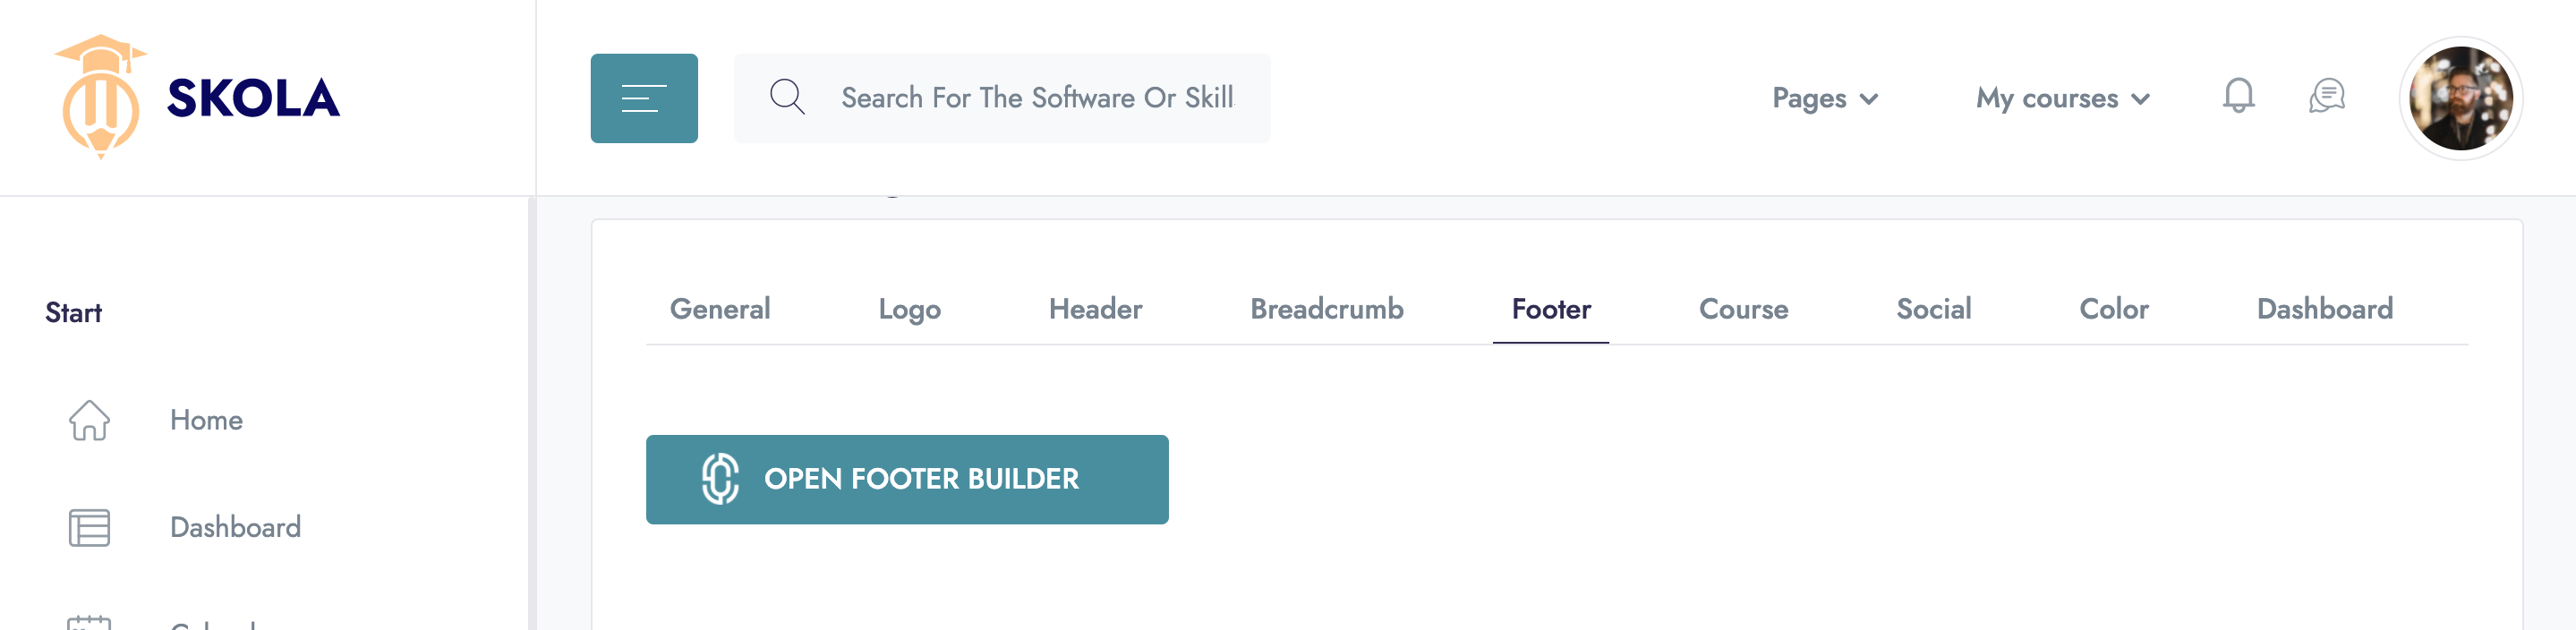
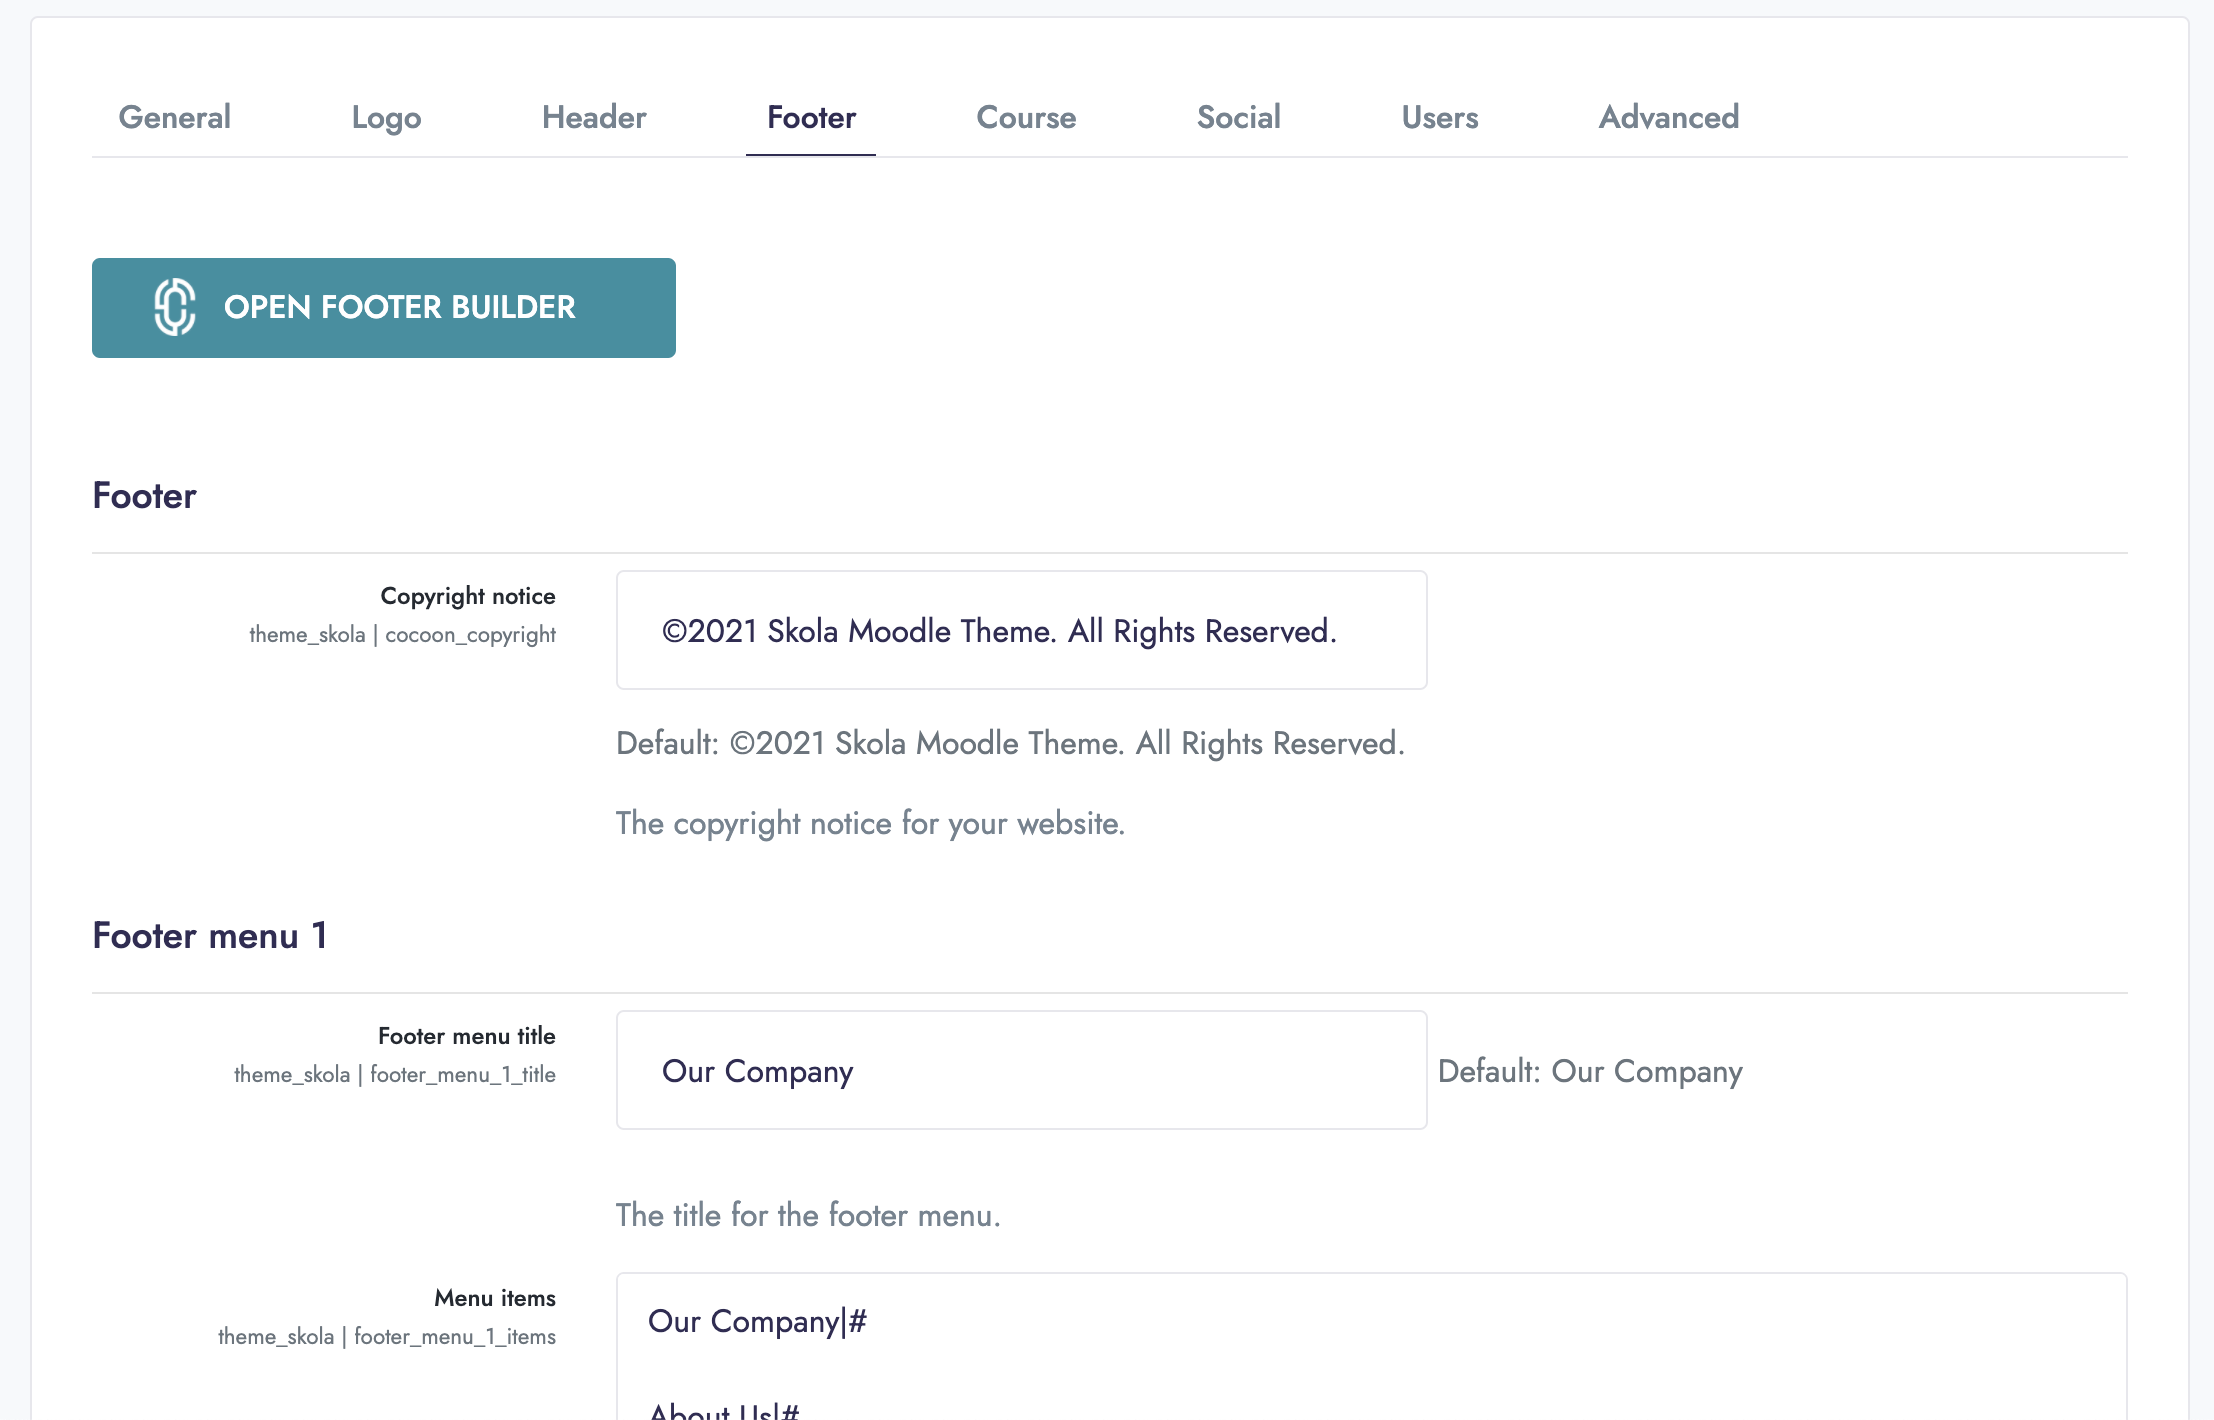
Footer settings
The Footer settings panel provides settings for configuring your website footer. It's important to complete every field.
Here you can also access the Footer Builder, in order to build your custom website footer.
List of settings
-
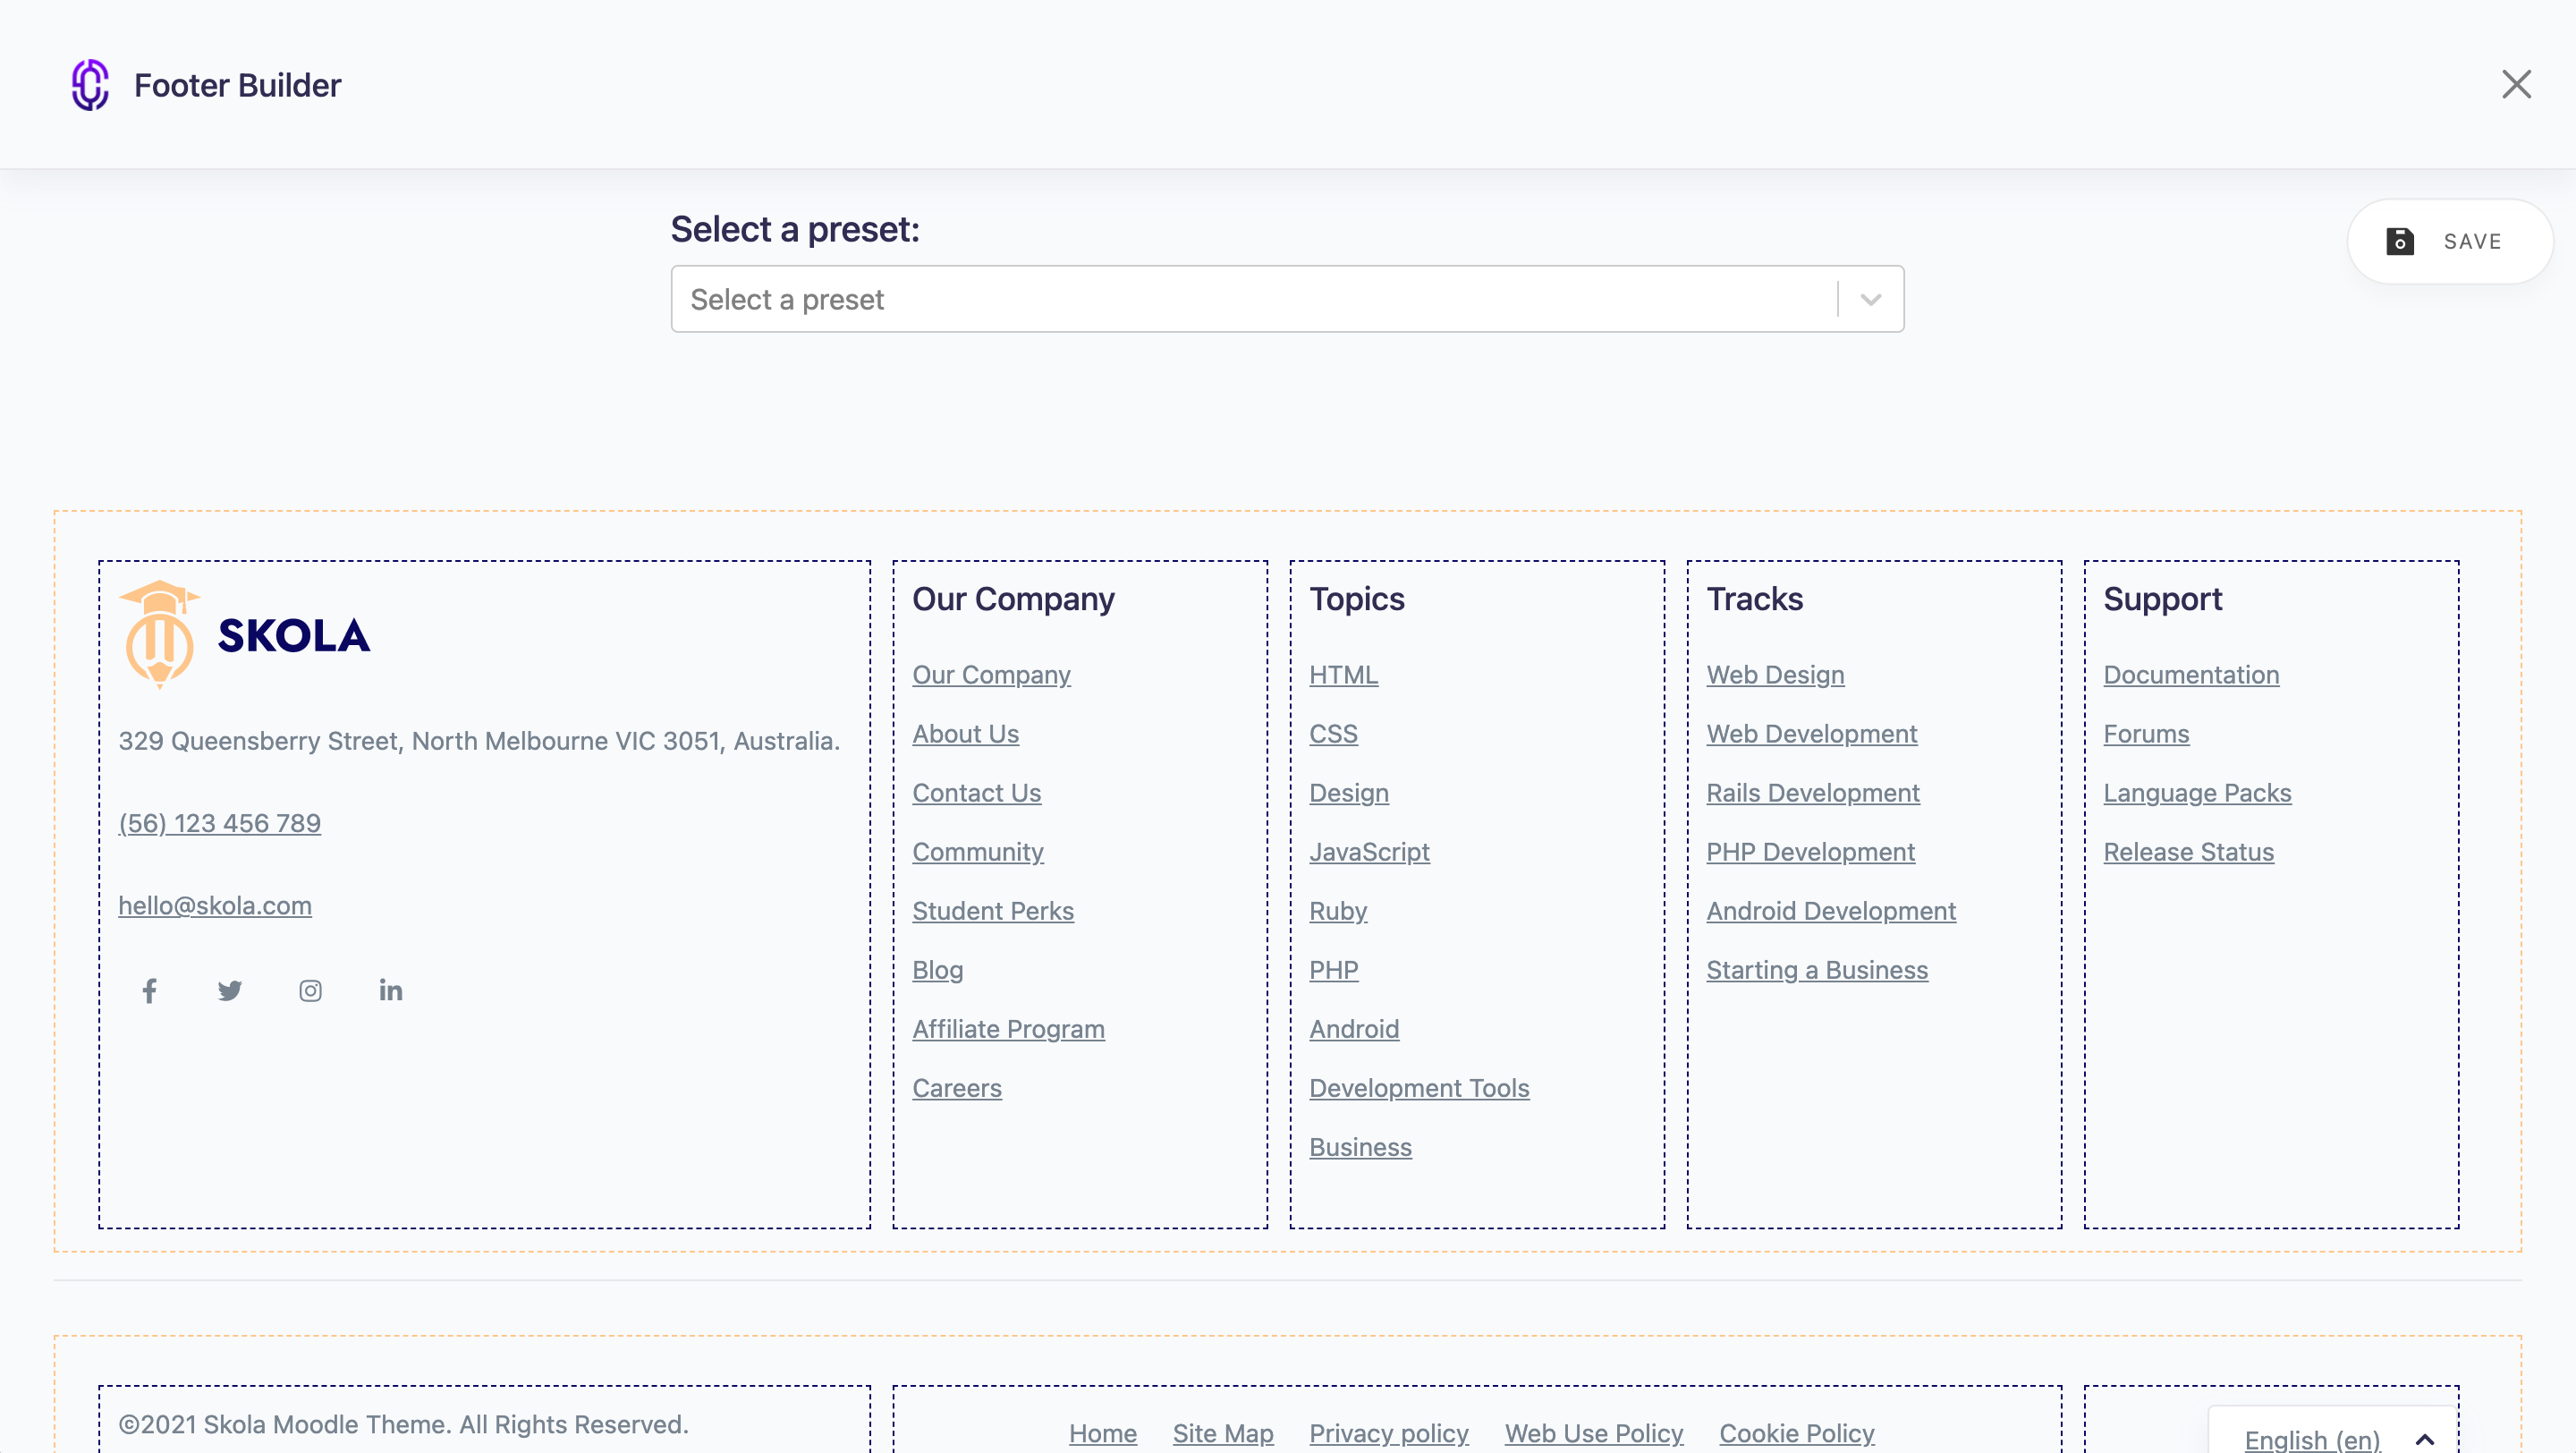
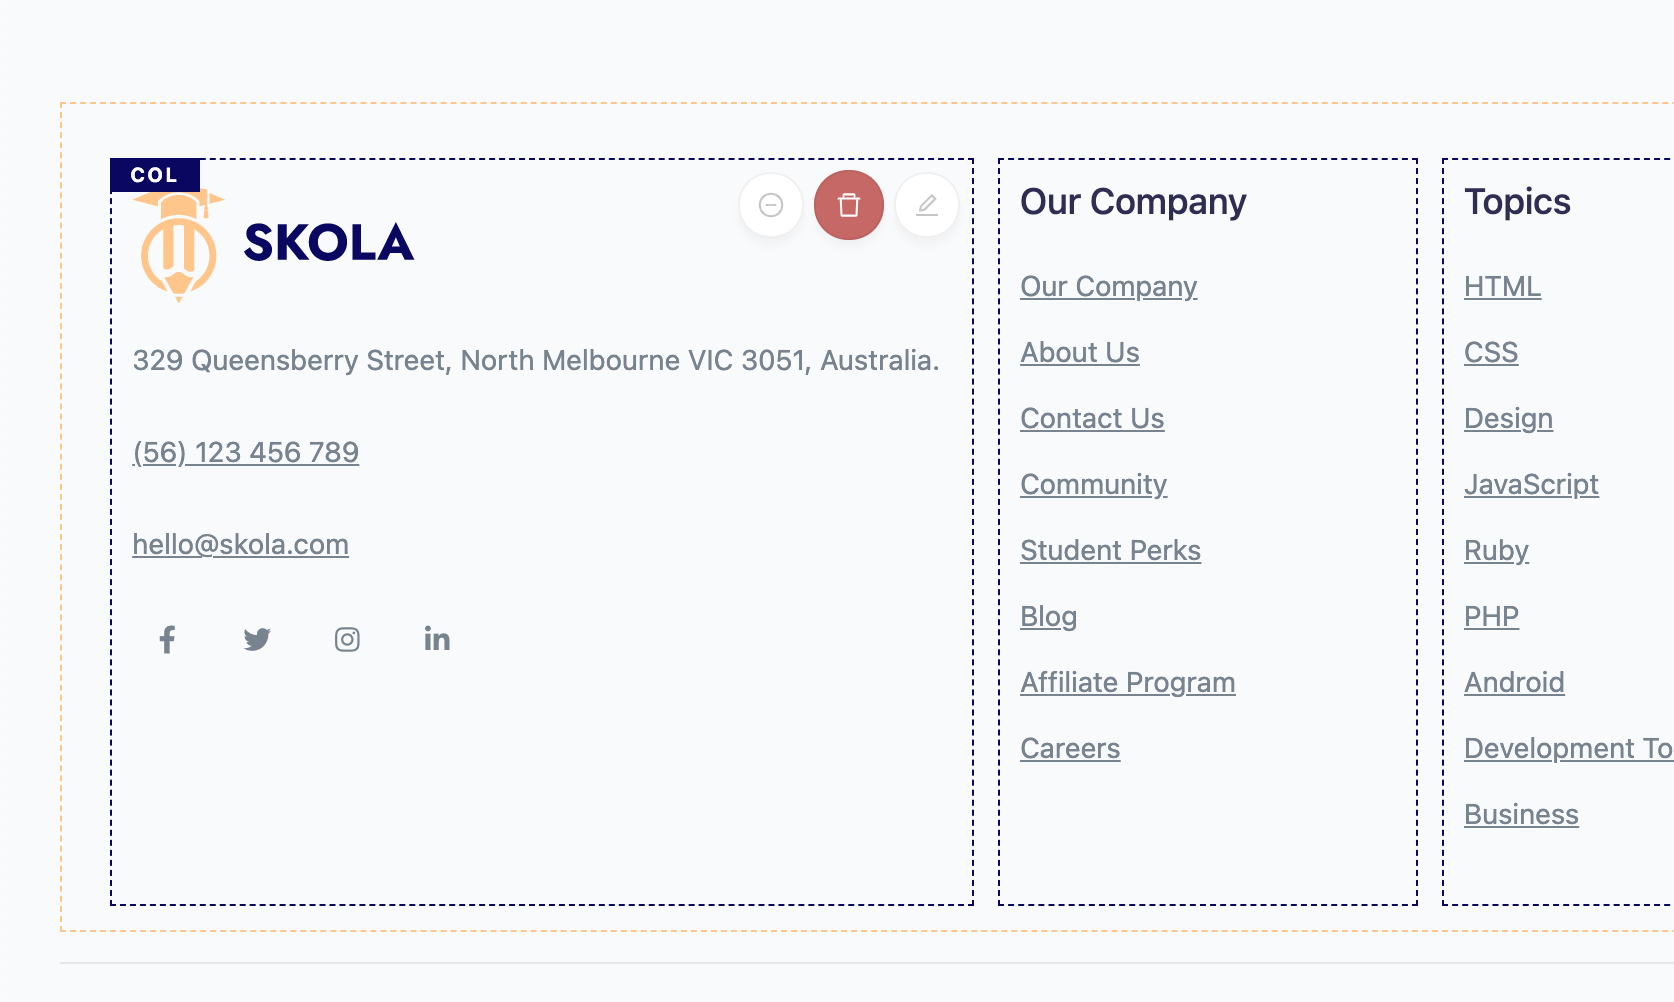
Open Footer Builder
Open the Footer Builder to select a preset style for the footer, or build your own. You can also customize your existing footer here.
-
Copyright Notice
Configure the copyright notice to be displayed in the footer of all pages. Include any other disclaimers here.
-
Footer menu 1: Title
Some footer variations include a footer menu. Configure the title of the first footer menu here.
-
Footer menu 1: Menu items
Configure the menu items of the first footer menu here. Use Moodle core's standard menu-formatting syntax, as used for the Custom Menu. Separate the menu item's title with a pipe, and proceed with the URL.
Our Company|#
About Us|#
Contact Us|#
Community|#
Student Perks|#
Blog|#
Affiliate Program|#
Careers|#
-
Footer menu 2: Title
Some footer variations include a footer menu. Configure the title of the second footer menu here.
-
Footer menu 2: Menu items
Configure the menu items of the second footer menu here. Use Moodle core's standard menu-formatting syntax, as used for the Custom Menu. Separate the menu item's title with a pipe, and proceed with the URL.
HTML|#
CSS|#
Design|#
JavaScript|#
Ruby|#
PHP|#
Android|#
Development Tools|#
Business|#
-
Footer menu 3: Title
Some footer variations include a footer menu. Configure the title of the thitd footer menu here.
-
Footer menu 3: Menu items
Configure the menu items of the third footer menu here. Use Moodle core's standard menu-formatting syntax, as used for the Custom Menu. Separate the menu item's title with a pipe, and proceed with the URL.
Web Design|#
Web Development|#
Rails Development|#
PHP Development|#
Android Development|#
Starting a Business|#
-
Footer menu 4: Title
Some footer variations include a footer menu. Configure the title of the fourth footer menu here.
-
Footer menu 4: Menu items
Configure the menu items of the first footer menu here. Use Moodle core's standard menu-formatting syntax, as used for the Custom Menu. Separate the menu item's title with a pipe, and proceed with the URL.
Documentation|#
Forums|#
Language Packs|#
Release Status|#
-
Address
Input your organization's physical address. This value is used in some header or footer variations. If left blank, no address will be displayed.
-
Call-to-action text
Some header variations display a Call to Action button. Set the text for this optional header element here.
-
Call-to-action link
Some header variations display a Call to Action button. Set the URL for this optional header element here. This should be an absolute URL, not a relative path. Either inbound or external URLs may be used. Be sure to include the HTTP protocol.
-
Call-to-action icon
Some header variations display a Call to Action button. Set the icon for this optional element here.
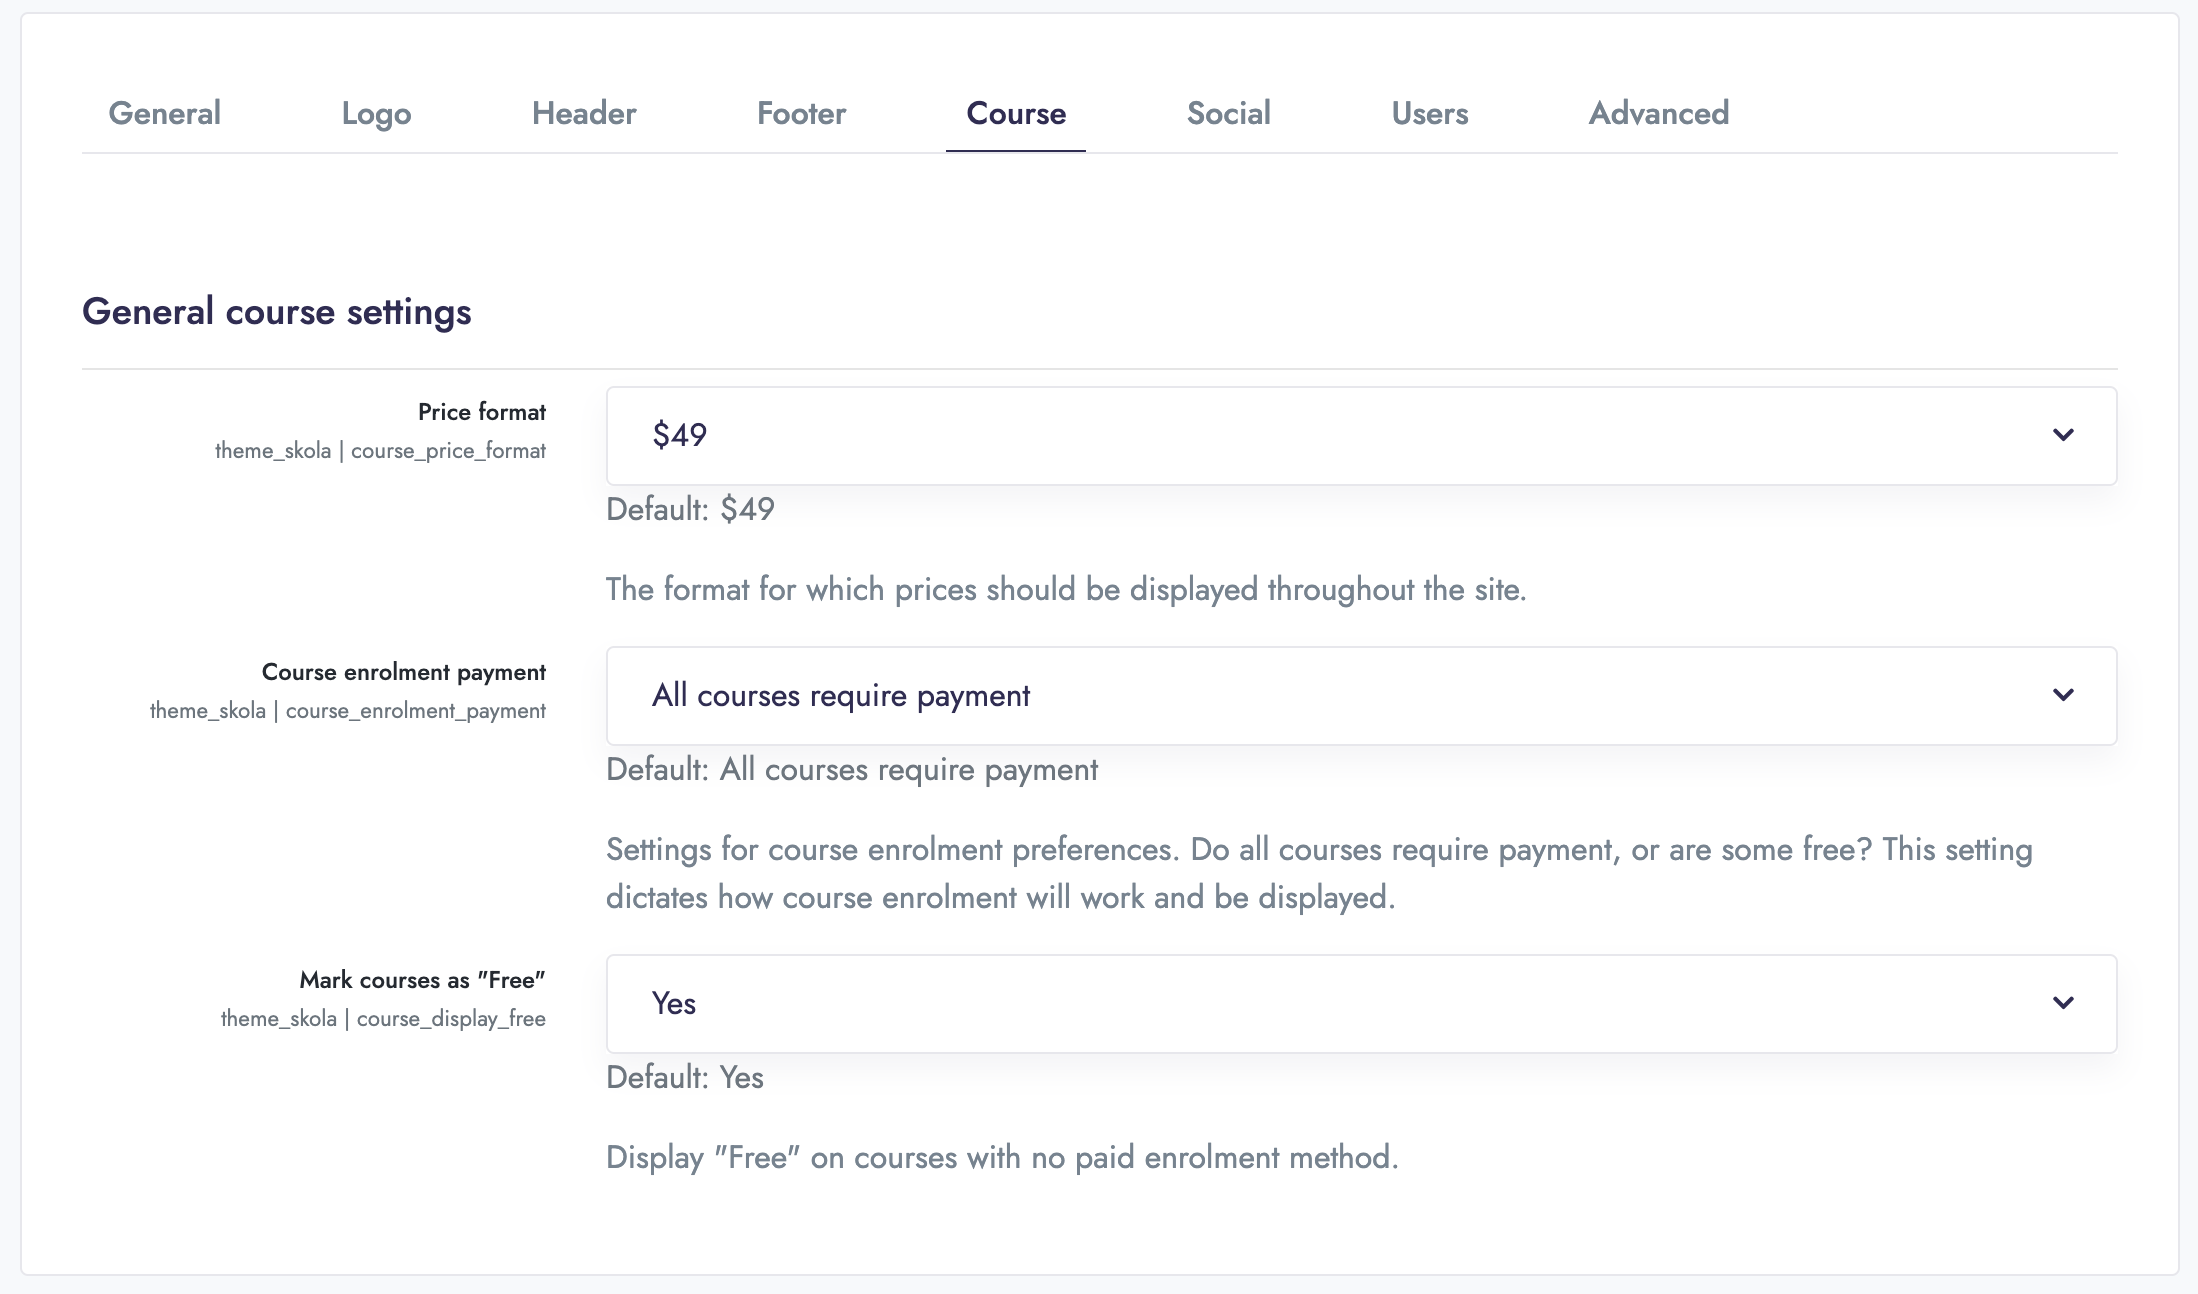
Course settings
The Course settings panel provides settings related to courses and how their details are displayed.
List of settings
-
Price format
Alter the display format used for prices across the Moodle platform. This will be used within blocks, courses, and course categories.
-
Mark courses as "Free"
By default, courses with no paid enrolment method will be marked as "Free" in Skola theme. To remove the "Free" label for courses without a paid enrolment method, toggle this setting to "No". This may be desired in situations where all courses are free.
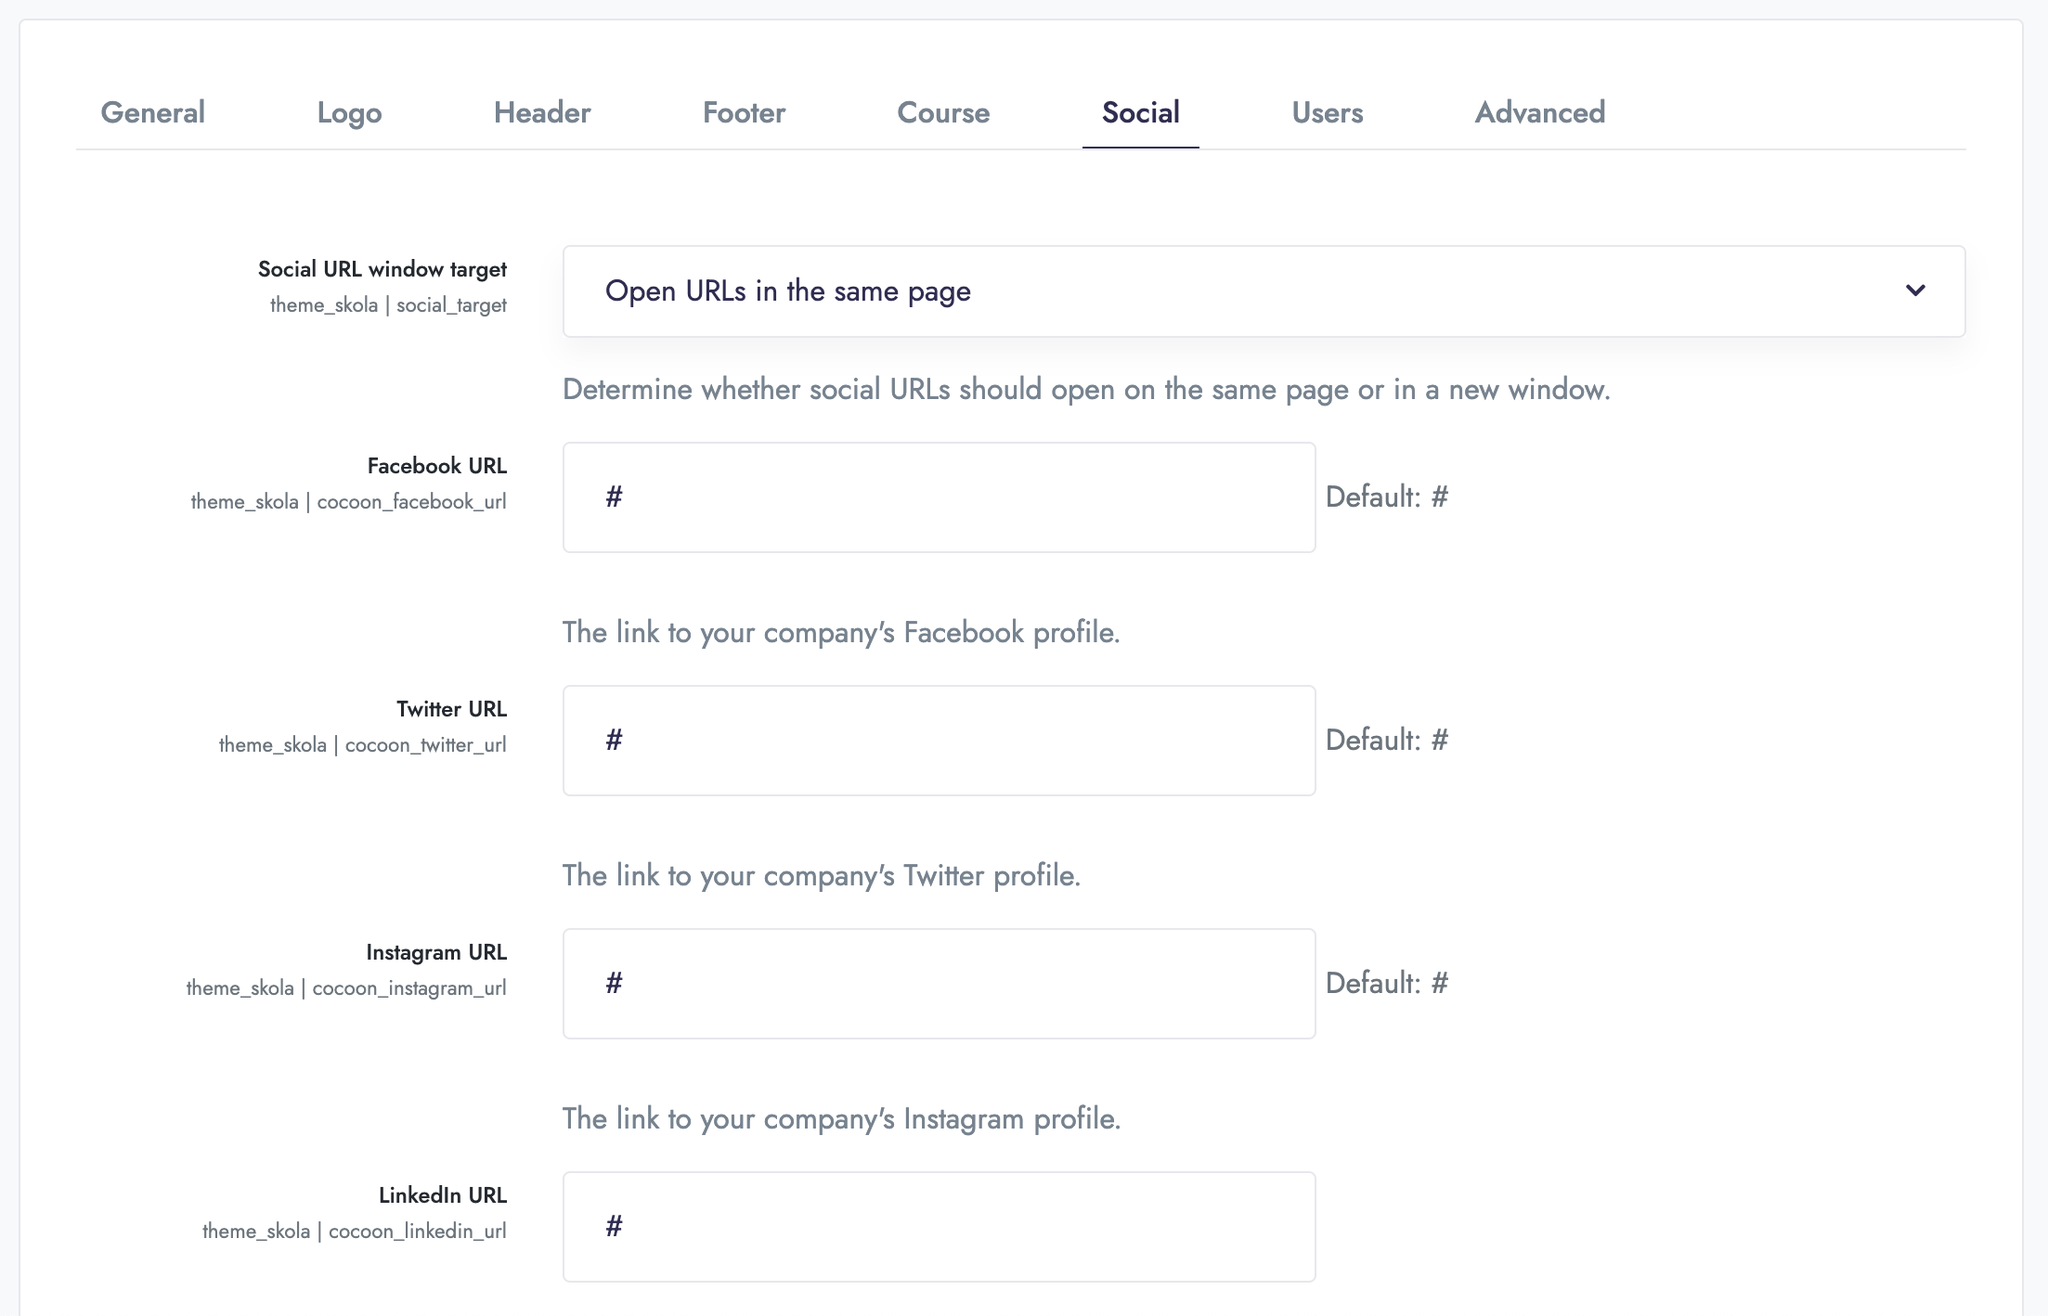
Social settings
The Social settings panel provides settings for configuring the social profile links for your website.
List of settings
-
Social URL Target
Some header and footer variations include social icons. Determine whether to open social URLs in the same page, or a new one.
-
Facebook URL
Enter your Facebook profile URL, starting with https:// (if this field is left blank, the social icon won't be displayed).
-
Twitter URL
Enter your Twitter profile URL, starting with https:// (if this field is left blank, the social icon won't be displayed).
-
Pinterest URL
Enter your Pinterest profile URL, starting with https:// (if this field is left blank, the social icon won't be displayed).
-
Dribbble URL
Enter your Dribbble profile URL, starting with https:// (if this field is left blank, the social icon won't be displayed).
-
Google URL
Enter your Google profile URL, starting with https:// (if this field is left blank, the social icon won't be displayed).
-
YouTube URL
Enter your YouTube profile URL, starting with https:// (if this field is left blank, the social icon won't be displayed).
-
VK URL
Enter your VK profile URL, starting with https:// (if this field is left blank, the social icon won't be displayed).
-
500px URL
Enter your 500px profile URL, starting with https:// (if this field is left blank, the social icon won't be displayed).
-
Behance URL
Enter your Behance profile URL, starting with https:// (if this field is left blank, the social icon won't be displayed).
-
Digg URL
Enter your Digg profile URL, starting with https:// (if this field is left blank, the social icon won't be displayed).
-
Flickr URL
Enter your Flickr profile URL, starting with https:// (if this field is left blank, the social icon won't be displayed).
-
Foursquare URL
Enter your Foursquare profile URL, starting with https:// (if this field is left blank, the social icon won't be displayed).
-
Medium URL
Enter your Medium profile URL, starting with https:// (if this field is left blank, the social icon won't be displayed).
-
Meetup URL
Enter your Meetup profile URL, starting with https:// (if this field is left blank, the social icon won't be displayed).
-
Snapchat URL
Enter your Snapchat profile URL, starting with https:// (if this field is left blank, the social icon won't be displayed).
-
Tumblr URL
Enter your Tumblr profile URL, starting with https:// (if this field is left blank, the social icon won't be displayed).
-
Vimeo URL
Enter your Vimeo profile URL, starting with https:// (if this field is left blank, the social icon won't be displayed).
-
WeChat URL
Enter your WeChat profile URL, starting with https:// (if this field is left blank, the social icon won't be displayed).
-
WhatsApp URL
Enter your WhatsApp profile URL, starting with https:// (if this field is left blank, the social icon won't be displayed).
-
WordPress URL
Enter your WordPress profile URL, starting with https:// (if this field is left blank, the social icon won't be displayed).
-
Weibo URL
Enter your Weibo profile URL, starting with https:// (if this field is left blank, the social icon won't be displayed).
-
Telegram URL
Enter your Telegram profile URL, starting with https:// (if this field is left blank, the social icon won't be displayed).
-
Moodle URL
Enter your Moodle profile URL, starting with https:// (if this field is left blank, the social icon won't be displayed).
-
Amazon URL
Enter your Amazon profile URL, starting with https:// (if this field is left blank, the social icon won't be displayed).
-
SlideShare URL
Enter your SlideShare profile URL, starting with https:// (if this field is left blank, the social icon won't be displayed).
-
Soundcloud URL
Enter your Soundcloud profile URL, starting with https:// (if this field is left blank, the social icon won't be displayed).
-
Leanpub URL
Enter your Leanpub profile URL, starting with https:// (if this field is left blank, the social icon won't be displayed).
-
Xing URL
Enter your Xing profile URL, starting with https:// (if this field is left blank, the social icon won't be displayed).
-
Bitcoin URL
Enter your Bitcoin profile URL, starting with https:// (if this field is left blank, the social icon won't be displayed).
-
Twitch URL
Enter your Twitch profile URL, starting with https:// (if this field is left blank, the social icon won't be displayed).
-
Github URL
Enter your Github profile URL, starting with https:// (if this field is left blank, the social icon won't be displayed).
-
Gitlab URL
Enter your Gitlab profile URL, starting with https:// (if this field is left blank, the social icon won't be displayed).
-
Forumbee URL
Enter your Forumbee profile URL, starting with https:// (if this field is left blank, the social icon won't be displayed).
-
Trello URL
Enter your Trello profile URL, starting with https:// (if this field is left blank, the social icon won't be displayed).
-
Weixin URL
Enter your Weixin profile URL, starting with https:// (if this field is left blank, the social icon won't be displayed).
-
Slack URL
Enter your Slack profile URL, starting with https:// (if this field is left blank, the social icon won't be displayed).
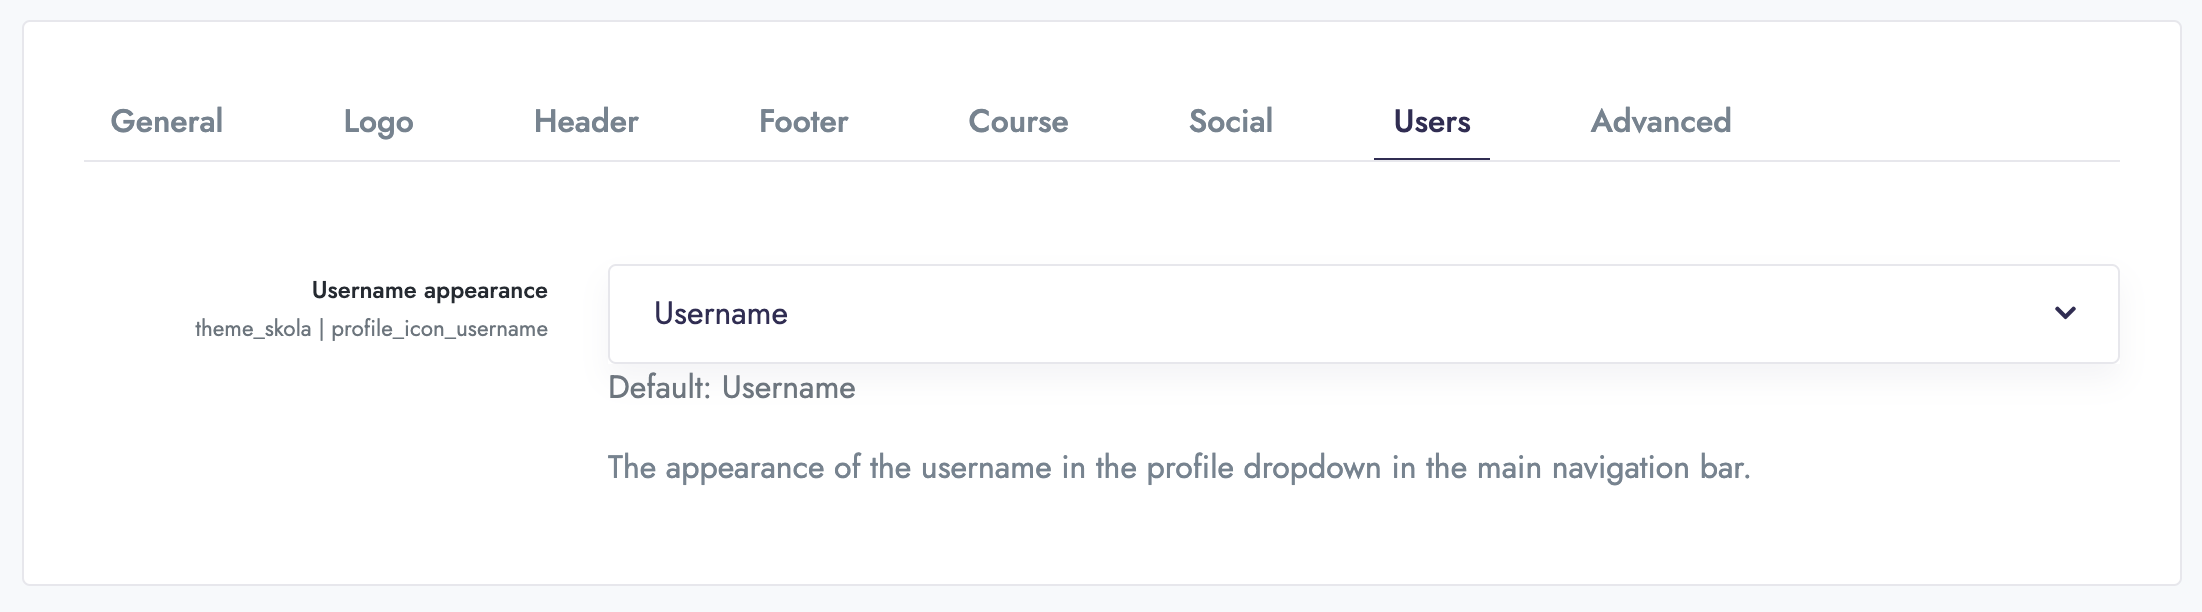
User settings
The User settings panel provides basic settings for user display.
List of settings
-
Username appearance
Select between the user's username or fullname to be displayed in the profile dropdown, side navigation drawer, and dashboard pages.
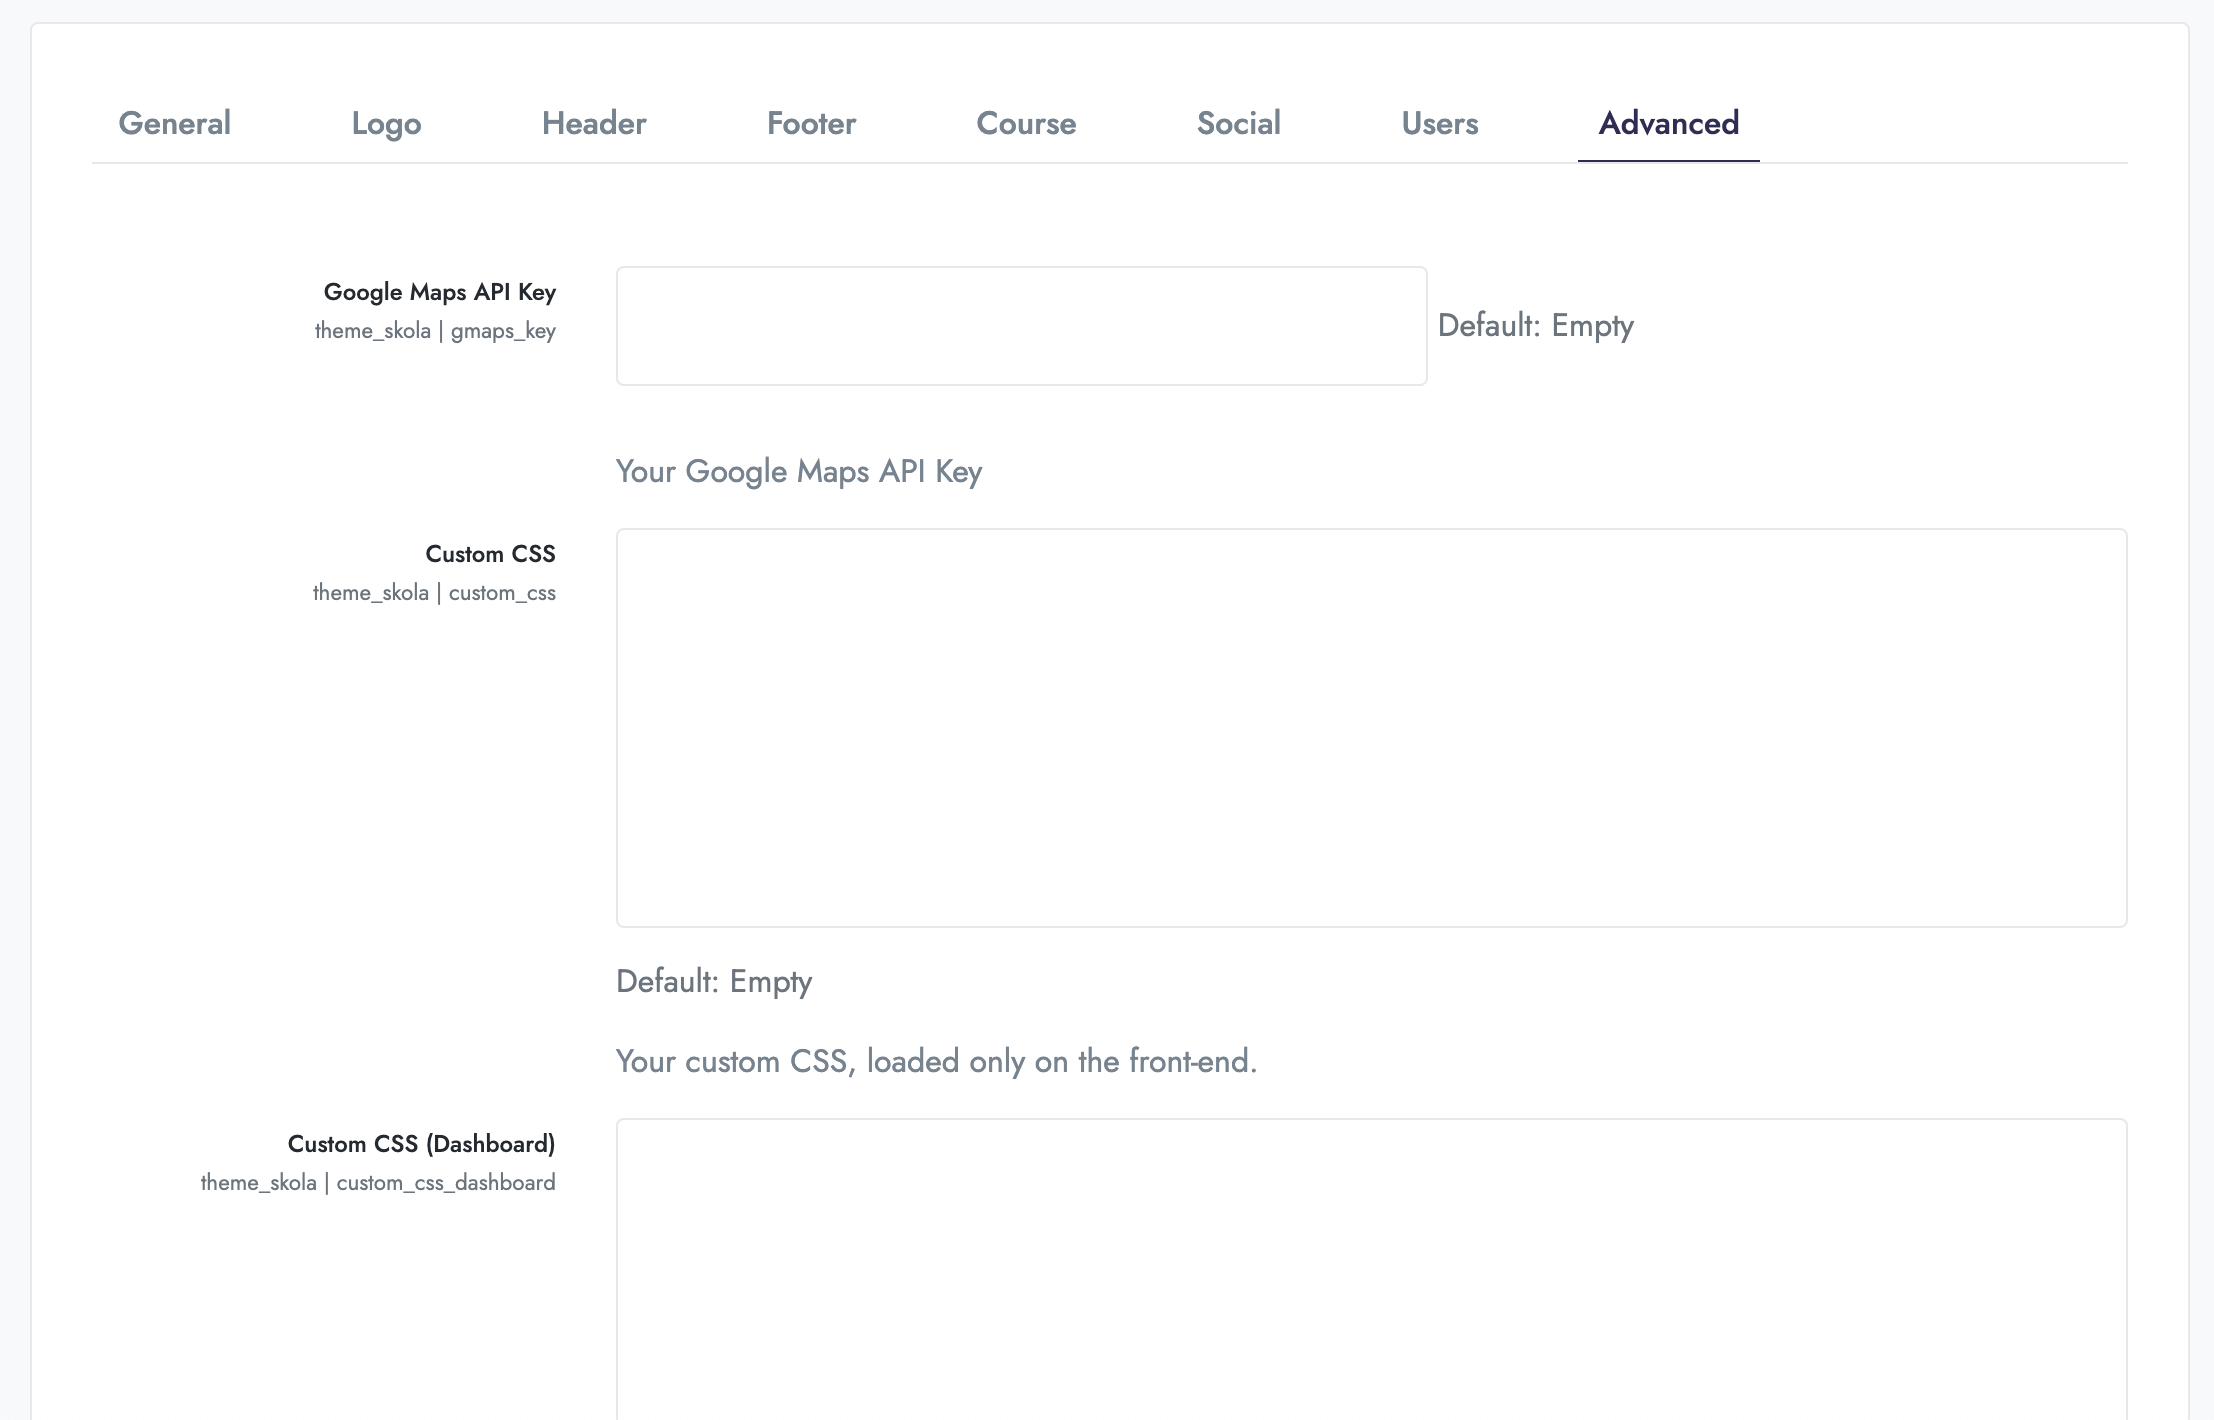
Advanced settings
The Advanced settings panel is used to configure finer details, such as the Google Maps API key, and Custom CSS or JavaScript.
List of settings
-
Google Maps API Key
Enter your Google Maps API key, to be used in the [Cocoon] Google Map block. The map will not be displayed in the absense of an API key.
-
Custom CSS
Enter any desired custom CSS to be applied to all frontend pages of the Skola theme. Please ensure that your CSS syntax is valid.
-
Custom CSS (Dashboard)
Any CSS included here will be applied only to the dashboard and site administration pages.
-
Custom JavaScript
Enter any desired custom JavaScript to be applied to all frontend pages of the Skola theme. Please ensure that your JavaScript syntax is valid. Where JavaScript is not valid or contains an unregular expression, frontend website functionality may break until the code is removed.
-
Custom JavaScript (Dashboard)
Any JavaScript included here will be applied only to the dashboard and site administration pages. Please ensure that your JavaScript syntax is valid. Where JavaScript is not valid or contains an unregular expression, frontend website functionality may break until the code is removed.
-
Page Settings button
By default, Moodle includes an action menu or settings cog button on certain pages of the Moodle LMS. It's typically visible based on a user's permissions within a certain context. Toggle this option to gain greater control of the settings cog, and disable its appearance for certain roles entirely, even if it contains action menu items.
-
Override Logo URL
By default, Skola's logo links to your site's frontpage. Enter an alternate URL here to take users to another destination when clicking the site logo.
-
Icons
Skola inclues over 3,000 icons in the form of optimized font faces. These 3,000 icons comprise 4 contributing iconsets. Enable or disable specific iconsets here. Disabling iconsets may help to improve the speed of some pages. We recommend that all iconsets remain enabled, or that this setting is utilized by developers.
-
SEO: Meta description
Include a meta description for your Moodle site, to override Moodle's default meta description tag.
-
SEO: Meta abstract
Include a meta abstract for your Moodle site, to override Moodle's default meta abstract tag. Please note that most leading search engines no longer use this metatag, and it should be used for legacy support only.
-
SEO: Meta keywords
Include meta keywords for your Moodle site, to override Moodle's default meta keywords tag. Please note that most leading search engines no longer use this metatag, and it should be used for legacy support only. To receive more targeted organic traffic, we recommend utilizing the 100+ custom blocks included with the theme, in order to enrich the indexable content on your site's pages. For better indexing, opt for text-rich blocks and combine these with optimized, appropriately sized images.
-
Expose Blocks
By default, Skola restricts which block types can be added to each page, depending on page-type. For example—by default, blocks that we intend for use on the Dashboard page are not visible in Live Customizer. To override this setting, and expose all 100+ custom blocks everywhere, toggle this setting on. This will allow all frontend custom blocks to be added to dashboard pages, and all dashboard custom blocks to be added to frontend pages. We recommend that this setting is utilized by developers only.
This section will provide further guidance on how Skola works, and how content should be managed.
Pages
Skola includes styling for all common areas of a typical Moodle installation, including (but not limited to):
- Front page
- Custom Pages (Activities)
- Course categories
- Single courses (and sub-pages like Participants)
- Calendar
- Login and Email-based Self Registration
- Blogs
- Dashboard (Messages, Profile, Settings, etc)
These styles are automatically applied on activation of the theme.
However, there are many more possibilities with Skola.
One of Skola's greatest features is its intuitive use of custom blocks, which allow you to create feature-rich pages anywhere on your Moodle site.
You can assign any of the custom blocks below to one of Skola's included regions:
Regions
- Fullwidth top
- Fullwidth bottom
- Above content
- Below content
- Sidebar left
- Sidebar right
Please note that certain blocks are best-placed in the fullwidth regions, and others in the sidebar regions.
Blocks
Skola ships with over 100 custom blocks, which can be assigned to any region within the theme.
Custom blocks have [Cocoon] in the title, for easy recognition:
- [Cocoon] About 1 - Informational block with text and image.
- [Cocoon] About 2 - An alternate informational block with text and image.
- [Cocoon] About 3 - An alternate informational block with text, counters and image.
- [Cocoon] About 4 - An alternate informational block with text and an image.
- [Cocoon] About 5 - An alternate informational block with text and an image.
- [Cocoon] Action Panels - Two CTAs beside each other.
- [Cocoon] App Buttons - Two app buttons for App Store and Play Store.
- [Cocoon] Blog Recent List - Sidebar list of recent blog entries.
- [Cocoon] Blog Slider - A blog slider carousel.
- [Cocoon] Blog Slider 2 - An alternate blog slider carousel.
- [Cocoon] Blog Slider 3 - An alternate blog slider carousel.
- [Cocoon] Boxes - A set of boxes to display services.
- [Cocoon] Boxes 2 - An alternate set of boxes to display services.
- [Cocoon] Course Category Grid - A grid of selected course categories.
- [Cocoon] Course Category Grid 2 - An alternate grid of selected course categories.
- [Cocoon] Course Category Grid 3 - An alternate grid of selected course categories.
- [Cocoon] Course Category Grid 4 - An alternate grid of selected course categories.
- [Cocoon] Course Category Grid 5 - An alternate grid of selected course categories.
- [Cocoon] Course Category Slider - A sliding carousel of course categories.
- [Cocoon] Course Category Slider 2 - An alternate sliding carousel of course categories.
- [Cocoon] Coming Soon - A "Coming Soon" block with countdown timer.
- [Cocoon] Contact Details - Icons with contact details, plus a contact form built with Cocoon Form Builder.
- [Cocoon] Course Grid - A grid of selected courses.
- [Cocoon] Course Grid 2 - An alternate grid of selected courses.
- [Cocoon] Course Grid 3 - An alternate grid of selected courses.
- [Cocoon] Course Grid 4 - An alternate grid of selected courses.
- [Cocoon] Course Grid 5 - An alternate grid of selected courses.
- [Cocoon] Course Grid 6 - An alternate grid of selected courses.
- [Cocoon] Course Grid 7 - An alternate grid of selected courses.
- [Cocoon] Course Grid 8 - An alternate grid of selected courses.
- [Cocoon] Course Slider - A sliding carousel of courses.
- [Cocoon] Course Slider 2 - An alternate sliding carousel of courses.
- [Cocoon] Course Slider 3 - An alternate sliding carousel of courses.
- [Cocoon] Course Slider 4 - An alternate sliding carousel of courses.
- [Cocoon] Course Slider 5 - An alternate sliding carousel of courses.
- [Cocoon] Course Slider 6 - An alternate sliding carousel of courses.
- [Cocoon] Course Slider 7 - An alternate sliding carousel of courses.
- [Cocoon] Custom HTML - A custom HTML block used for unique syntax.
- [Cocoon] Event List - A list of events built using Cocoon Events.
- [Cocoon] Event List 2 - An alternate list of events built using Cocoon Events.
- [Cocoon] Event List 3 - An alternate list of events built using Cocoon Events.
- [Cocoon] Event List 4 - An alternate list of events built using Cocoon Events.
- [Cocoon] Event List 5 - An alternate list of events built using Cocoon Events.
- [Cocoon] Event List 6 - An alternate list of events built using Cocoon Events.
- [Cocoon] Event List 7 - An alternate list of events built using Cocoon Events.
- [Cocoon] Event List 8 - An alternate list of events built using Cocoon Events.
- [Cocoon] Event List 9 - An alternate list of events built using Cocoon Events.
- [Cocoon] FAQs - An expandable accordion of FAQs.
- [Cocoon] Featured Tabs - Large tabbed items to display information and images.
- [Cocoon] Featured Teacher - Featured teacher, "Teacher of the Week".
- [Cocoon] Featured Video - A featured video with image and text.
- [Cocoon] Featured Video 2 - An alternate featured video with image and text.
- [Cocoon] Featured Video 3 - An alternate featured video with image and text.
- [Cocoon] Featured Video 4 - An alternate featured video with image and text.
- [Cocoon] Features - A grid of features.
- [Cocoon] Features 2 - An alternate grid of features.
- [Cocoon] Features 3 - An alternate grid of features.
- [Cocoon] Features 4 - An alternate grid of features.
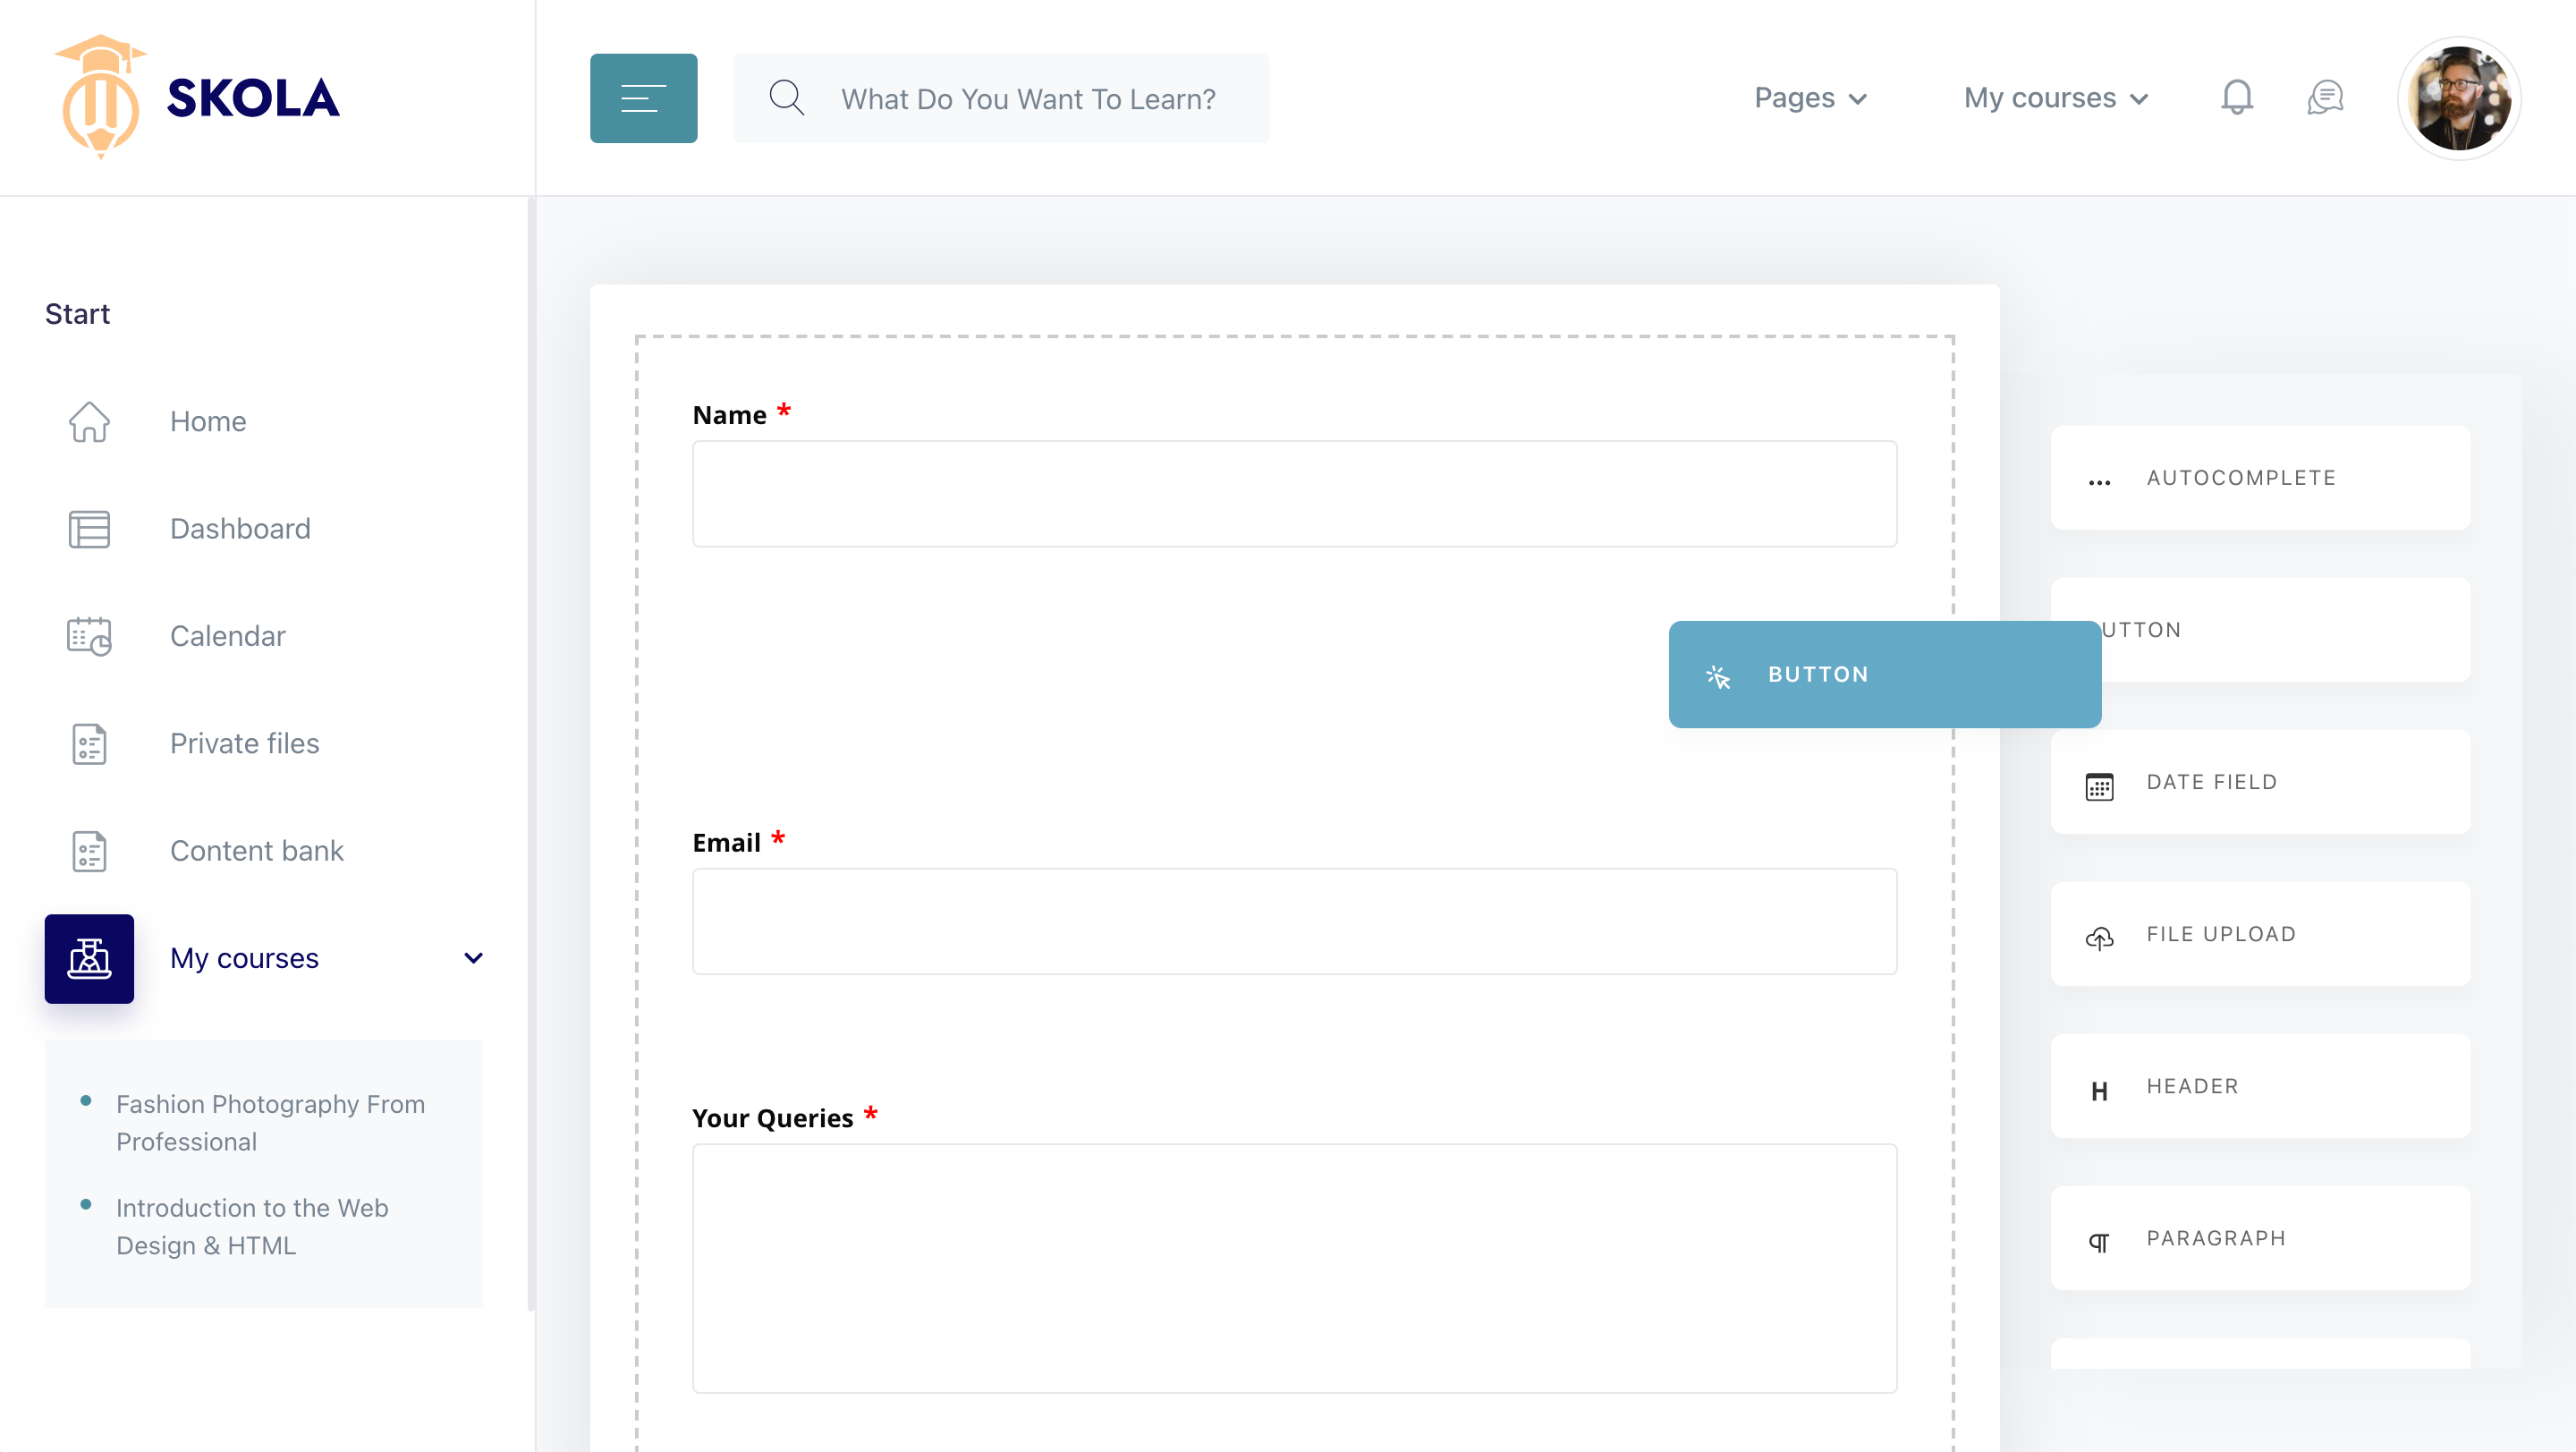
- [Cocoon] Form - A form built using Cocoon Form Builder.
- [Cocoon] Gallery - A zoom-enabled image gallery.
- [Cocoon] Gallery 2 - An alternate zoom-enabled image gallery.
- [Cocoon] Gallery 3 - An alternate zoom-enabled image gallery.
- [Cocoon] Gallery 4 - An alternate zoom-enabled image gallery.
- [Cocoon] Global Search - A site-wide search bar for the Sidebar region.
- [Cocoon] Google Map - A map powered by Google Maps.
- [Cocoon] Hero 1 - The first hero variation.
- [Cocoon] Hero 2 - The second hero variation.
- [Cocoon] Hero 3 - The third hero variation.
- [Cocoon] Hero 4 - The fourth hero variation.
- [Cocoon] Hero 5 - The fifth hero variation.
- [Cocoon] Hero 6 - The sixth hero variation.
- [Cocoon] Hero 7 - The seventh hero variation.
- [Cocoon] Hero 8 - The eighth hero variation.
- [Cocoon] Hero 9 - The ninth hero variation.
- [Cocoon] Hero 10 - The tenth hero variation.
- [Cocoon] Hero 11 - The eleventh hero variation.
- [Cocoon] Hero 12 - The twelvth hero variation.
- [Cocoon] Hero 13 - The thirteenth hero variation.
- [Cocoon] Hero 14 - The fourteenth hero variation.
- [Cocoon] Hero 15 - The fifteenth hero variation.
- [Cocoon] Logos Slider - A sliding carousel of logo images.
- [Cocoon] My Profile - Dashboard block with a user's profile information.
- [Cocoon] My Users Online - Dashboard block showing the users currently online.
- [Cocoon] Parallax - Parallax image and text in a single section.
- [Cocoon] Parallax 2 - An alternate parallax image and text in a single section.
- [Cocoon] Parallax 3 - An alternate parallax image and text in a single section.
- [Cocoon] Parallax Counters - A parallax image and number counters in a single section.
- [Cocoon] Parallax Counters 2 - An alternate parallax image and number counters in a single section.
- [Cocoon] Parallax Subscribe - Parallax subscription block.
- [Cocoon] Parallax Subscribe 2 - An alternate parallax subscription block.
- [Cocoon] Parallax Video - A parallax image and video combination.
- [Cocoon] Price Tables - Price tables in columns.
- [Cocoon] Price Tables 2 - Advanced price tables in columns.
- [Cocoon] Simple Counters - A set of simple counters.
- [Cocoon] Subscribe - Mailing list subscription form.
- [Cocoon] Subscribe 2 - Mailing list subscription form.
- [Cocoon] Subscribe 3 - Mailing list subscription form.
- [Cocoon] Subscribe 4 - Mailing list subscription form.
- [Cocoon] Testimonials - A carousel of user testimonials.
- [Cocoon] Testimonials 2 - An alternate carousel of user testimonials.
- [Cocoon] Testimonials 3 - An alternate carousel of user testimonials.
- [Cocoon] Testimonials 4 - An alternate carousel of user testimonials.
- [Cocoon] Testimonials 5 - An alternate carousel of user testimonials.
- [Cocoon] Testimonials 6 - An alternate carousel of user testimonials.
- [Cocoon] Testimonials 7 - An alternate carousel of user testimonials.
- [Cocoon] Users Slider - A slider of selected site users.
- [Cocoon] Users Slider 2 - An alternate slider of selected site users.
- [Cocoon] Users Slider 3 - An alternate slider of selected site users.
- [Cocoon] Users Slider 4 - An alternate slider of selected site users.
- [Cocoon] Users Slider 5 - An alternate slider of selected site users.
- [Cocoon] Users Slider 6 - An alternate slider of selected site users.
Each block is configurable independently and can be added to any Moodle page. You can also configure blocks to be displayed site-wide.
Most blocks in Skola are edited using Cocoon Live Customizer, which provides an intuitive drag-and-drop inline editing experience for Moodle.
To create a main menu, you should add items to the Moodle custom menu.
→ Navigate to Site administration > Appearance > Themes > Theme settings > Custom menu items to configure your main menu.
Modify the items in the 'Custom menu items' field to alter the main menu:
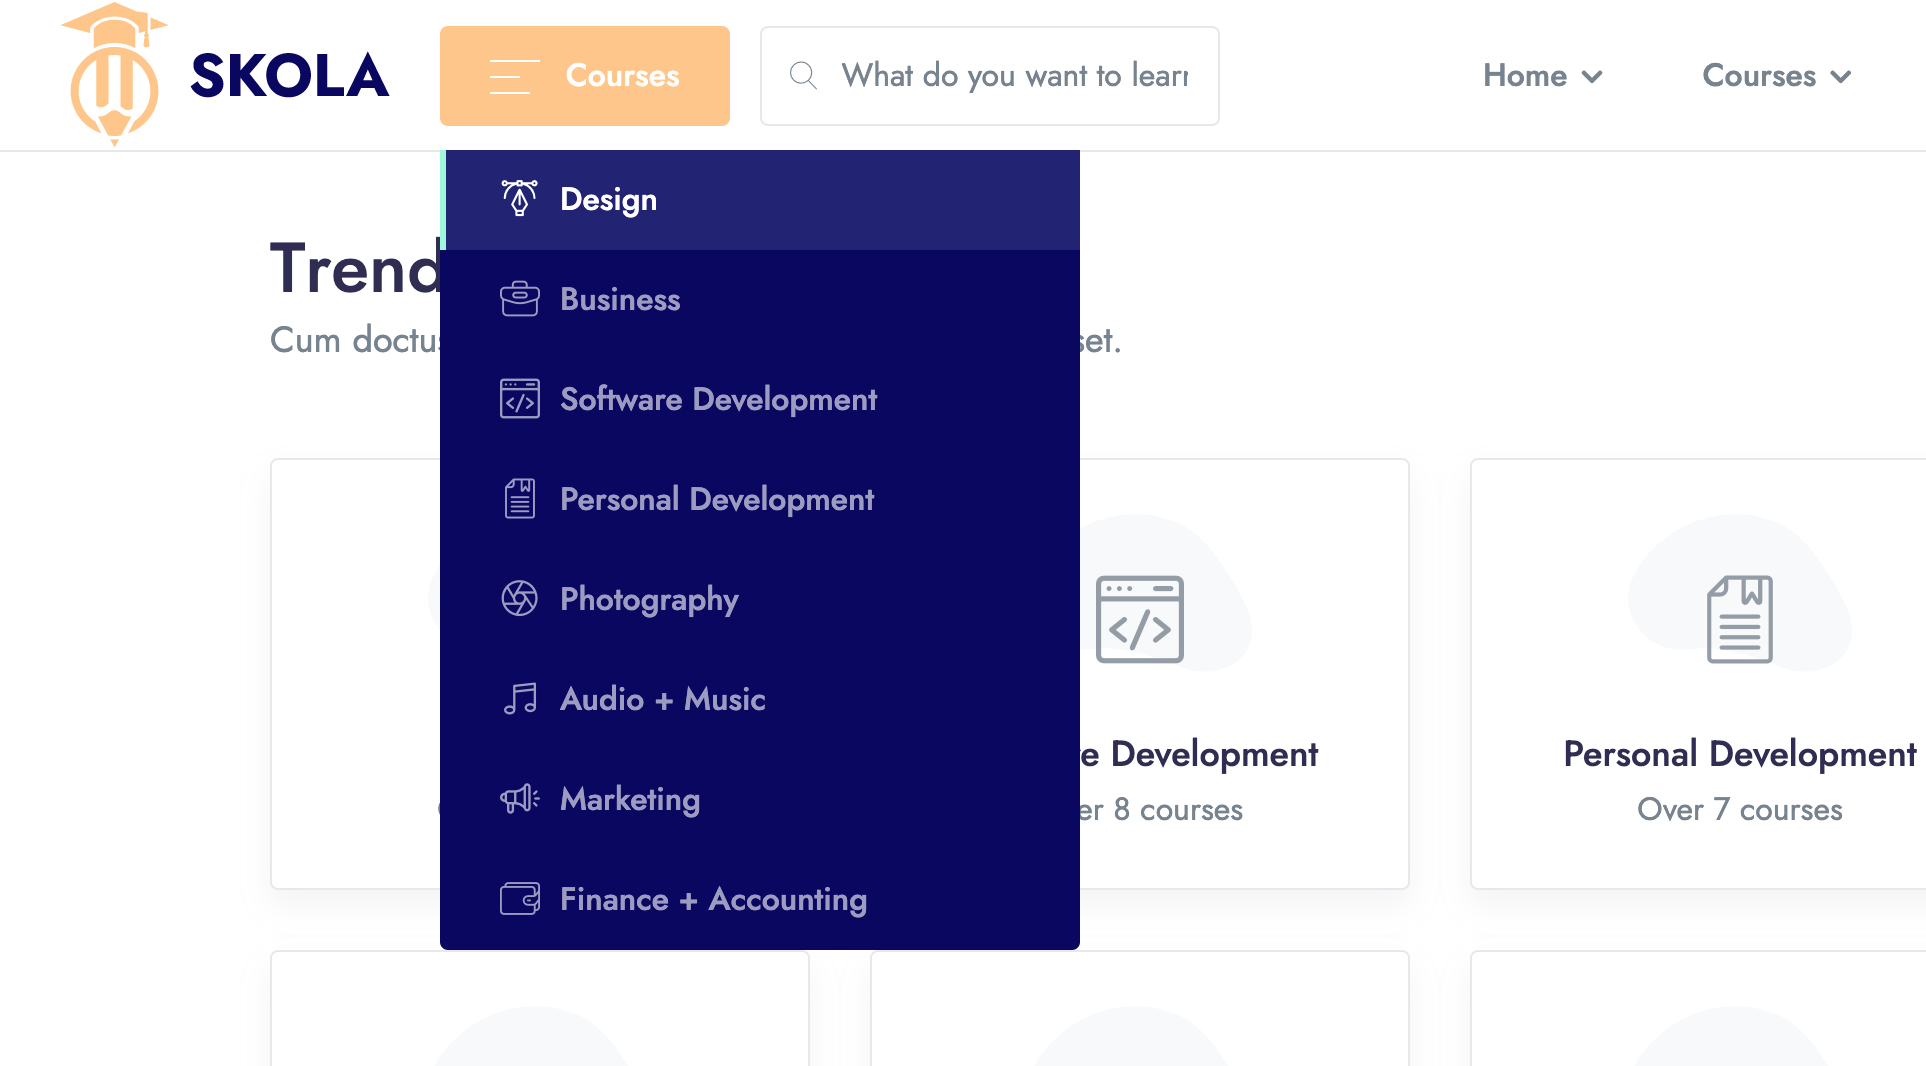
Multi-level Dropdown Menu
To create multi-level dropdowns in Skola, simply inlude an additional hyphen before the sub-menu item (increase the indentation):
Pages|#
- About Us|/mod/page/view.php?id=124
- About Us v2|/mod/page/view.php?id=125
- Become an Instructor|/mod/page/view.php?id=131
- Pricing|/mod/page/view.php?id=130
- FAQ|/mod/page/view.php?id=126
- User|#
-- Login|/login/index.php
-- Register|/login/signup.php
- Coming Soon|/mod/page/view.php?id=140
- Terms & Conditions|/admin/tool/dataprivacy/summary.php
- Elements|/mod/page/view.php?id=139

Mega Menu
Skola includes mega menu functionality which can be activated by setting the parent menu item's URL as '@megamenu'. Use hyphens to increase the level of indentation and create grouping within the mega menu.
Courses|@megamenu
  - Courses List
    -- Courses List v1|/course/index.php?categoryid=3
    -- Courses List v2|/course/index.php?categoryid=4
    -- Courses List v3|/course/index.php?categoryid=5
    -- Courses List v4|/course/index.php?categoryid=6
    -- Courses List v5|/course/index.php?categoryid=7
    -- Courses List v6|/course/index.php?categoryid=8
    -- Instructors
    -- Instructors List|/local/cocoon_users
    -- Instructor Profile|/user/profile.php?id=22
  - Courses Single
    -- Course Single v1|/course/view.php?id=11
    -- Course Single v2|/course/view.php?id=10
    -- Course Single v3|/course/view.php?id=9
    -- Course Single v4|/course/view.php?id=8
    -- Course Single v5|/course/view.php?id=7
  - Other Course Pages
    -- Free Course|/course/view.php?id=4
    -- Paid Course|/course/view.php?id=5
    -- Topics Format|/course/view.php?id=11
    -- Social Format|/course/view.php?id=10
    -- Weekly Format|/course/view.php?id=9

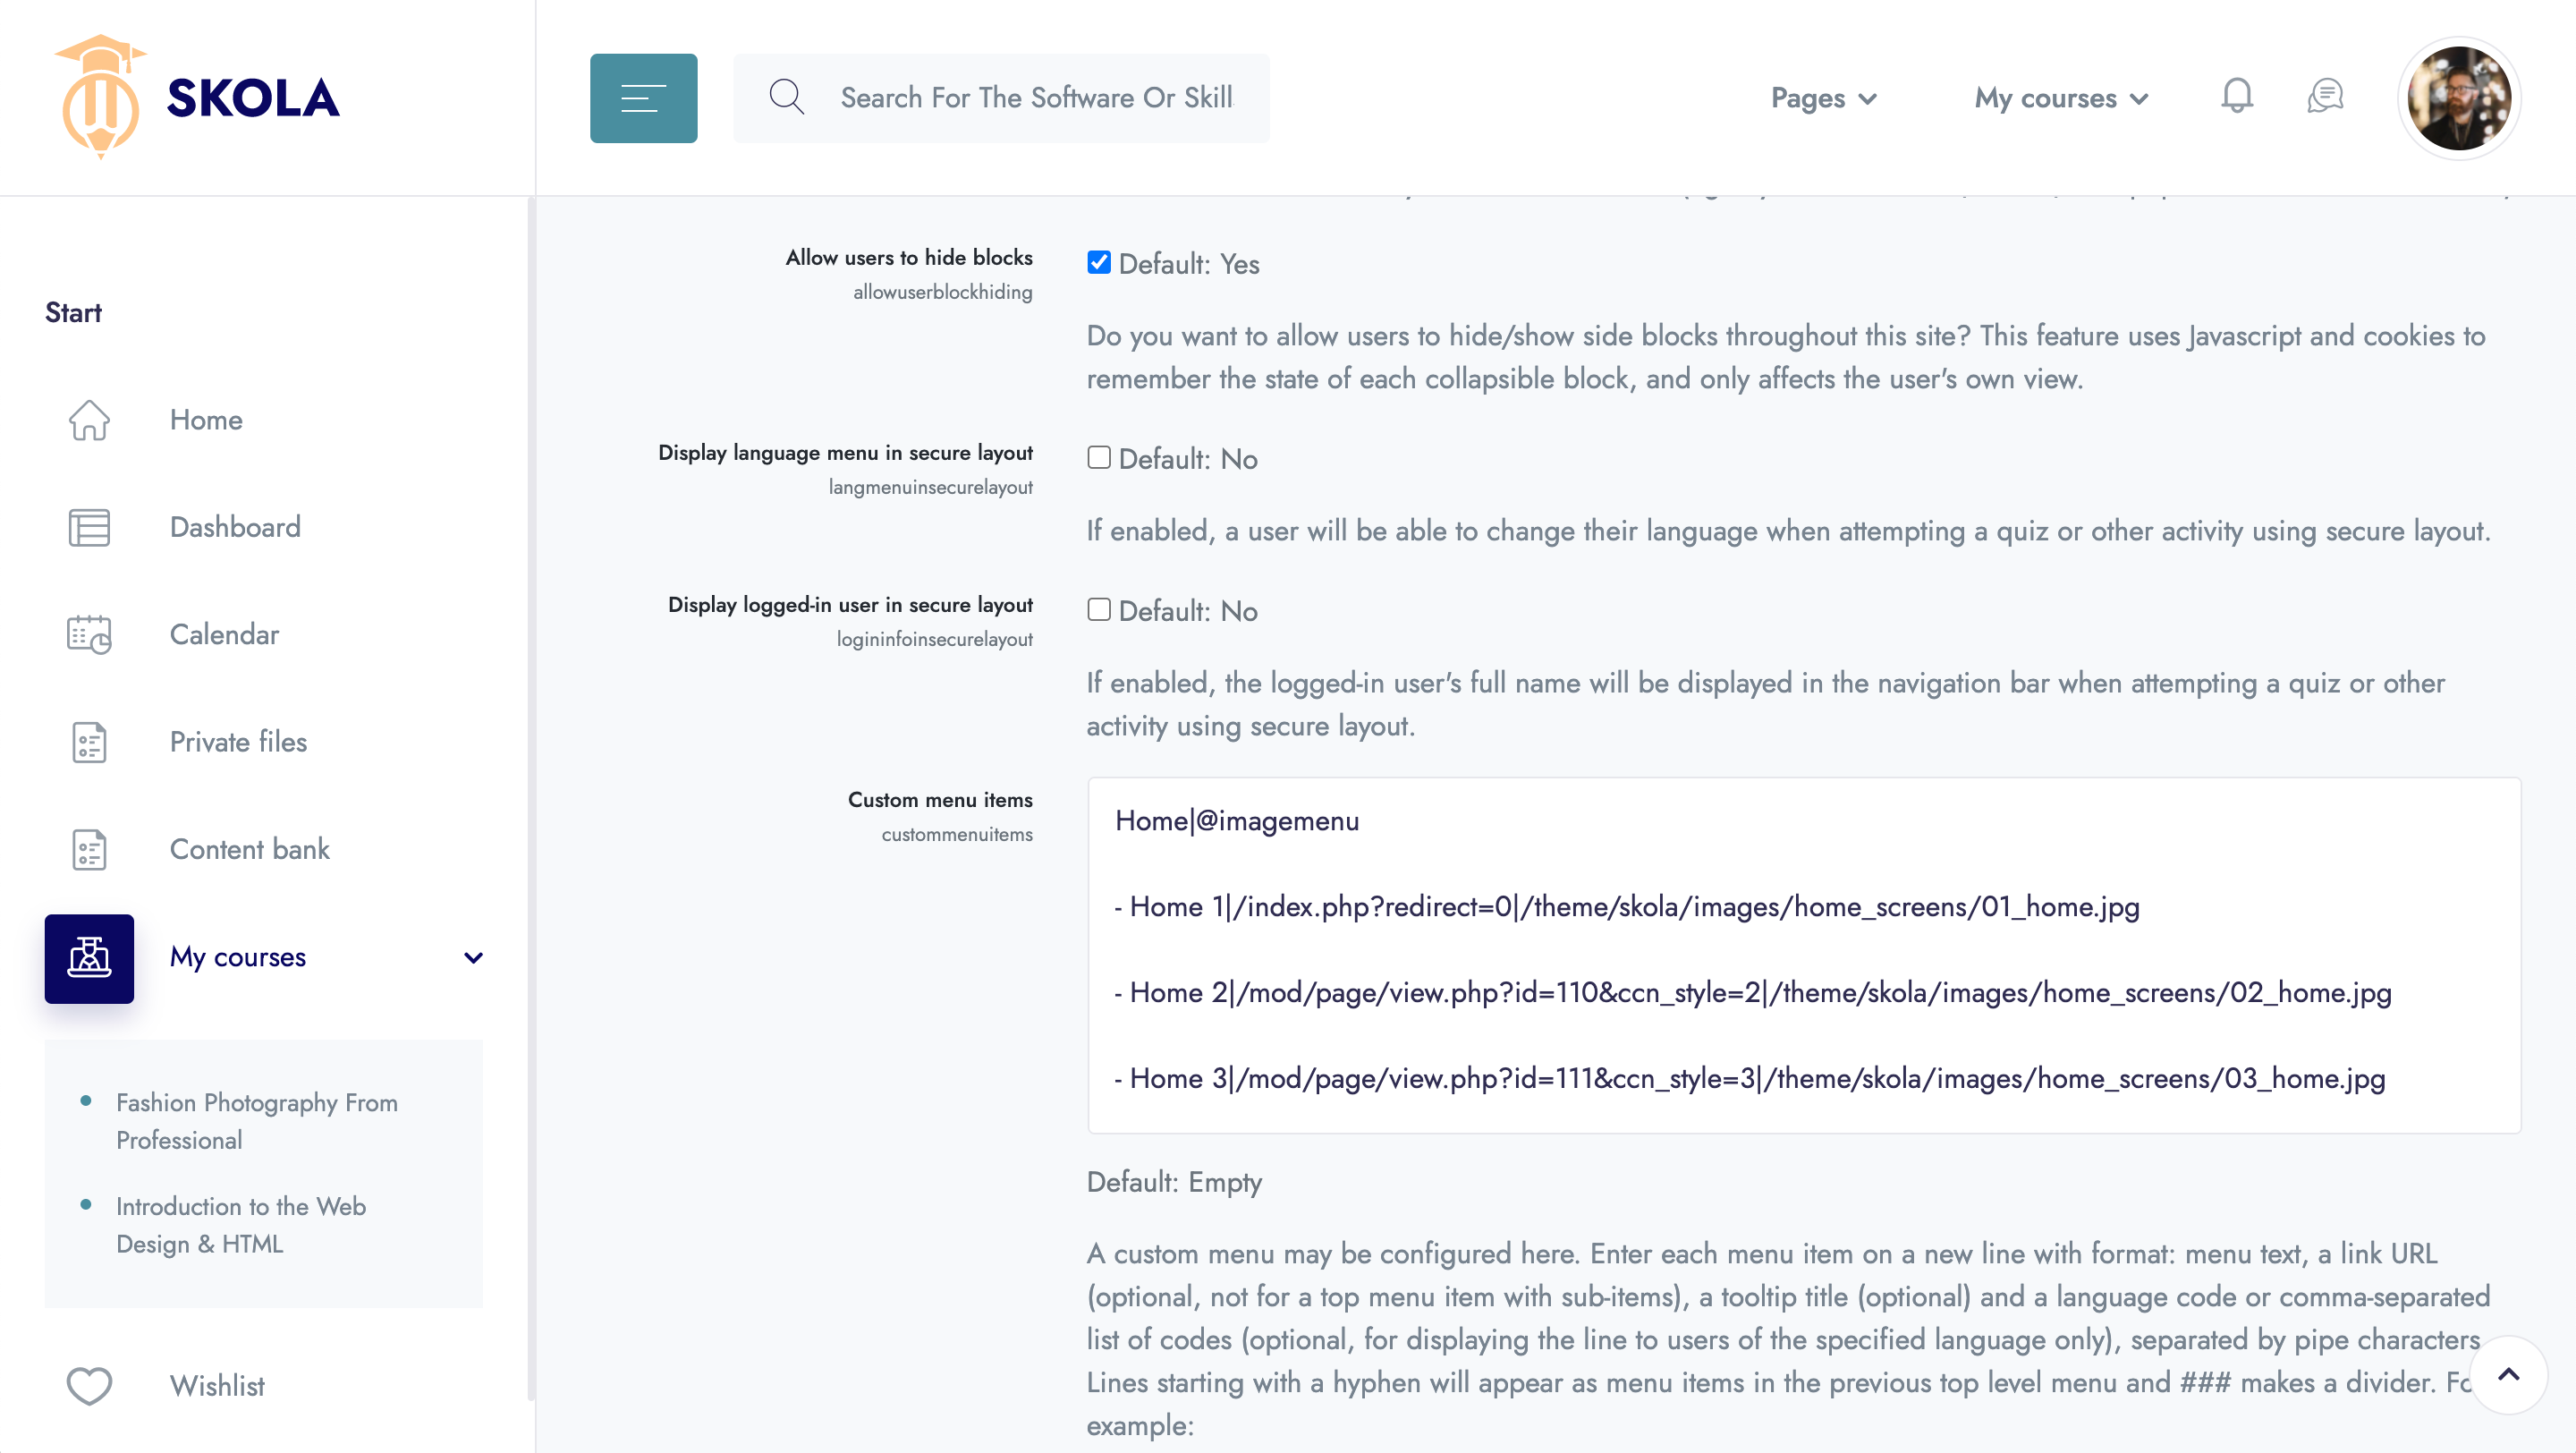
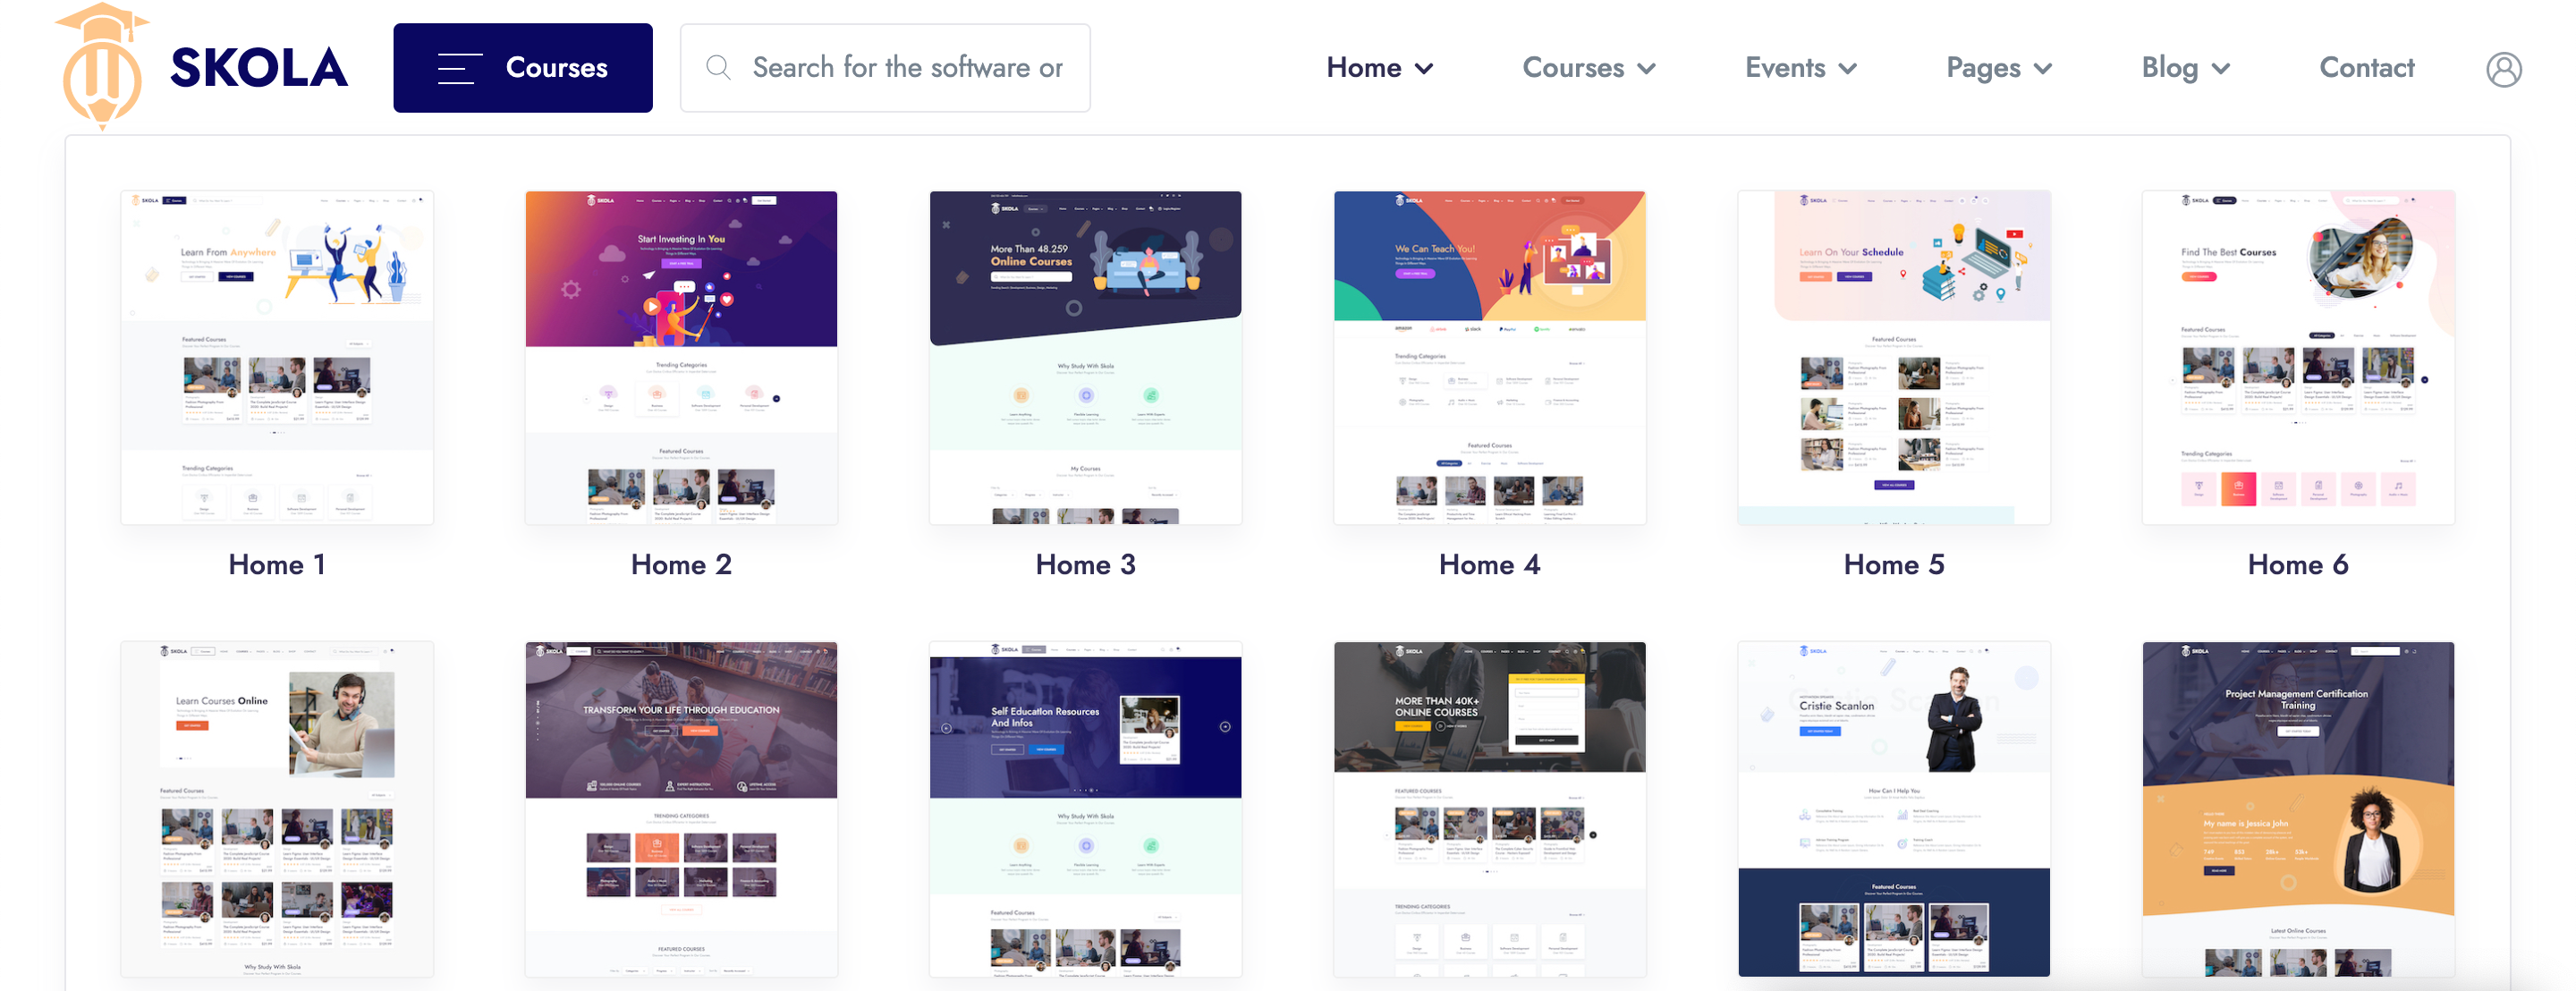
Image Menu
Set a parent menu item's URL as '@imagemenu' to enable the image menu functionality:
Home|@imagemenu
  - Home 1|/index.php?redirect=0|/theme/skola/images/home_screens/01_home.jpg
  - Home 2|/mod/page/view.php?id=110&ccn_style=2|/theme/skola/images/home_screens/02_home.jpg
  - Home 3|/mod/page/view.php?id=111&ccn_style=3|/theme/skola/images/home_screens/03_home.jpg
Skola includes styling for many common areas in a typical Moodle installation.
However, it's also possible to create completely custom pages using the custom blocks shipped with Skola. Please refer to Theme structure for reference.
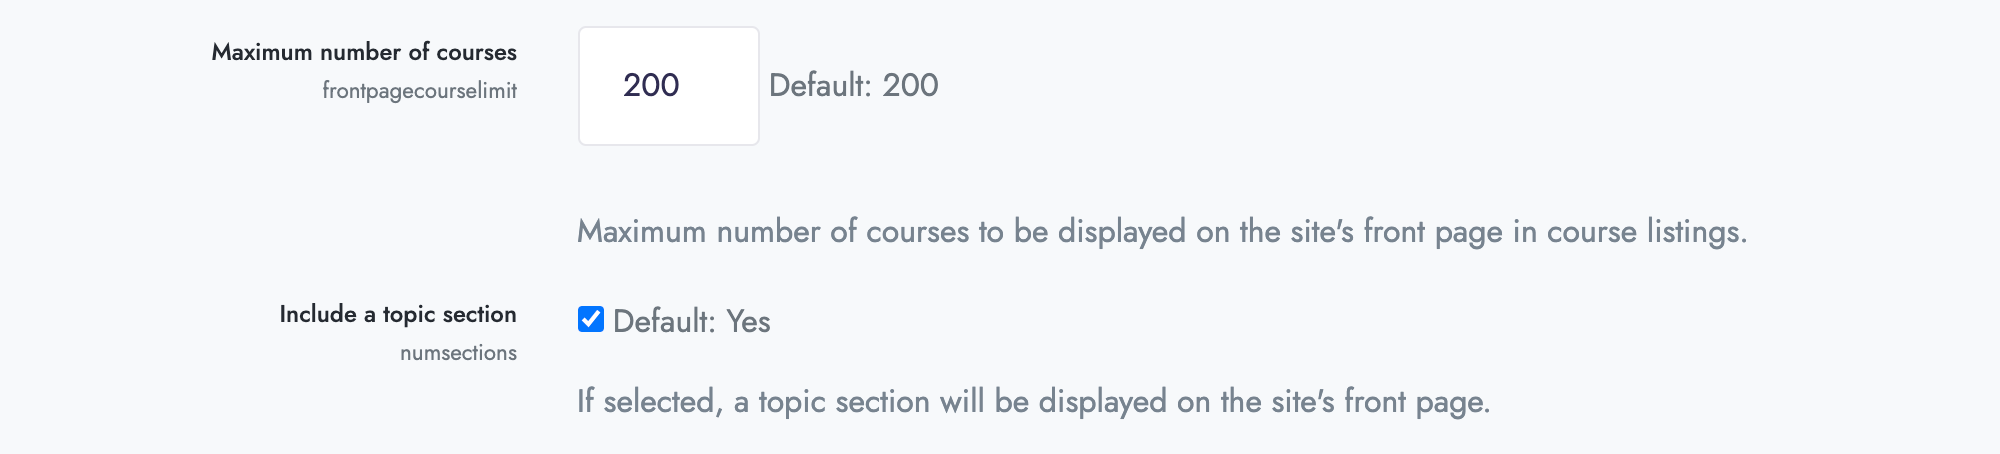
To create a custom page, you should first enable the "Topics" section on the Moodle frontpage:
→ Navigate to Site administration > Front page > Front page settings and enable "Include a topic section":
→ Navigate to your front page and click "Add an activity or resource" in the topics section:
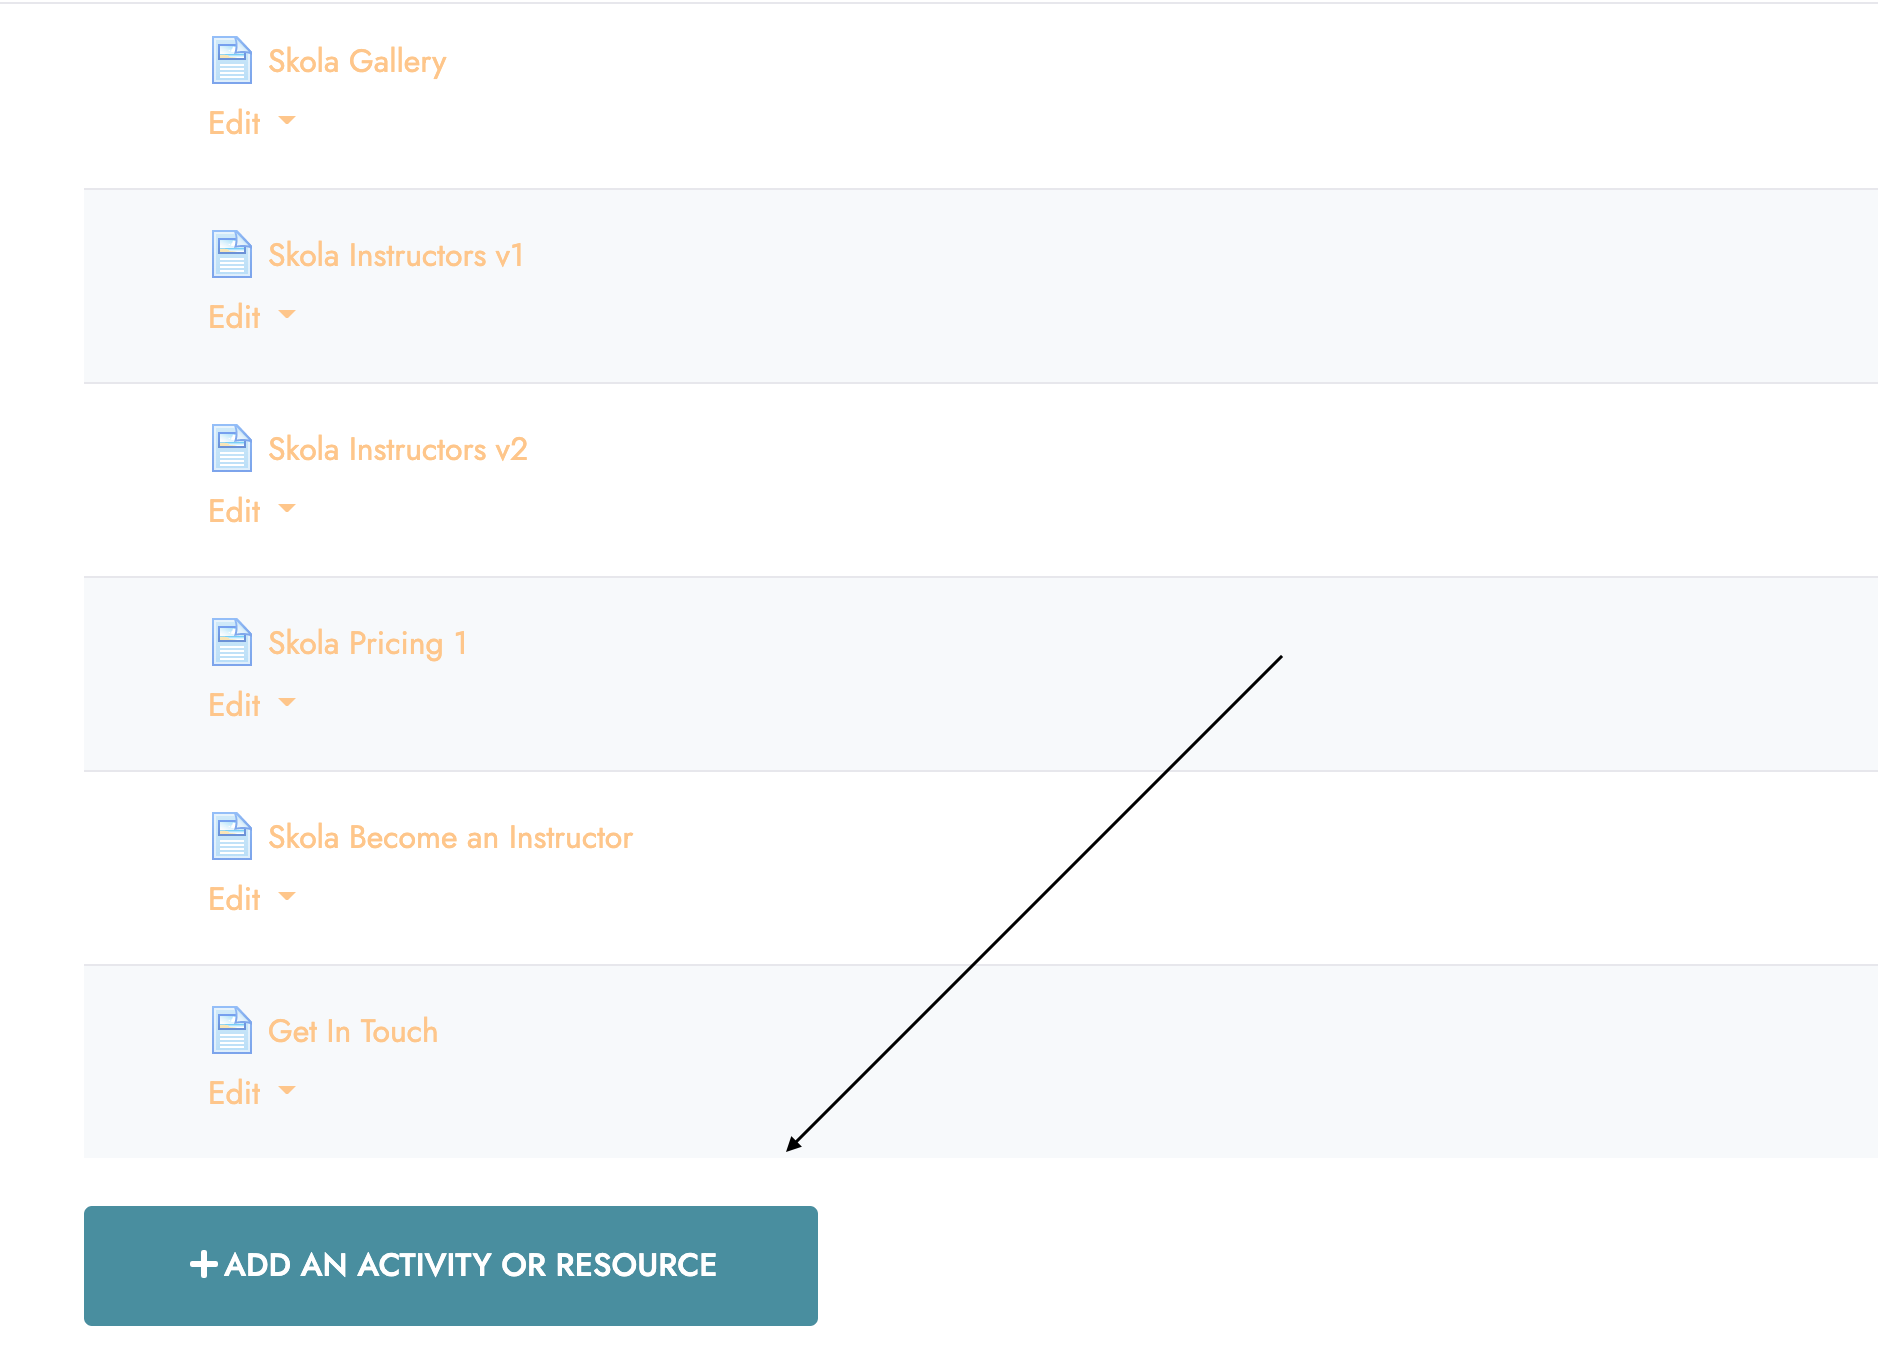
→ Add a new "Page", under "Resources".
You're now able to create and assign custom blocks to your page. To do so, please refer to Live Customizer, below. Please refer to Theme structure for a full list of available custom blocks.
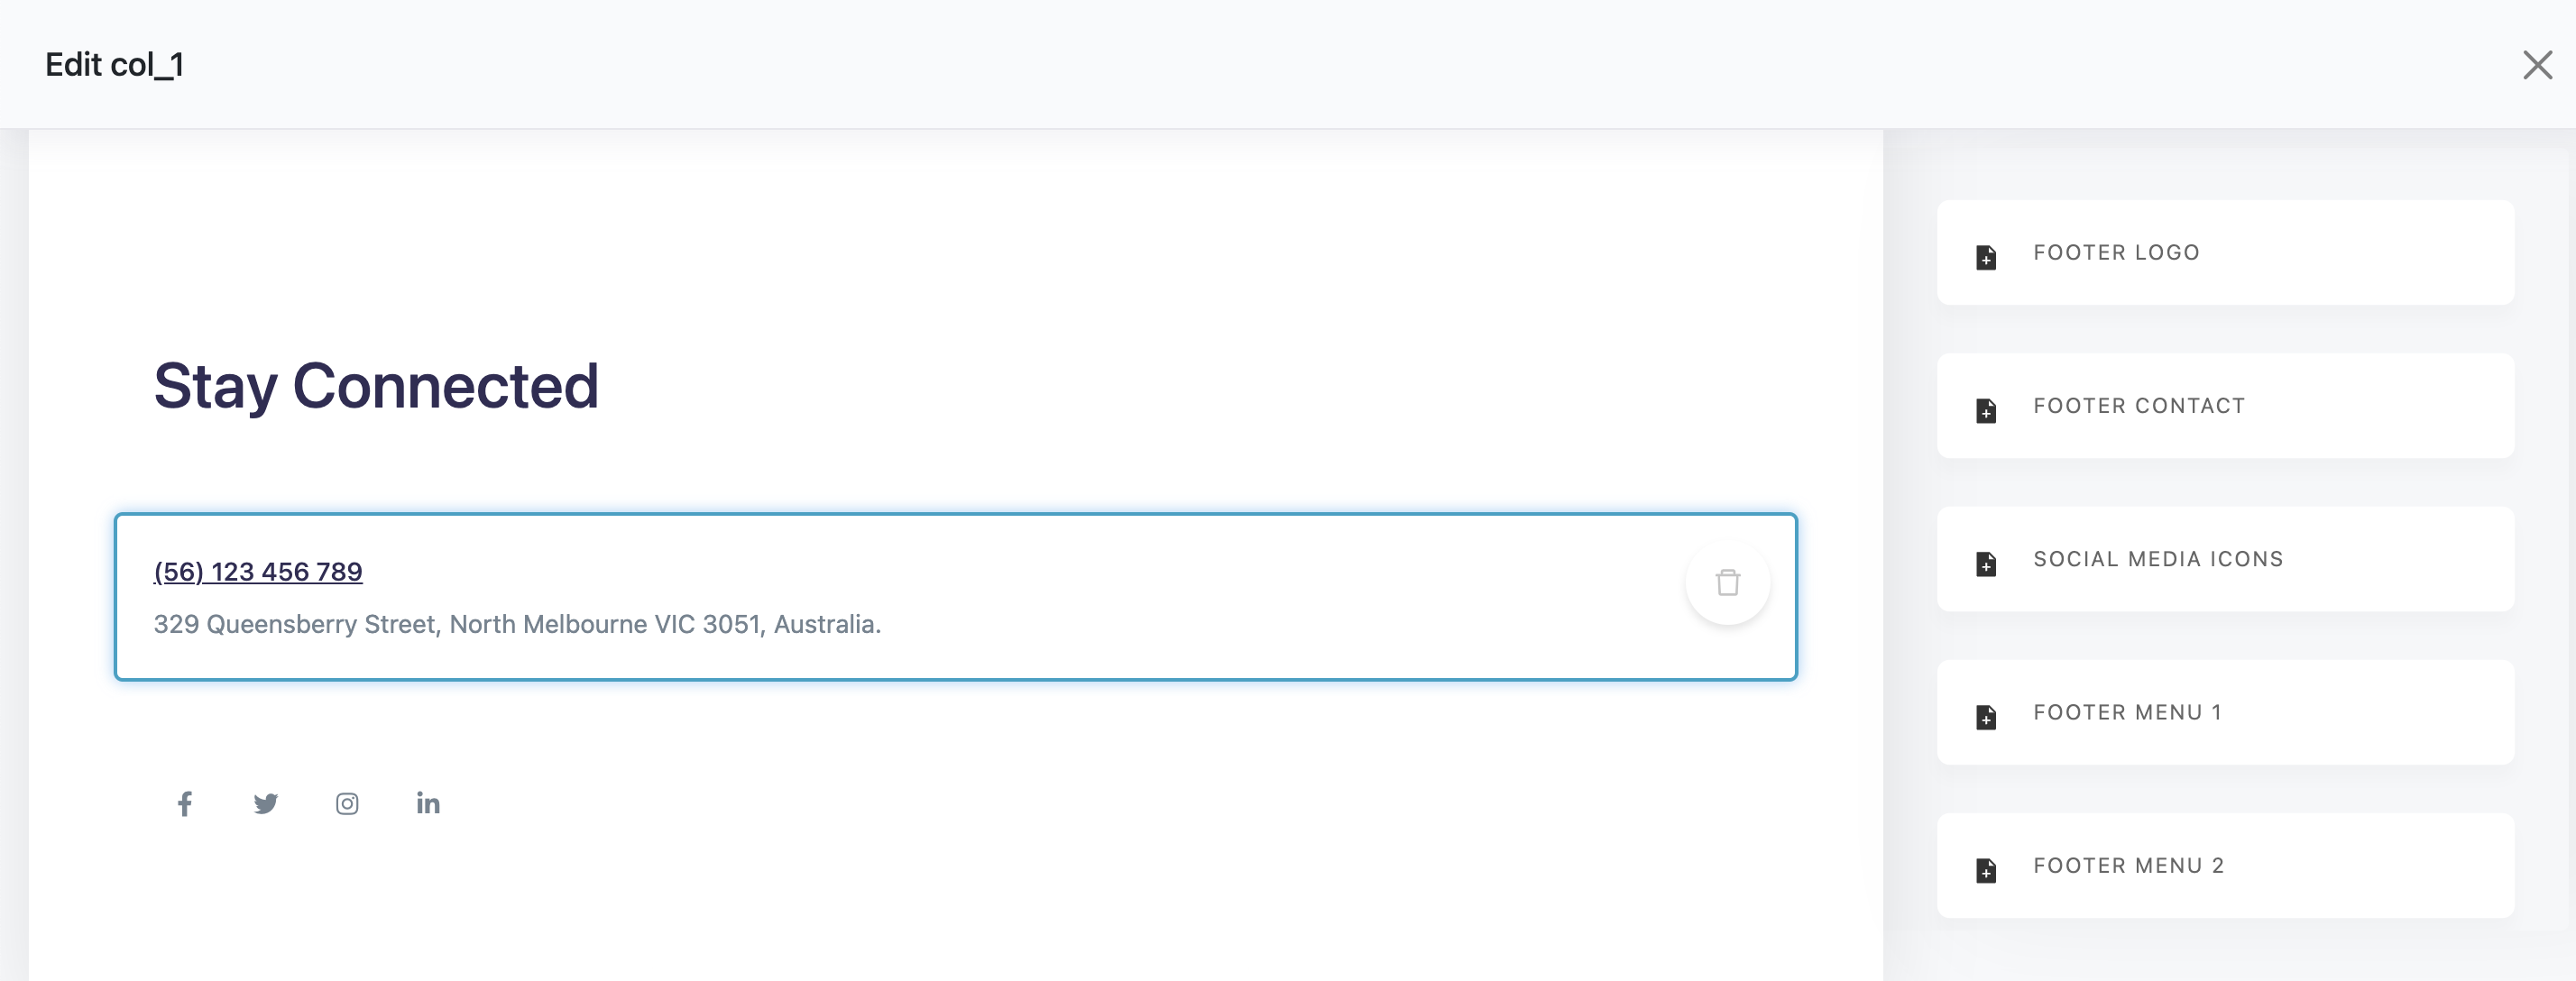
Skola ships with the exclusive Cocoon Live Customizer.
Cocoon Live Customizer allows you to build content-rich pages using drag-and-drop real-time editing.
Not all custom blocks support Live Customizer, and these can be configured using the standard method.
The theme comes with over 100 custom blocks for your convenience, and can be added to any Moodle page.
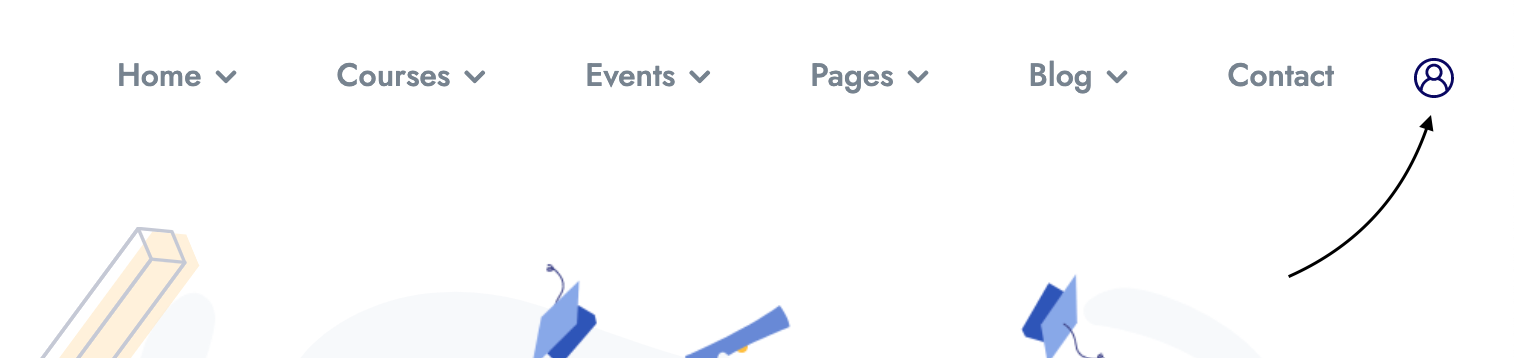
To add a custom block, first open the sidebar navigation by clicking the user icon in the menu bar:
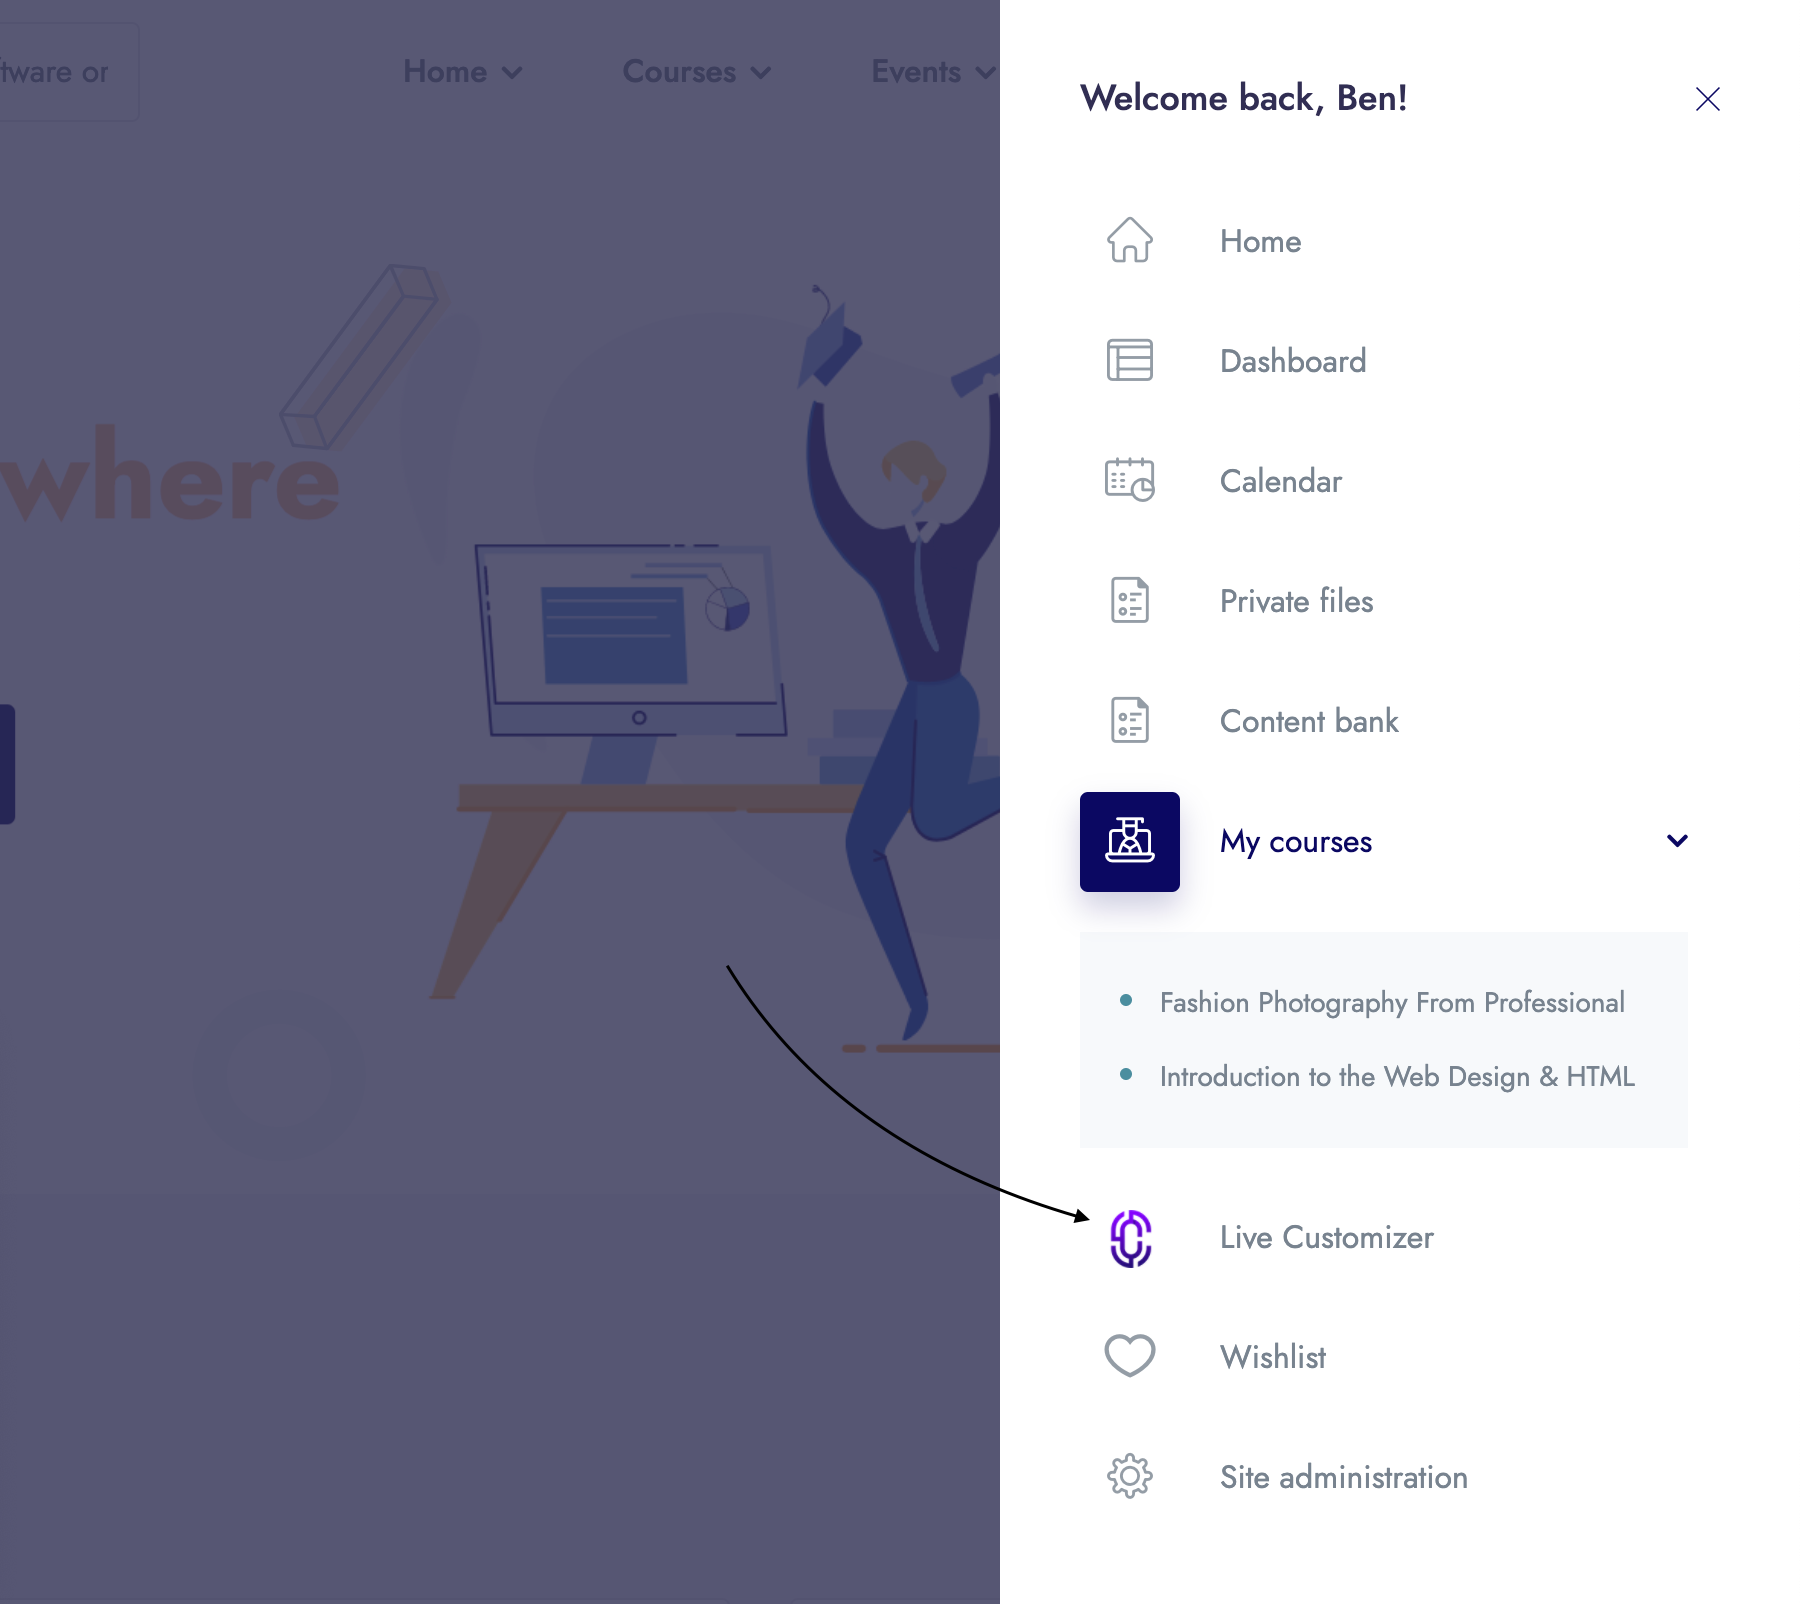
From the sidebar navigation menu, click the 'Live Customizer' action:
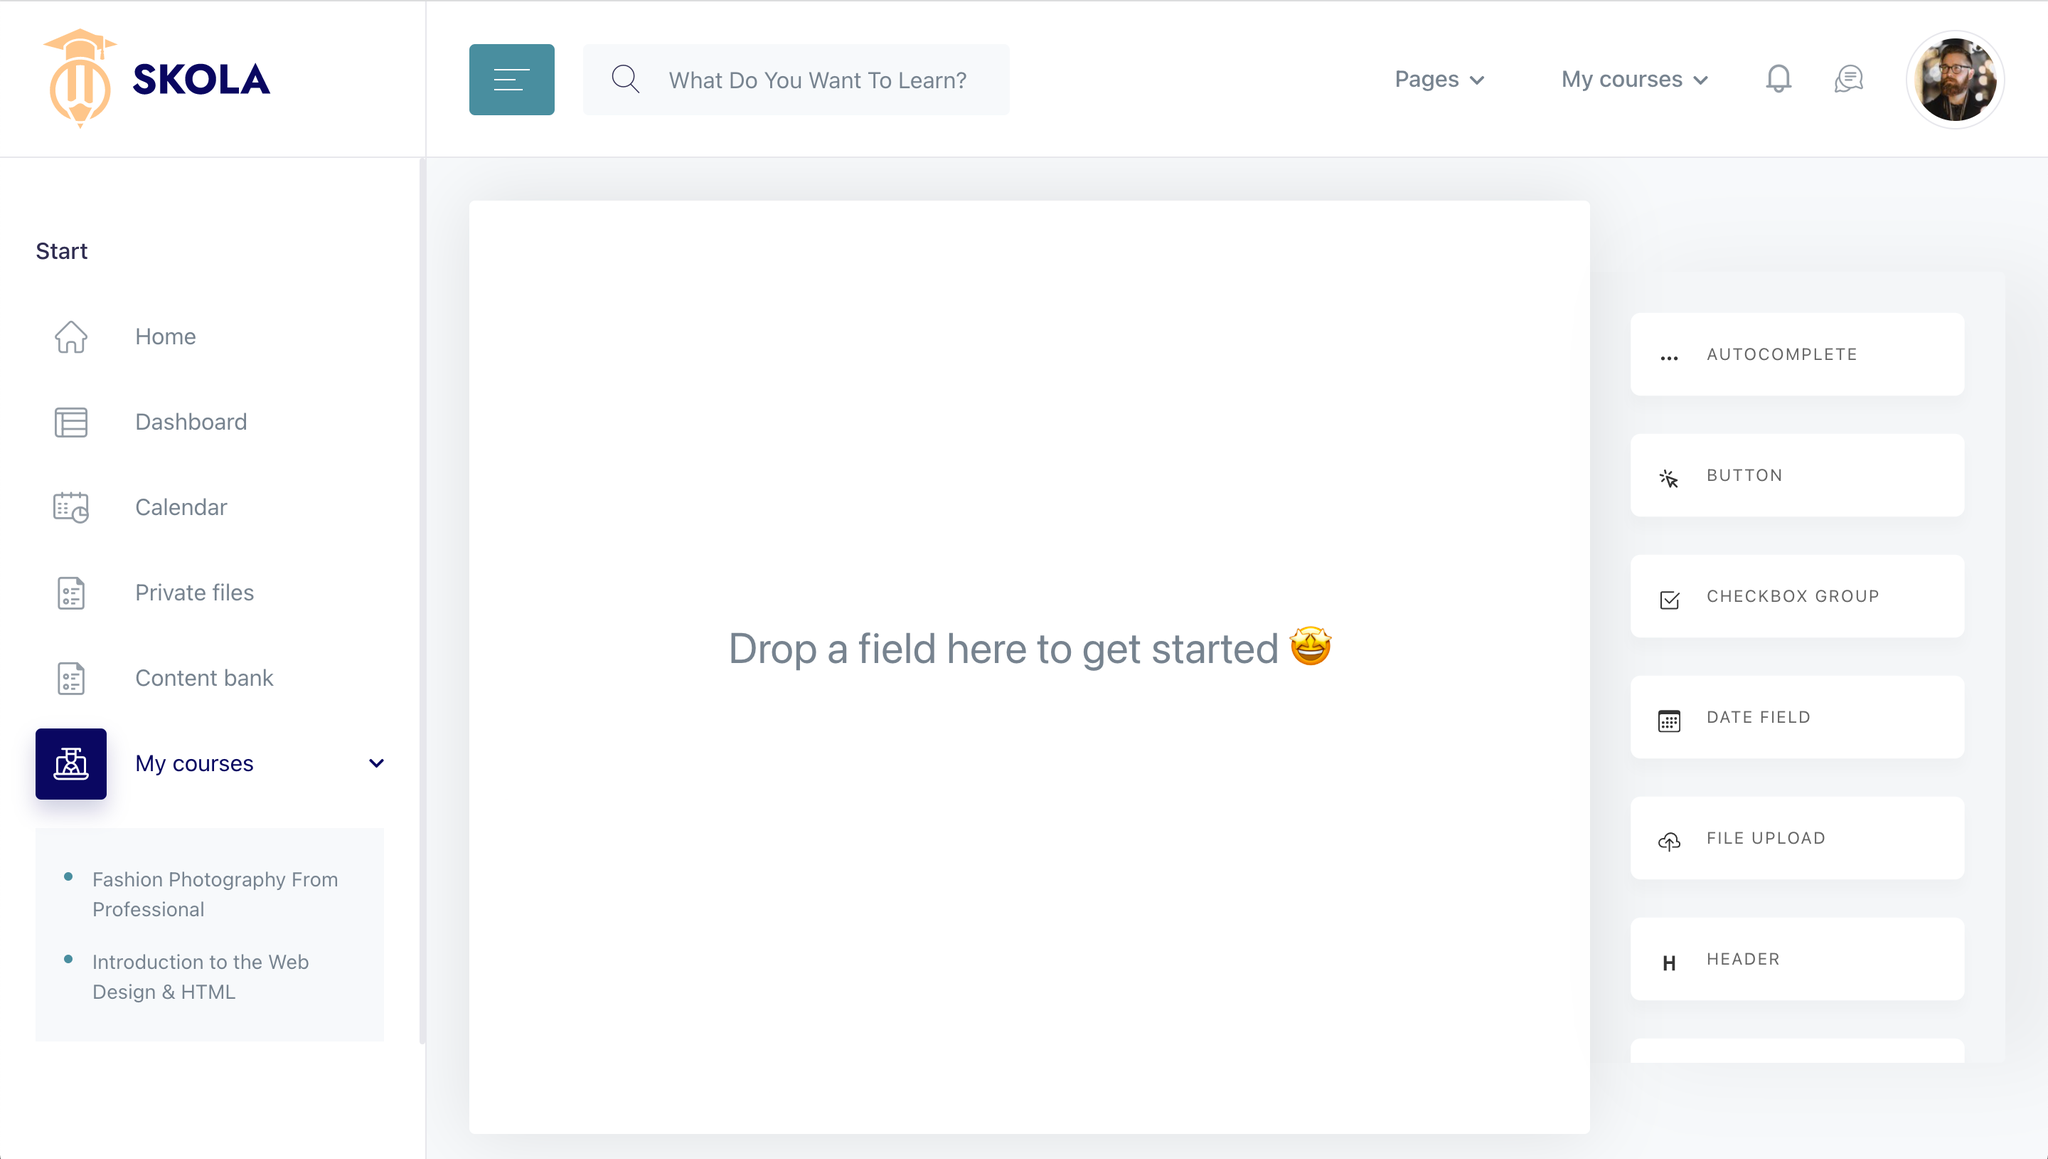
After a few seconds, the Live Customizer will load on the current page. Click the "+" button to add a new block:
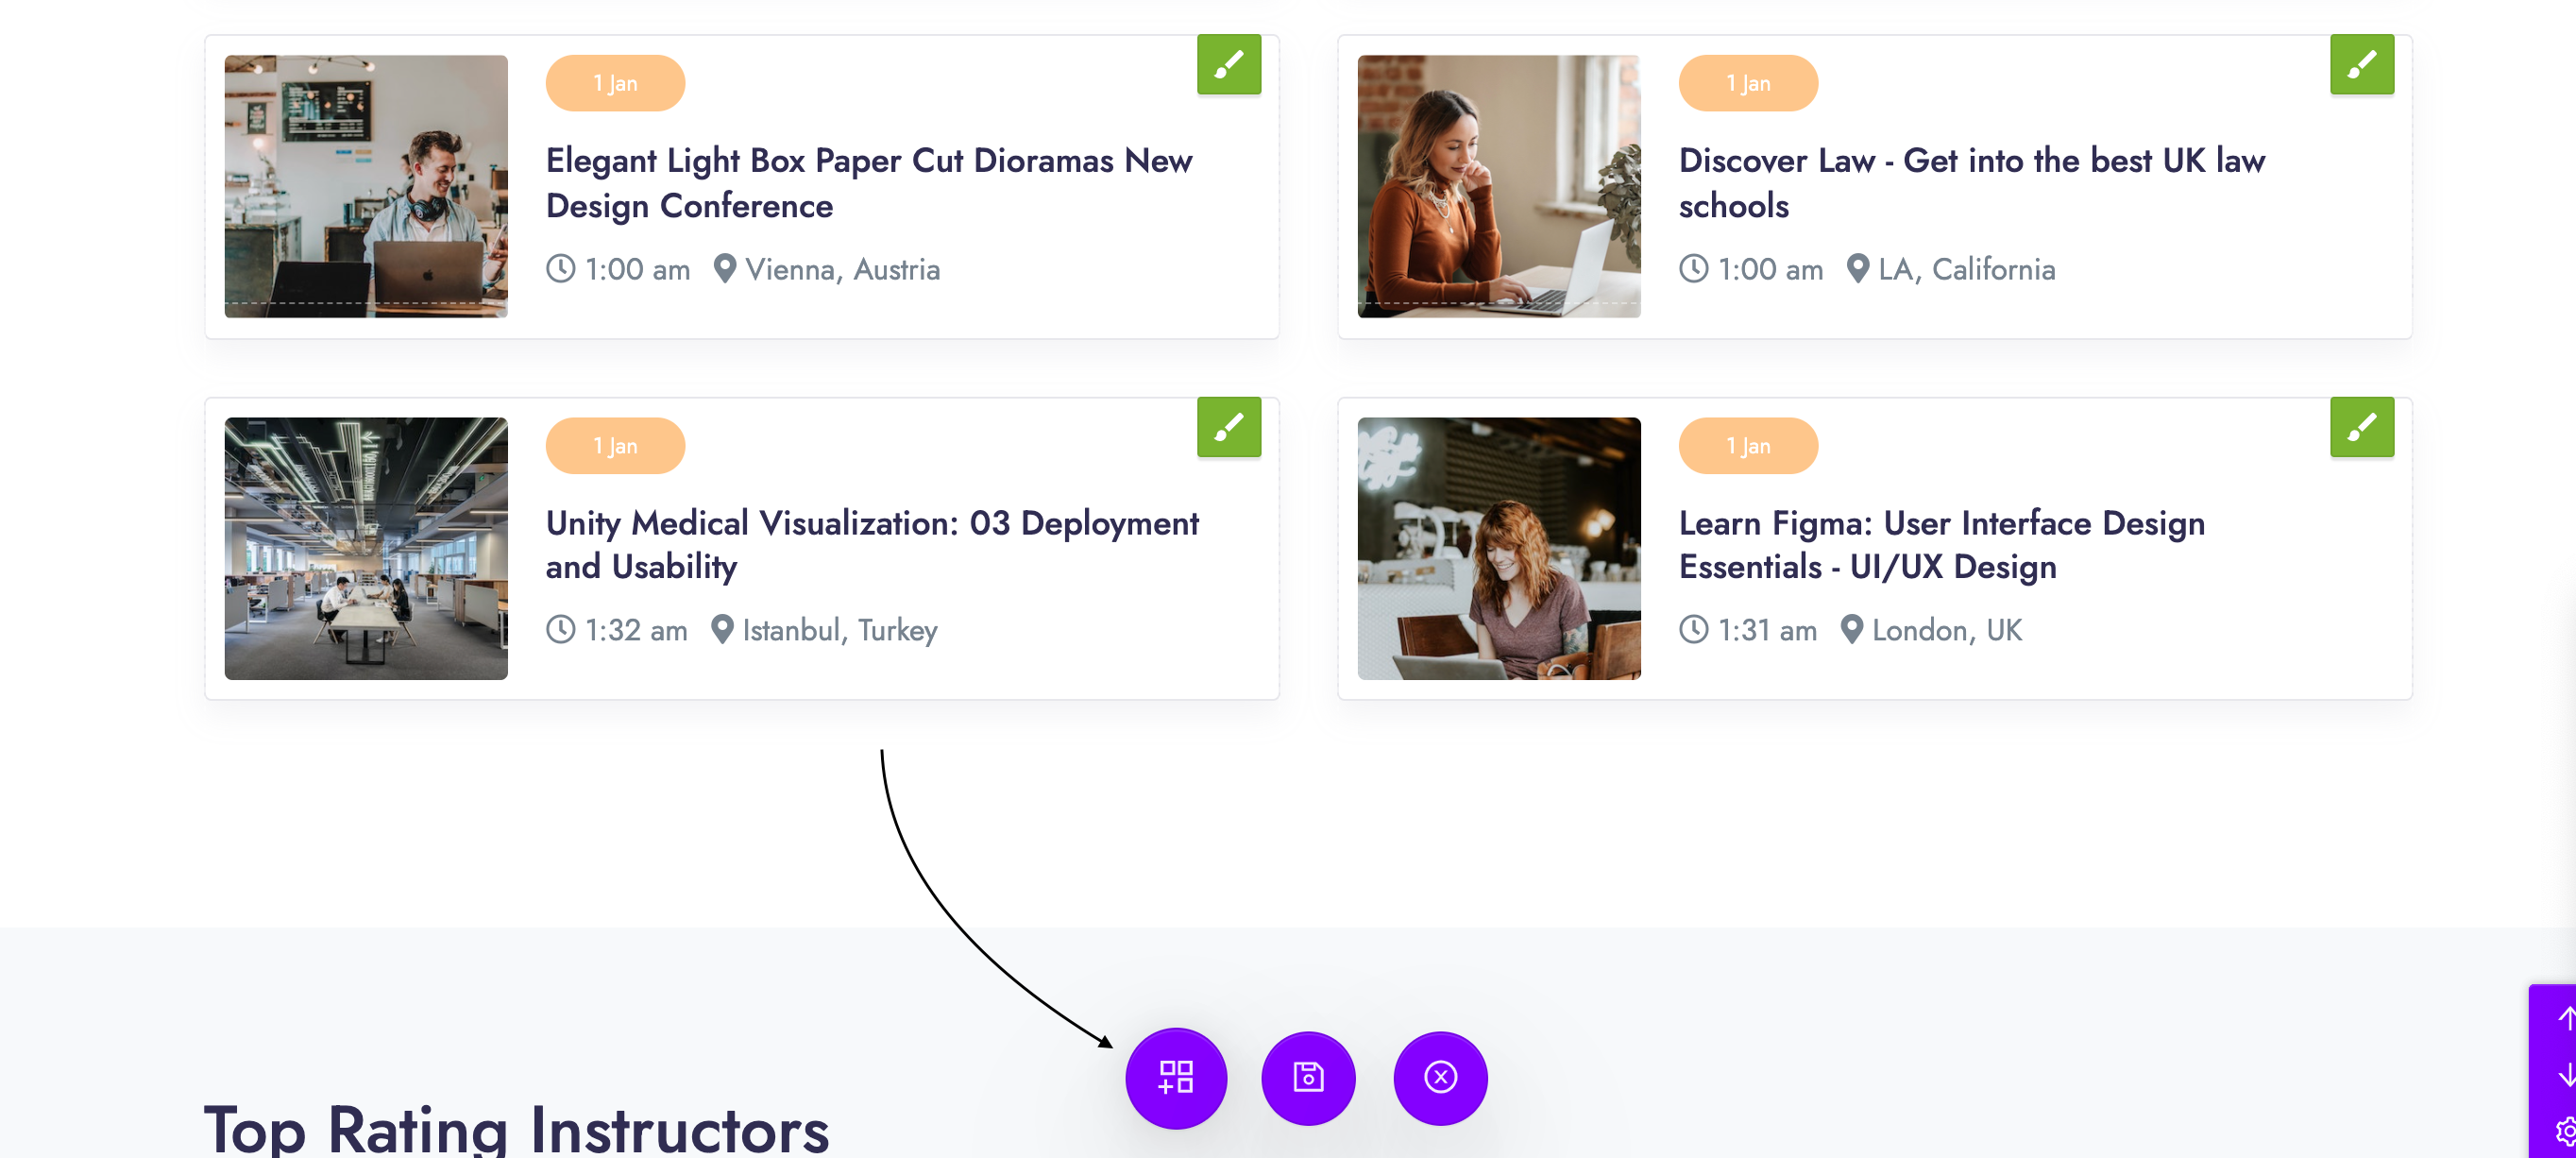
You will then be able to add any of Skola's 100+ custom blocks to the current page.
Please refer to Theme structure for a full list of available custom blocks.
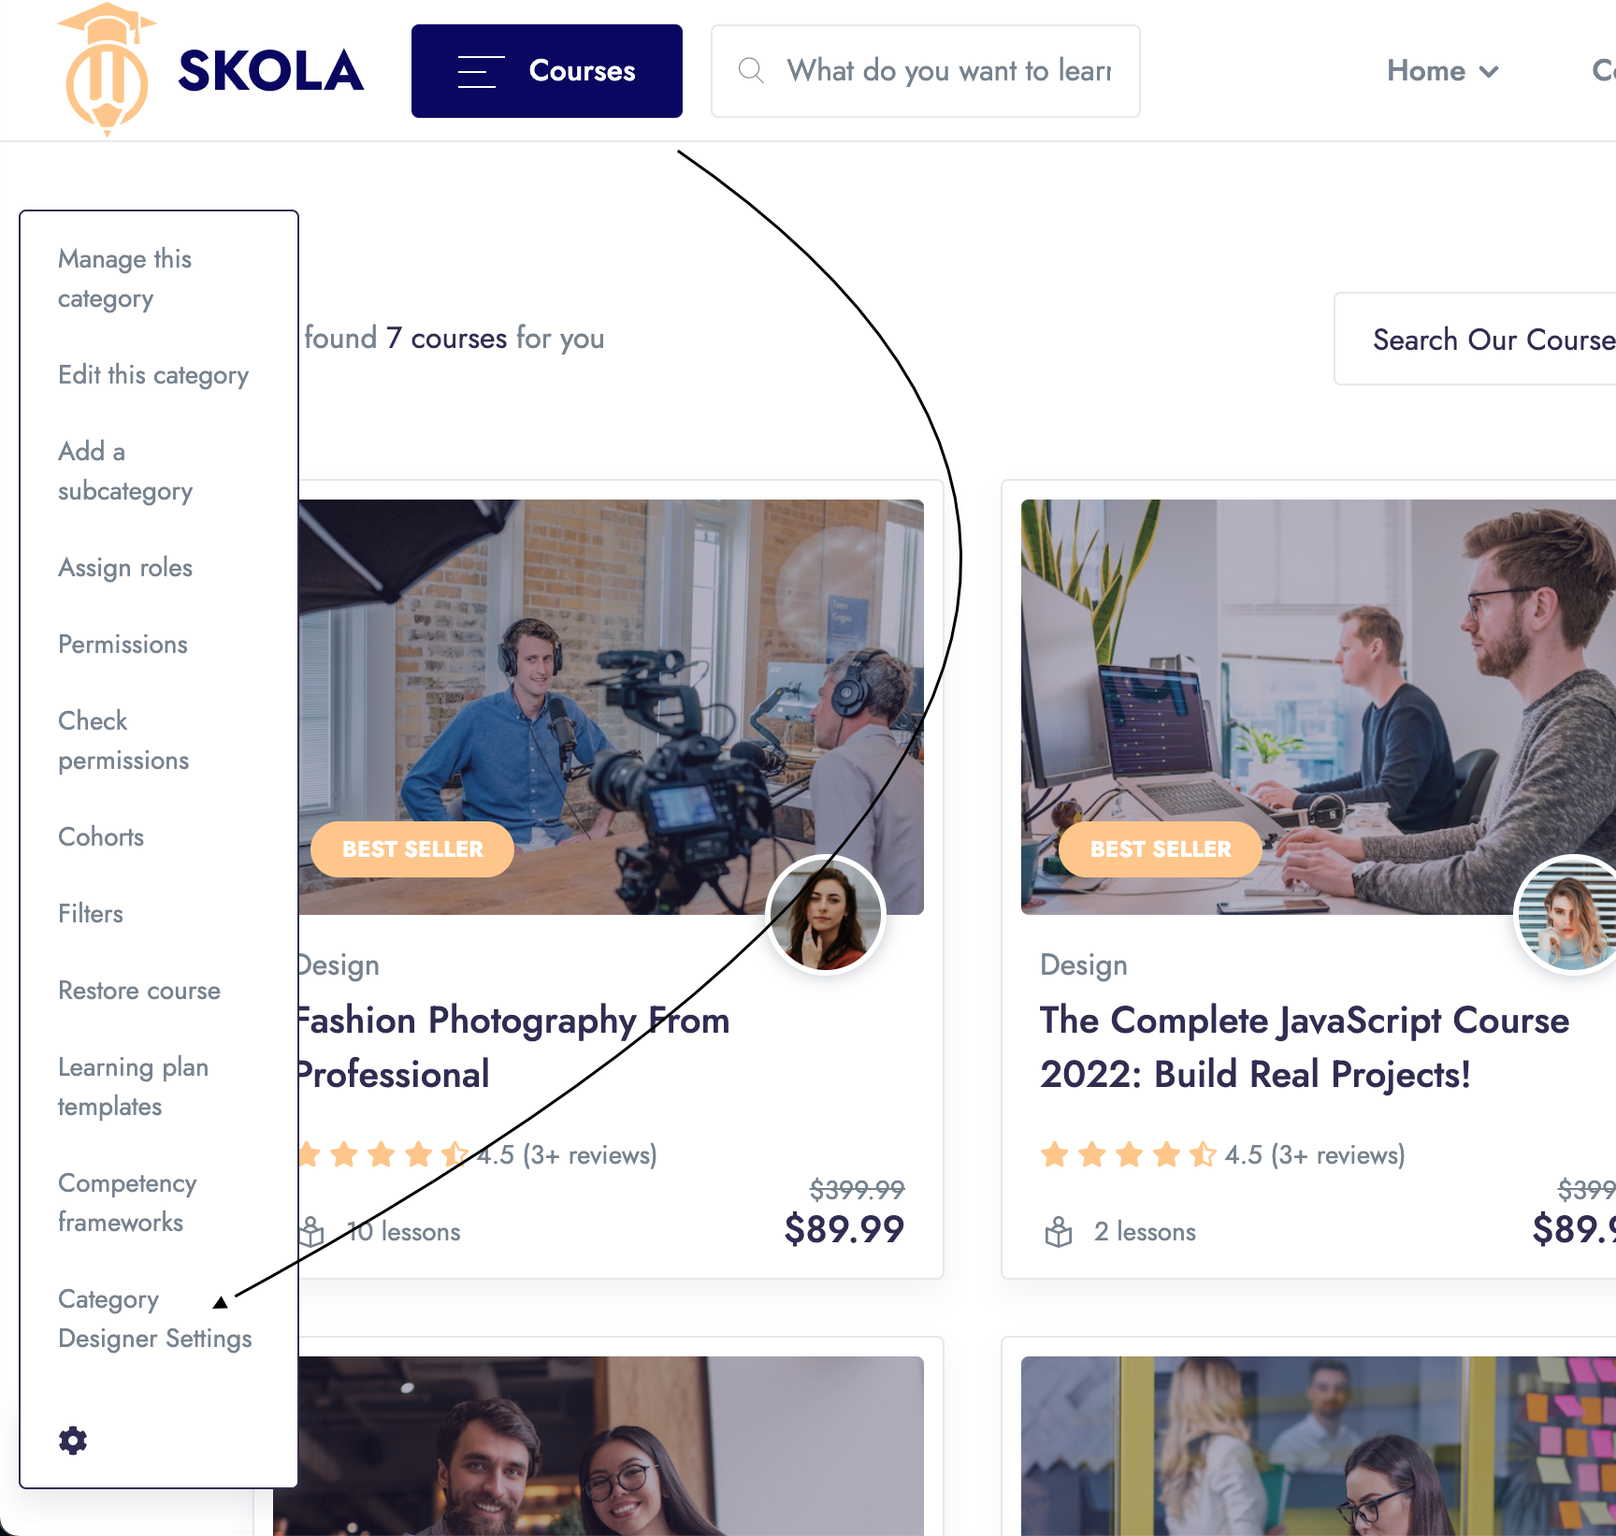
Skola ships with Cocoon Category Designer, a premium plugin allowing you customize the display settings and functionality of your Course Category pages.
Each Course Category page is capable of utilizing a different style, of which 6 defaults are included.
The separate category styles also differ in filter options and live search behavior.
To modify the settings for a particular category:
Enter the category:
Click "Category Designer Settings" from the page settings menu:
Skola ships with Cocoon Course Designer, a premium plugin allowing you customize the display settings and functionality of your Single Course pages.
Each Single Course is capable of utilizing a different style, and these styles dictate how the course and enrolment page are displayed.
To modify the settings for a particular course:
Enter the course:

Click "Course Designer Settings", below the Hero Section on the page:

Skola ships with Cocoon Events, a hyper-powerful custom Booking & Events plugin for Moodle.
Cocoon Events allows for creation of events in your Moodle platform, with a different use case than the core Moodle calendar.
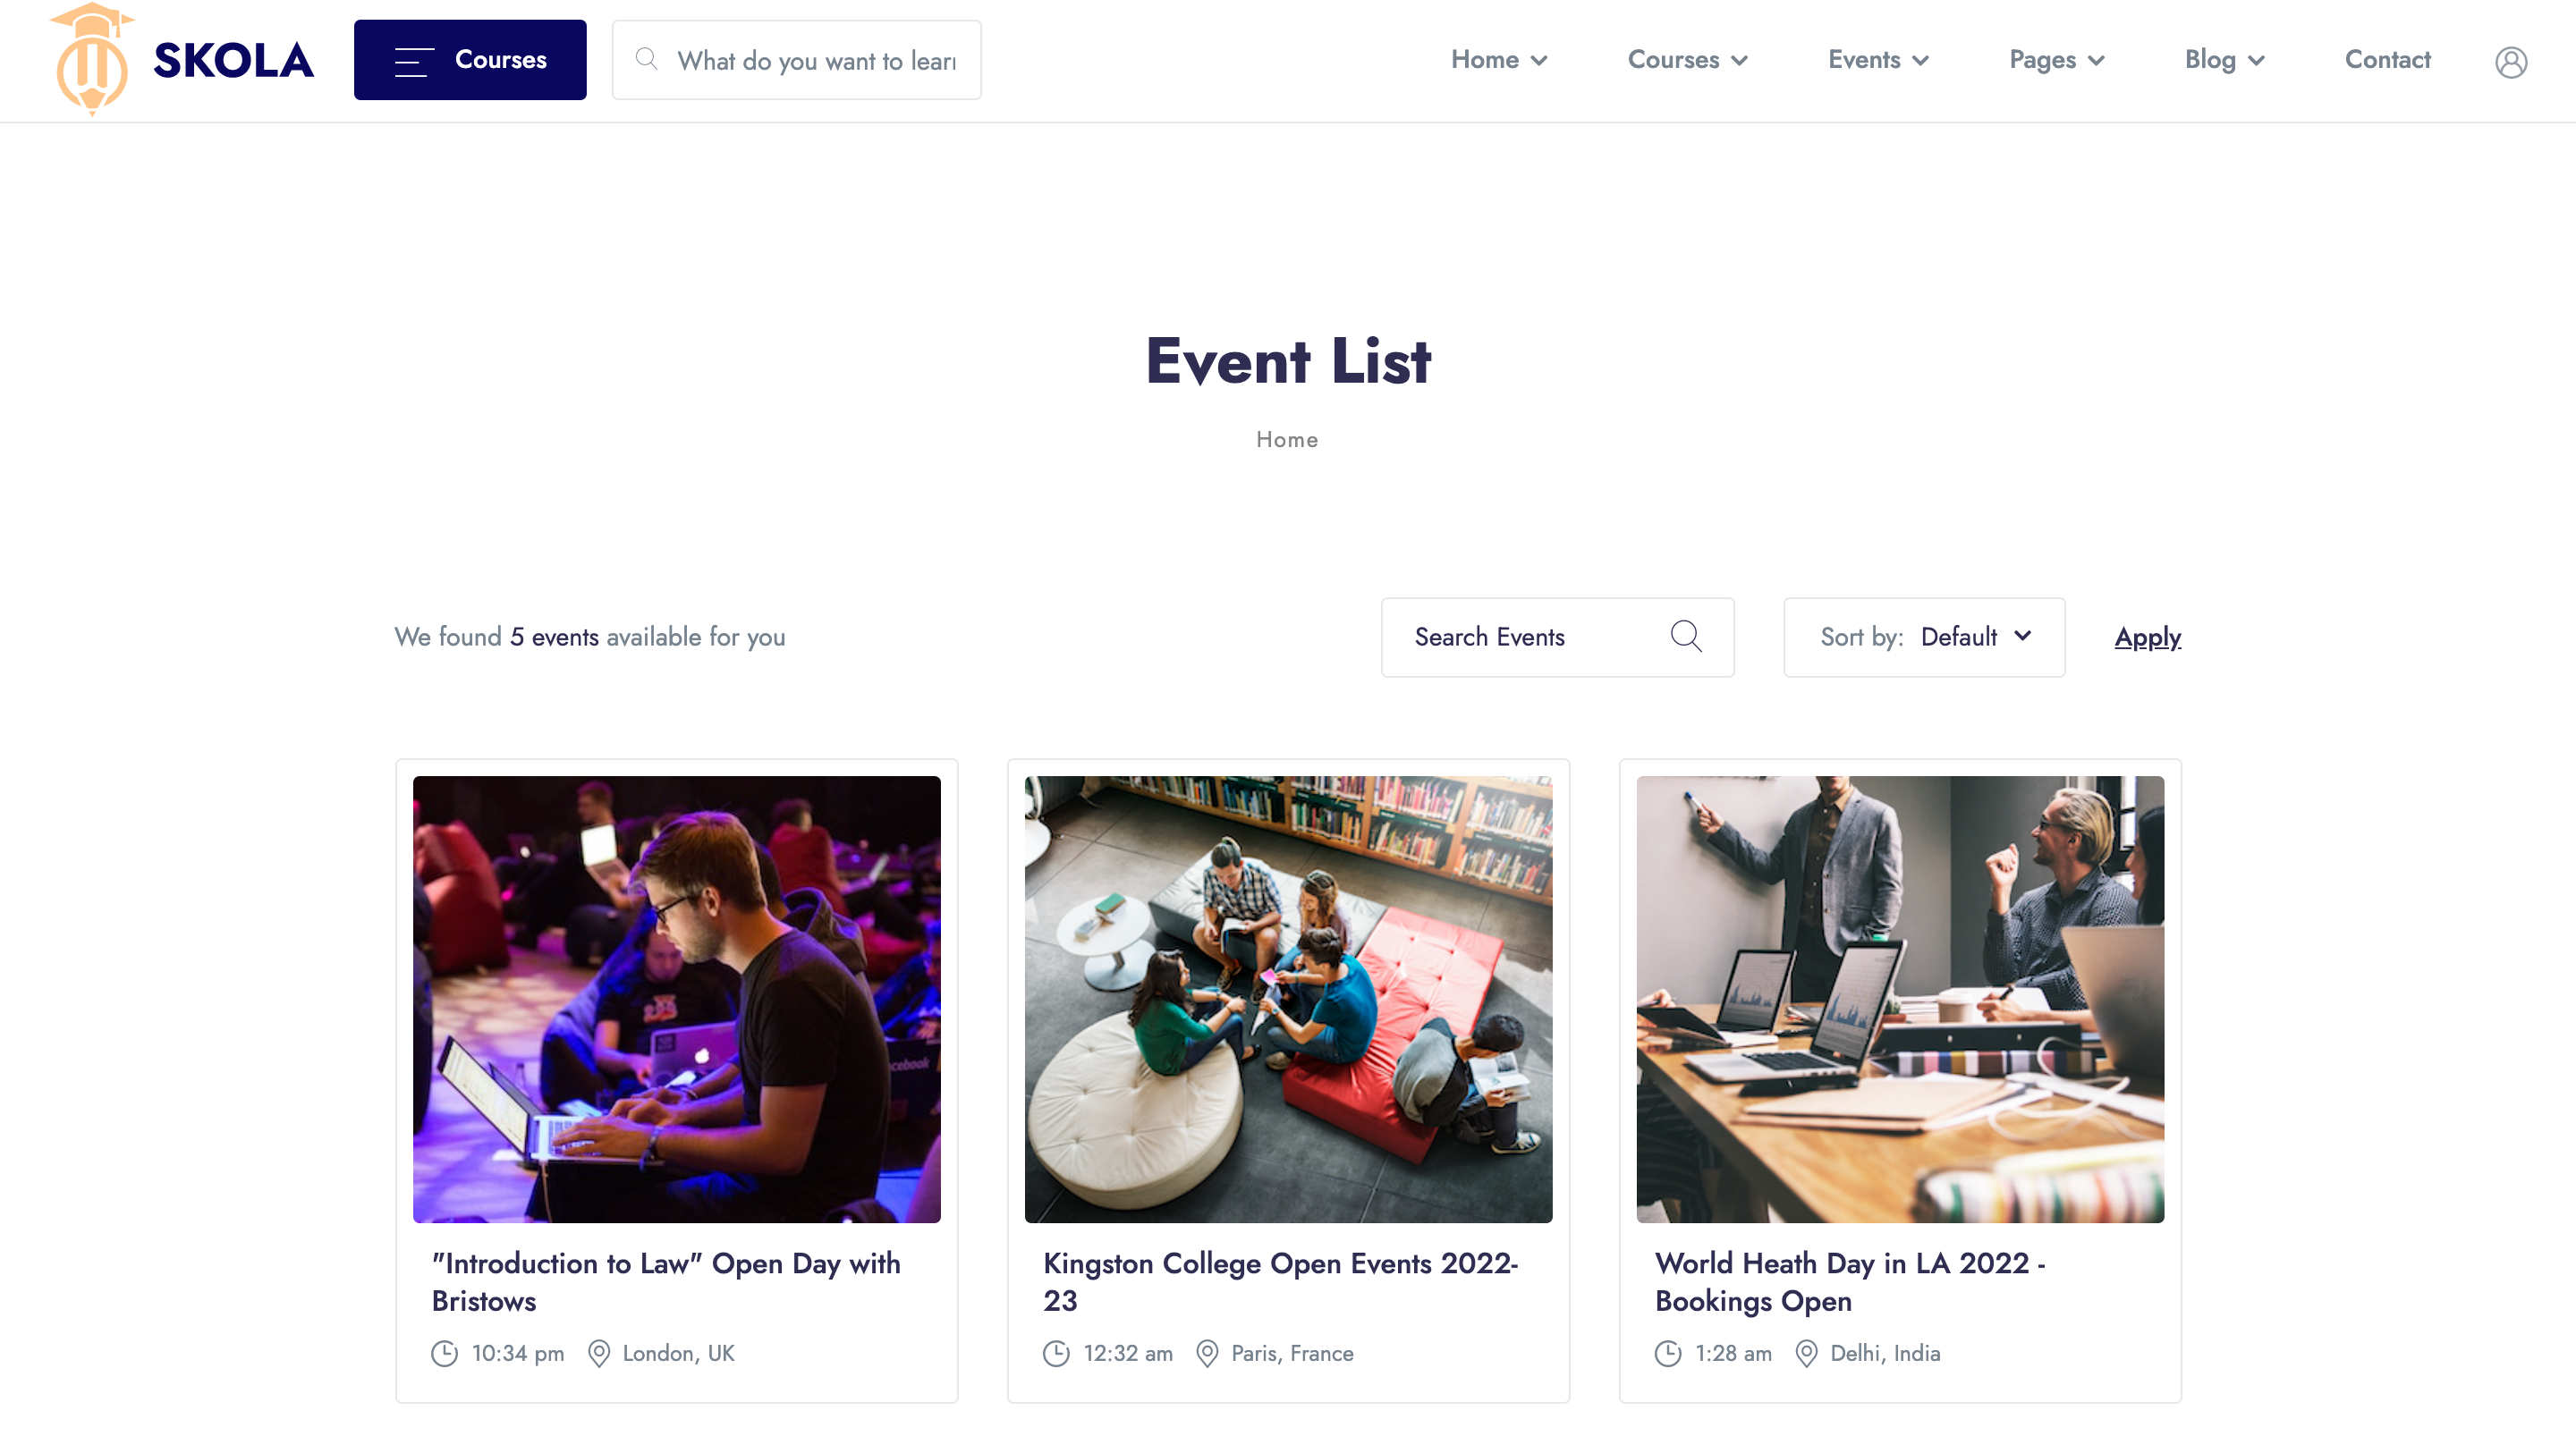
The plugin facilitates a booking system, which allows students to book slots to attend an event (this could be online or in-person).
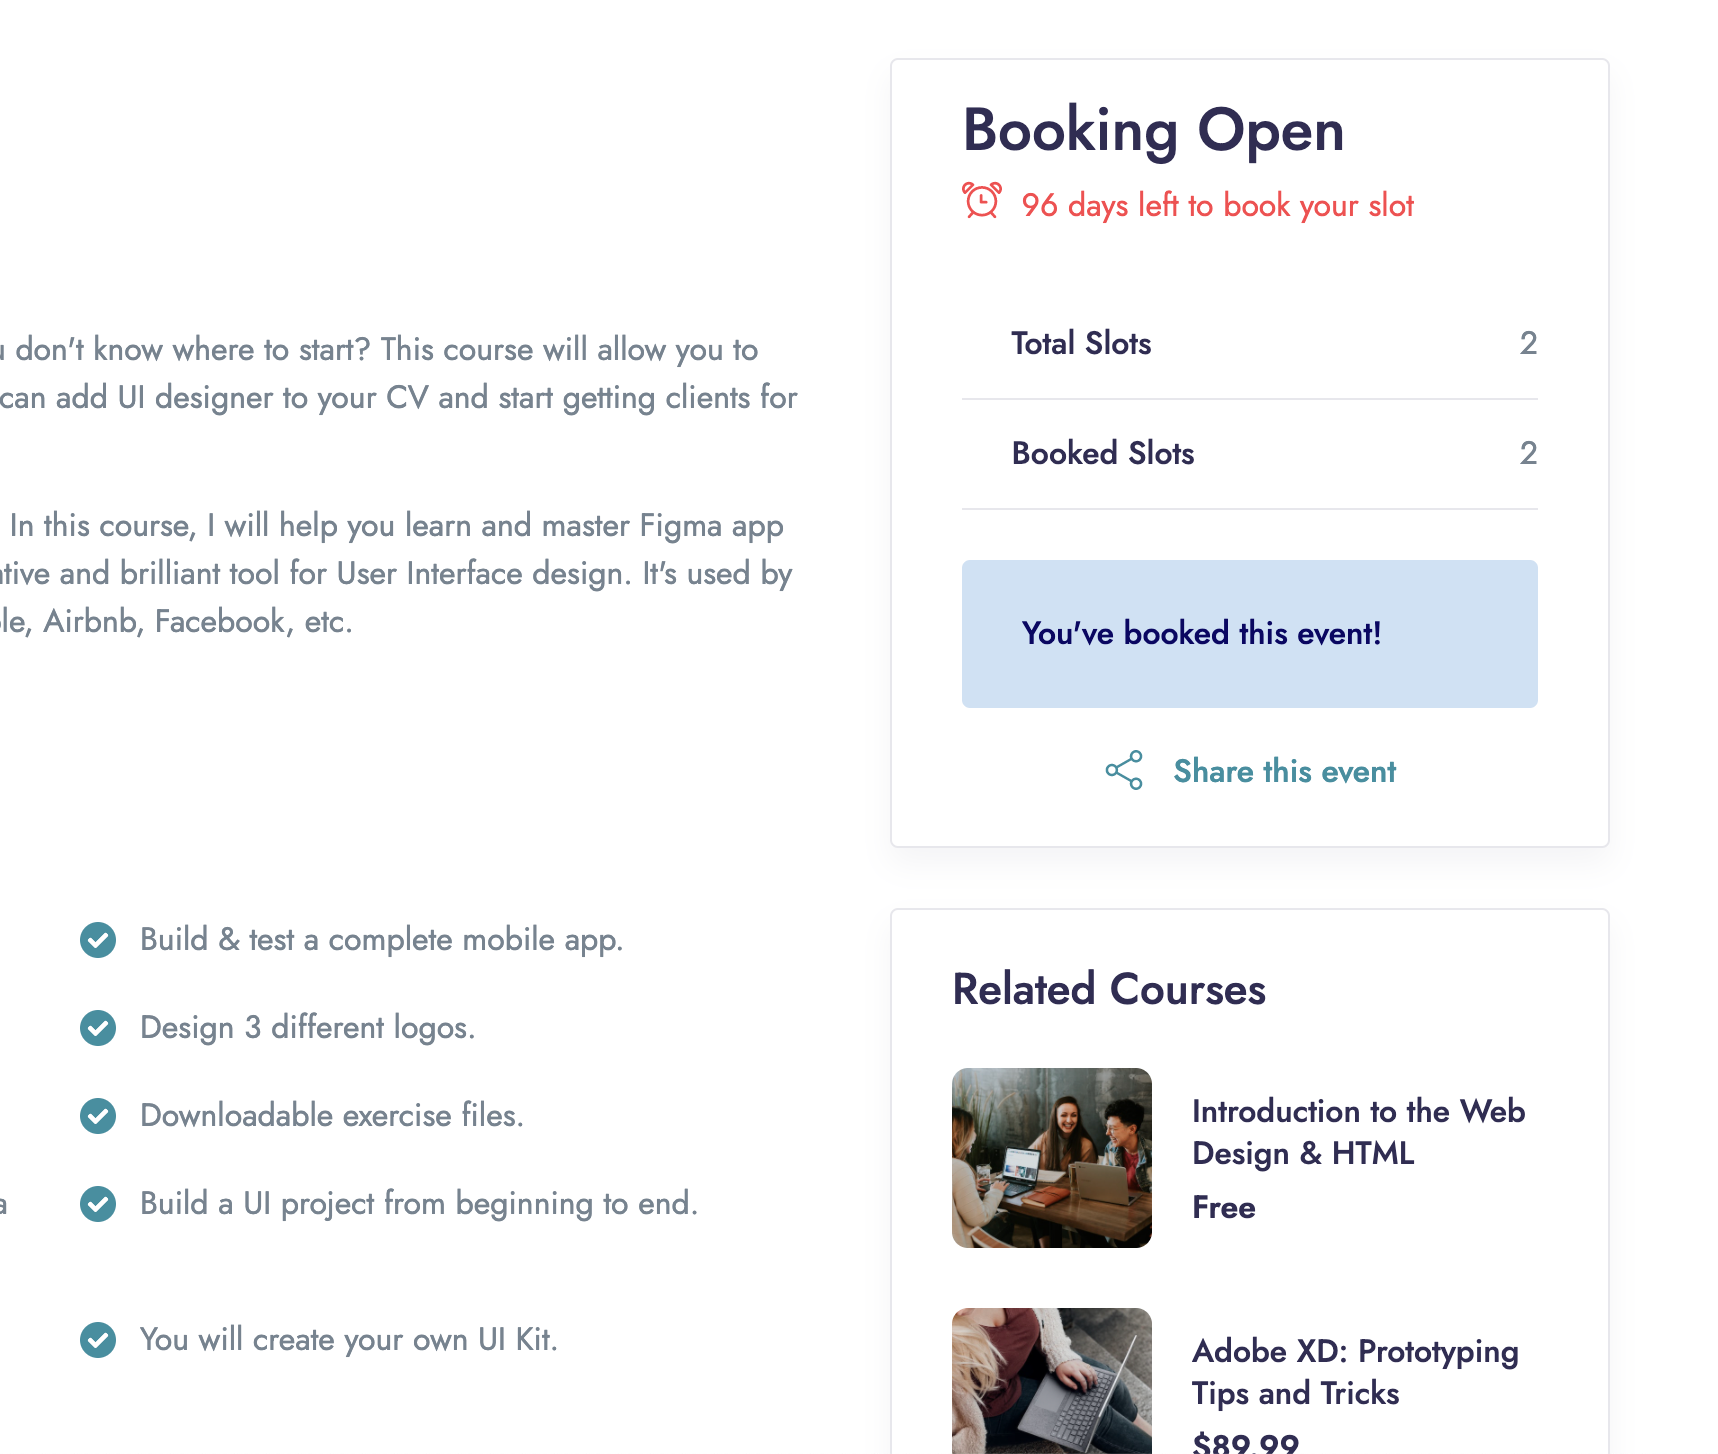
Additionally, Cocoon Events allows for the event creator to review the list of booked students/slots and manage these.
Students are also able to remove their booking from the event.
Creating Events
To create an event, navigate to the Event List page at /local/cocoon_events, and click "Create New Event":
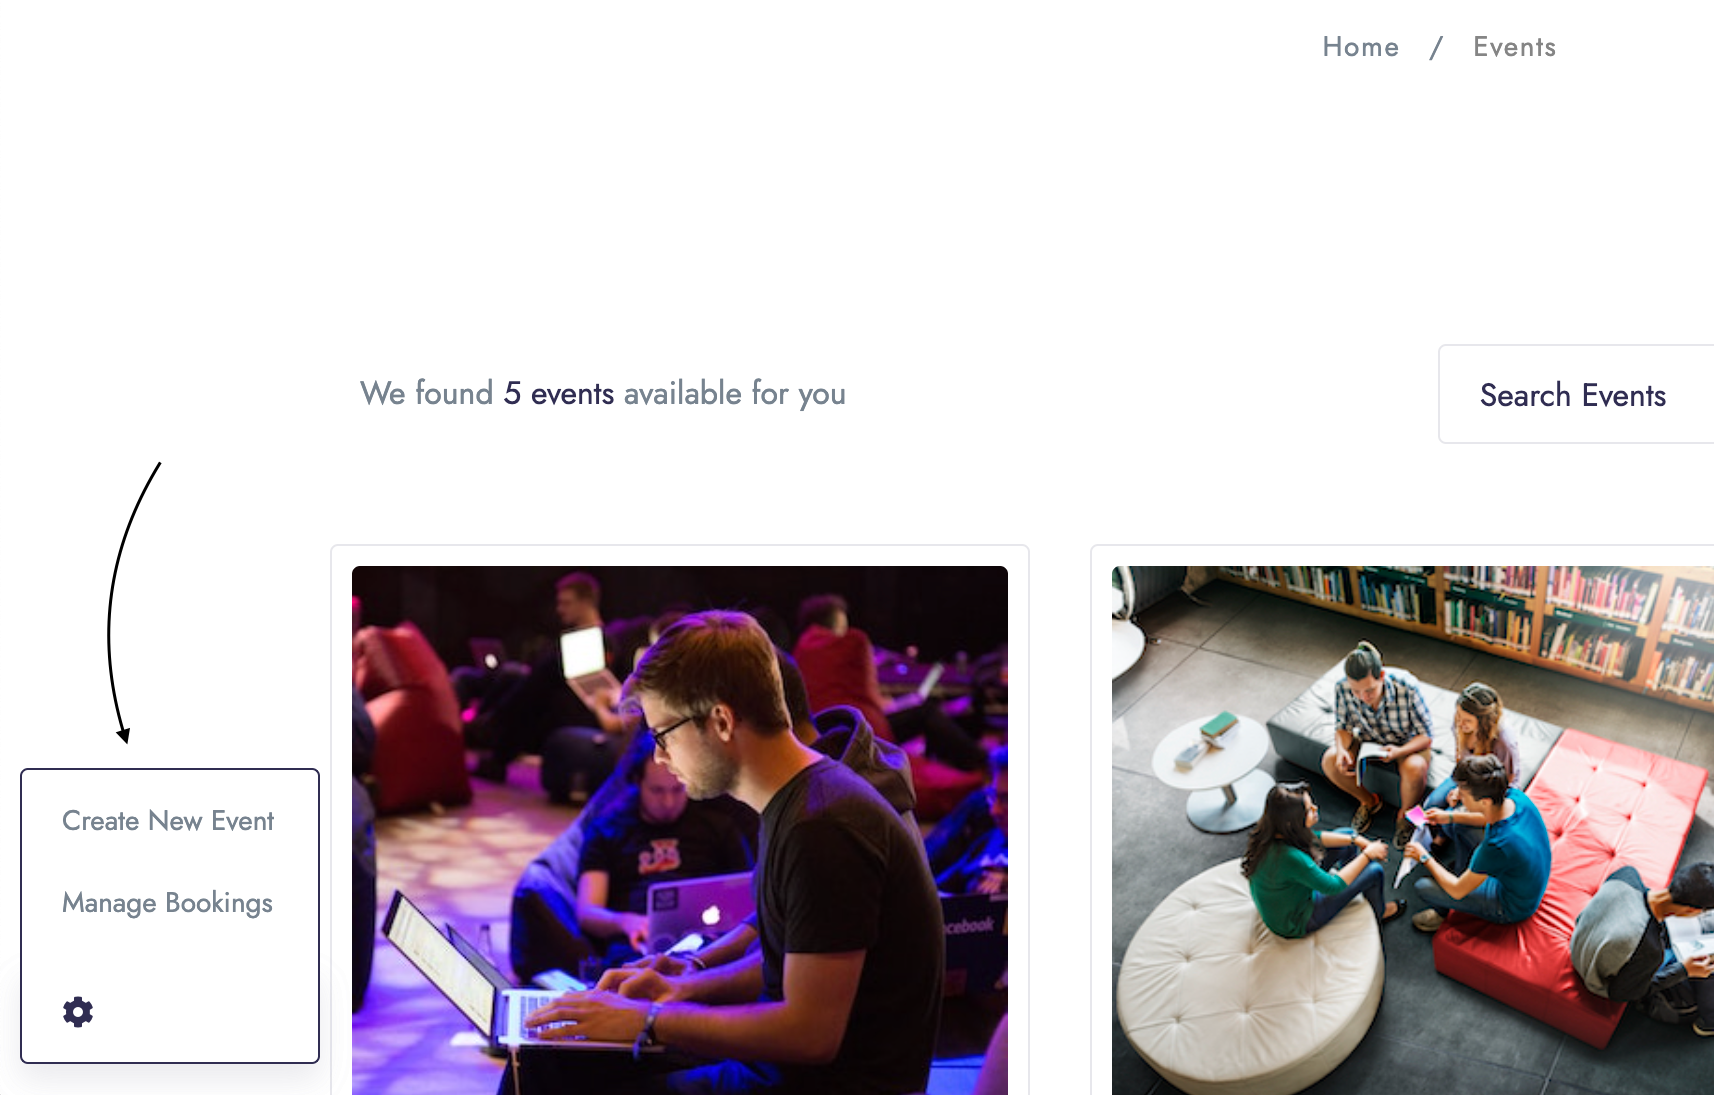
Managing Bookings
To oversee and manage bookings for each event (or all events), click "Manage Bookings".
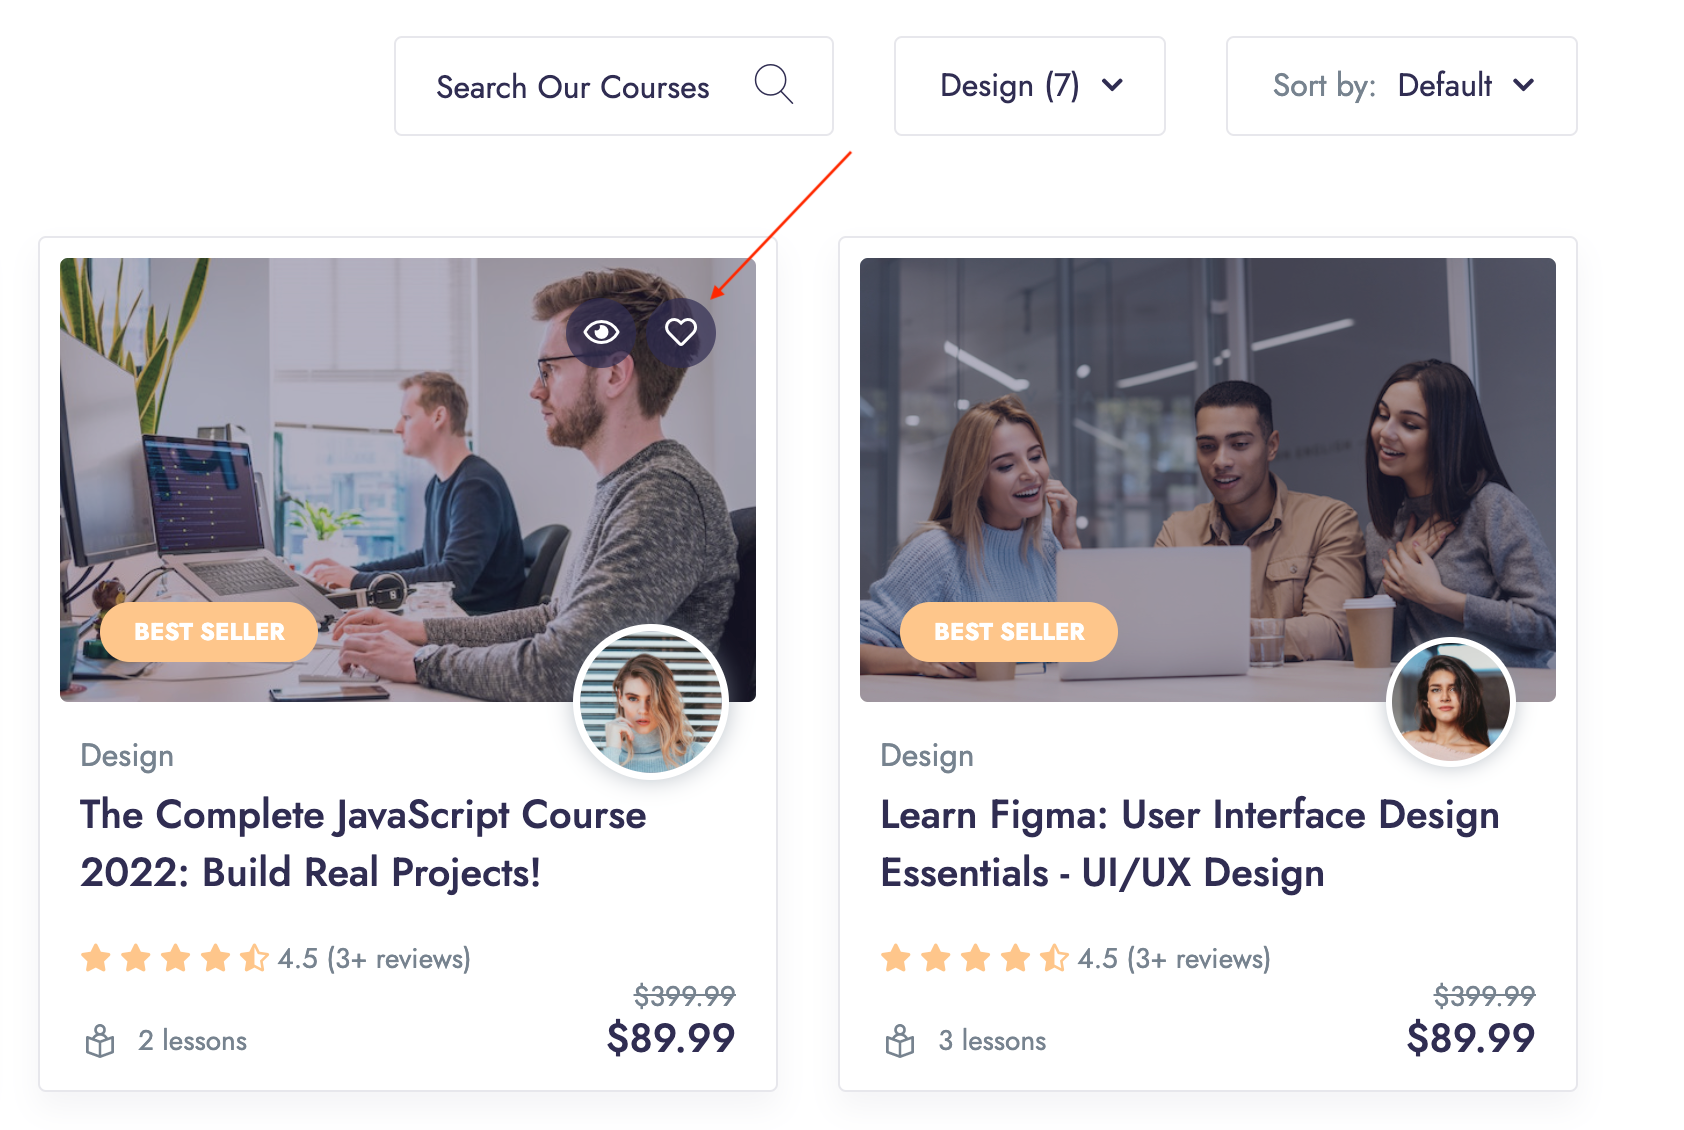
Skola ships with Cocoon Wishlist, a premium Moodle plugin that implements wishlisting capabilities into Moodle.
Cocoon Wishlist allows users to wishlist courses, adding them to their "Wishlist" in the user dashboard.
Courses can be added to a user's wishlist by clicking the heart icon beside course listings:
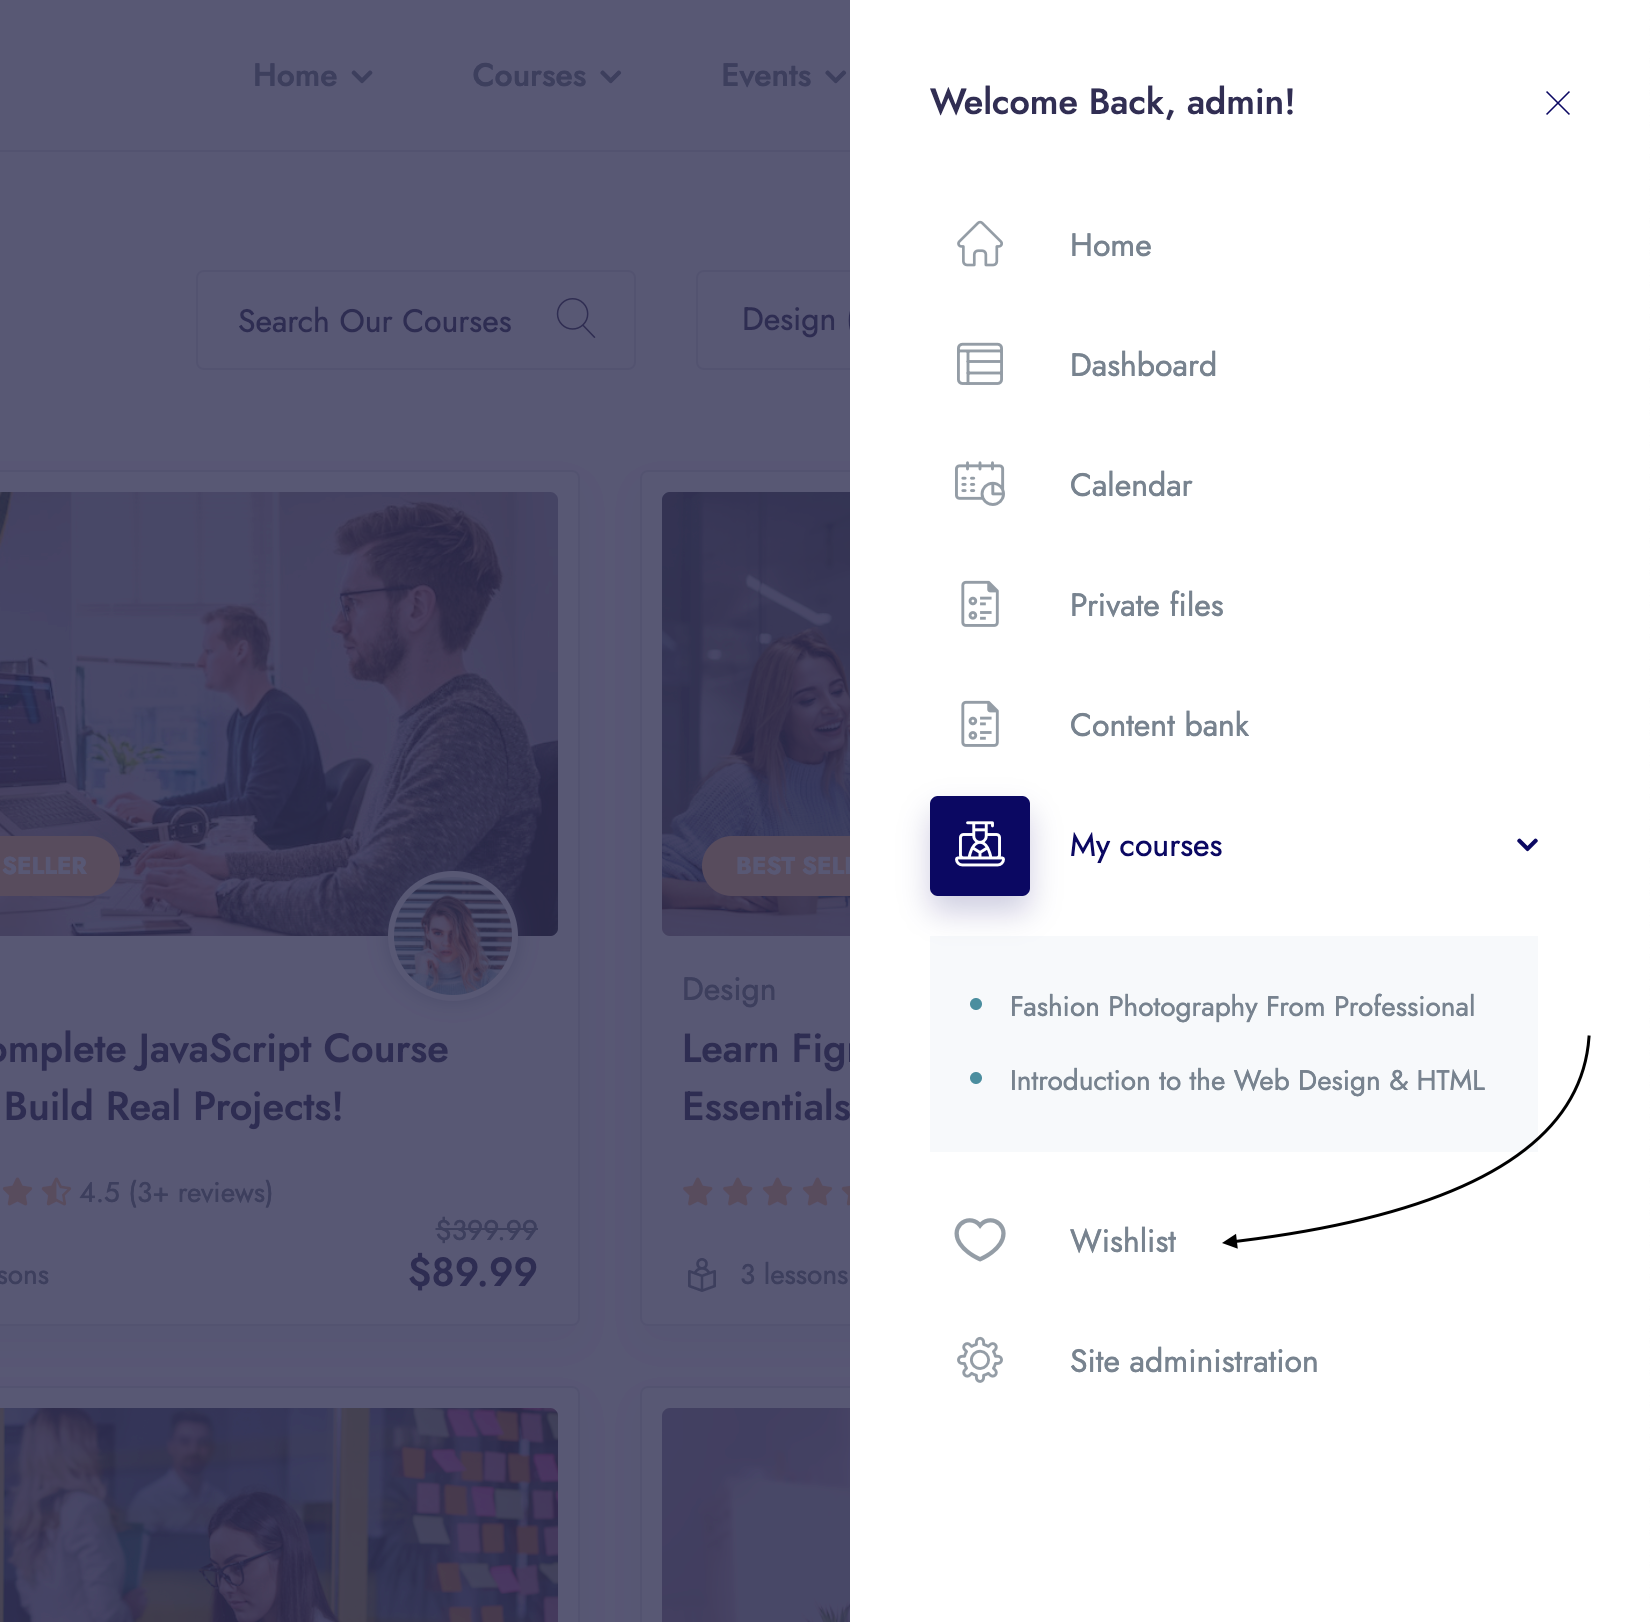
The wishlist can be accessed by the side navigation drawer, under "Wishlist":
Users can view the courses in their current wishlist, or remove them by clicking the broken heart:

Skola ships with the Cocoon Users plugin, which is capable of displaying filterable lists/grids of registered users on your Moodle site.
The plugin also allows for configuration of the available filters/sort options, and which role types are included in the listings.
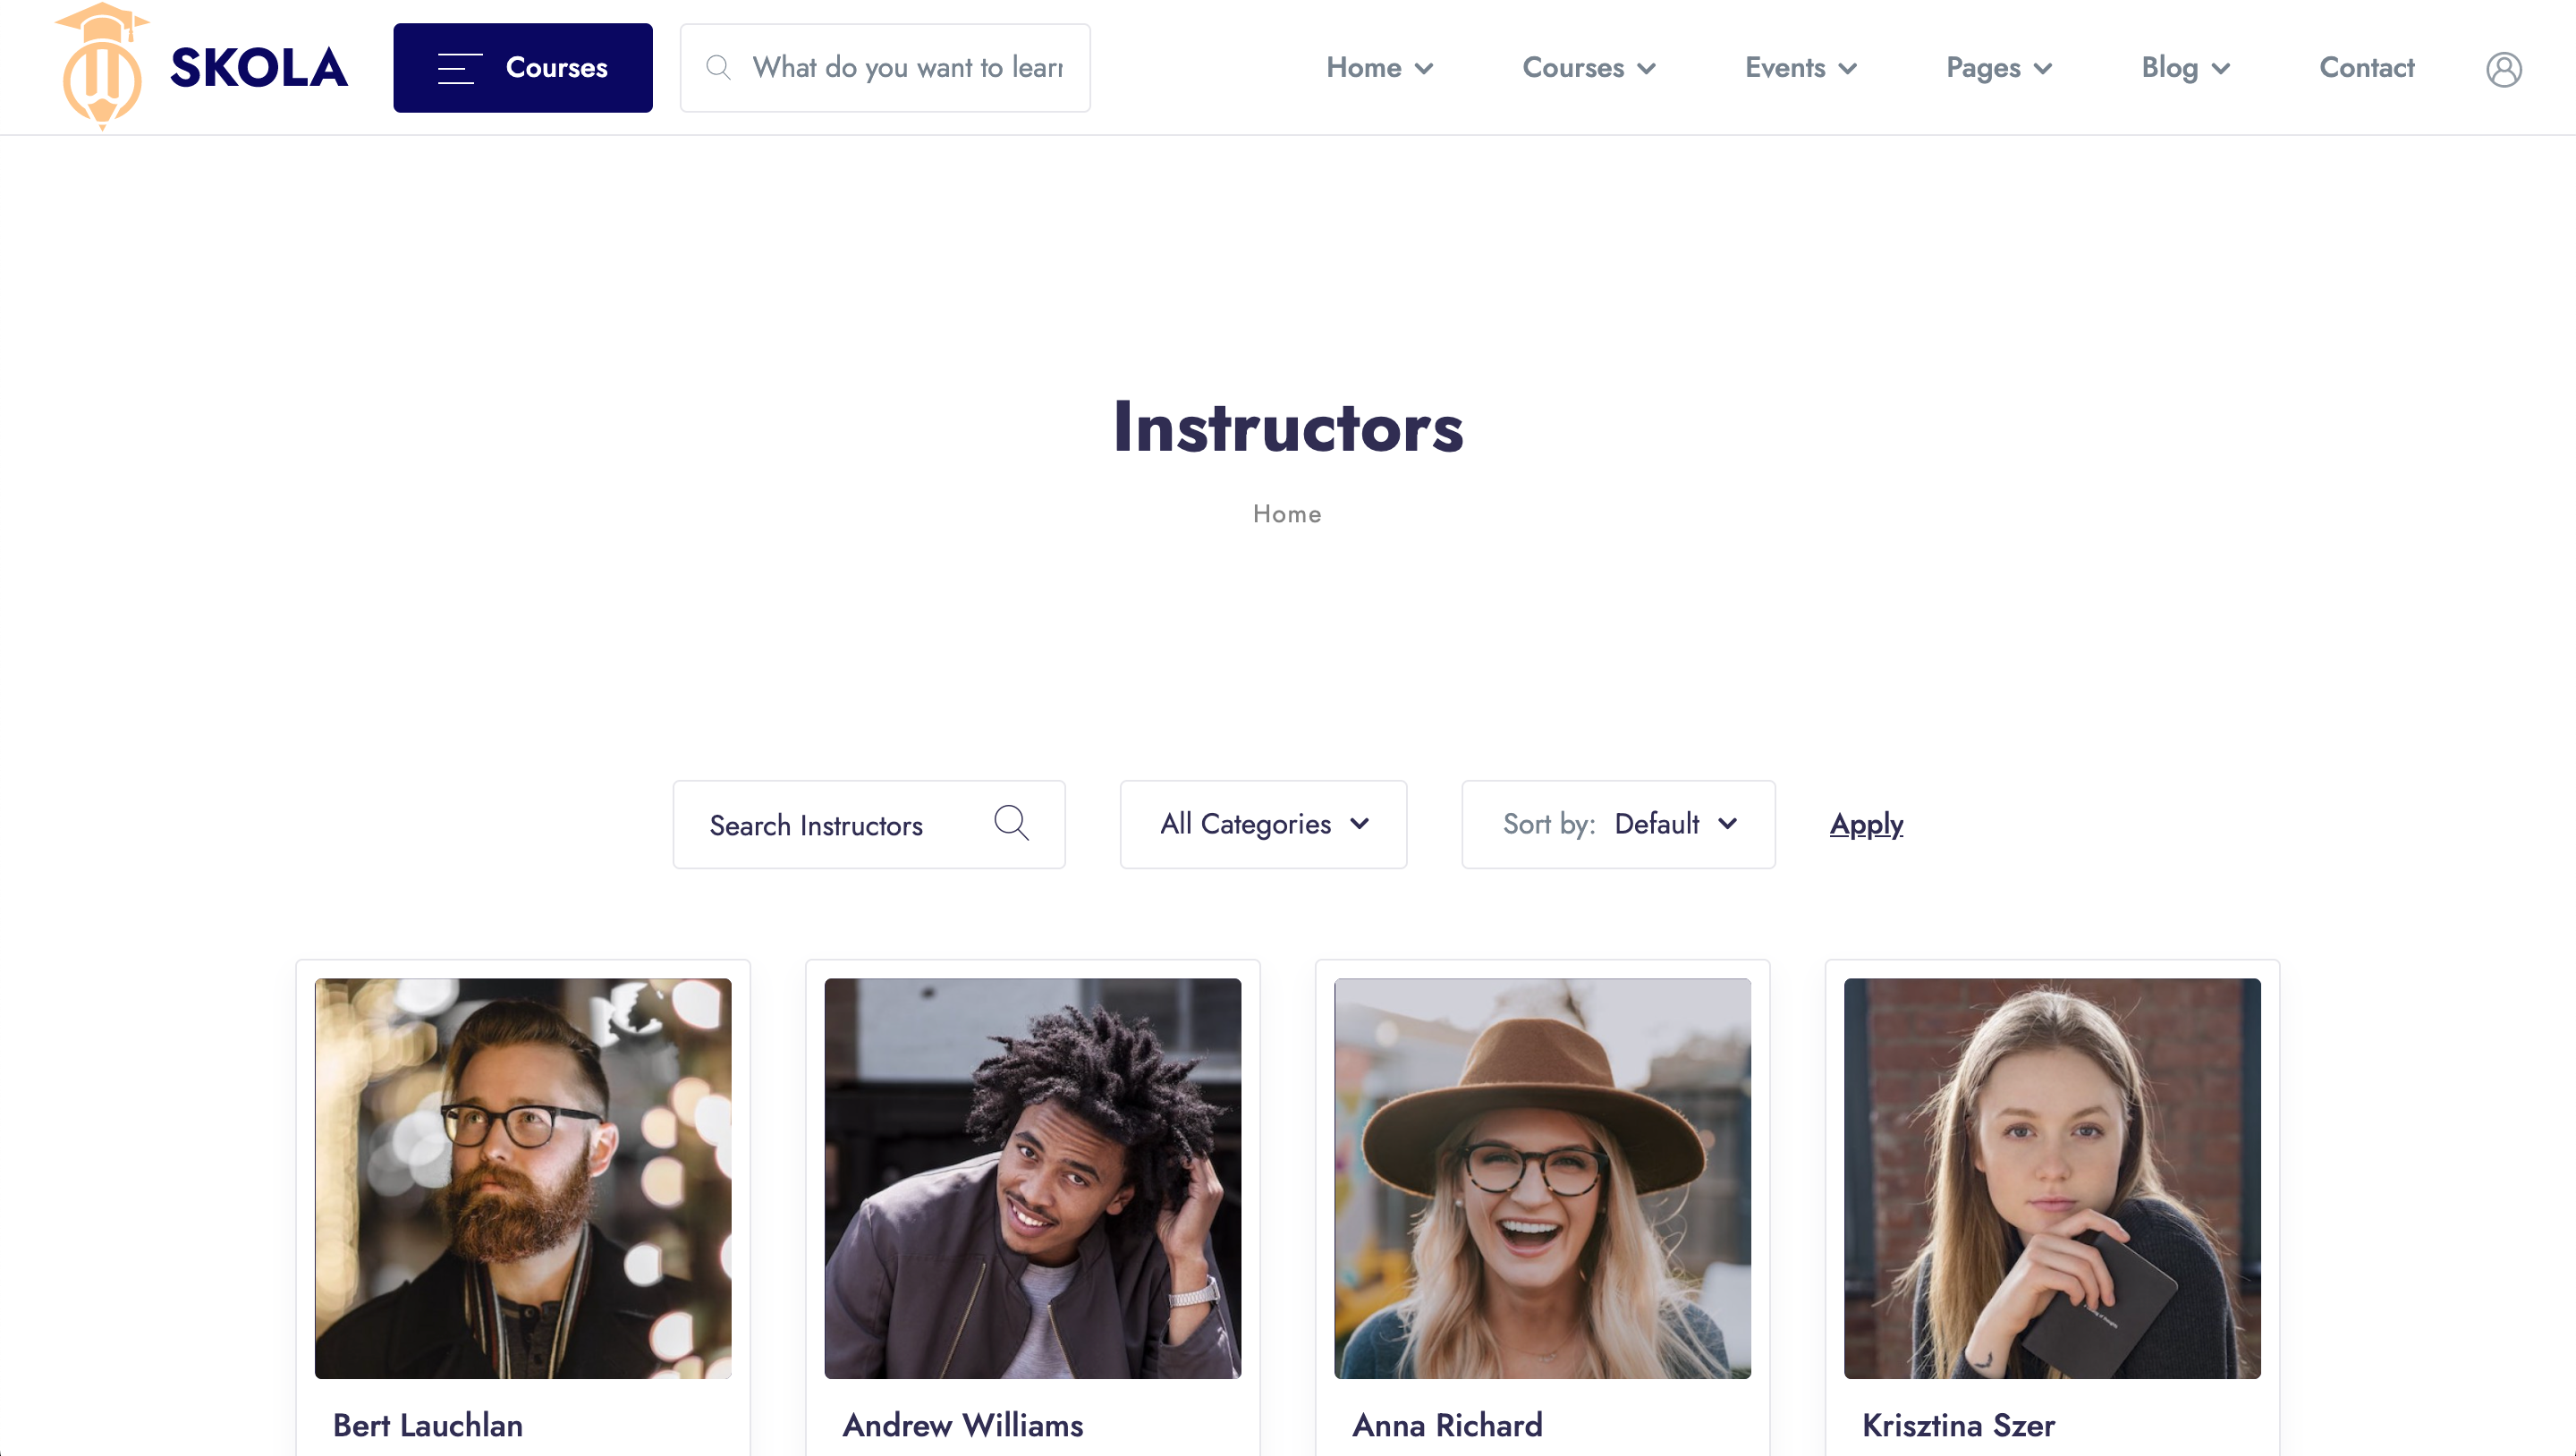
To configure the listing page:
- Go to Site administration > Plugins > Local Plugins > Cocoon Users
- Here you can customize the settings for the listing pages, including the following configurations:
- Page title
- Number of users to display per page
- Allow Searching?
- Allow Filtering?
- Allow Sorting?
- User Roles
Cocoon Live Customizer provides extensive support for the customization of certain custom blocks.
However, you may wish to further customize Skola theme styles or custom blocks with custom CSS changes.
In the Skola theme settings panel, various fields are provided for custom CSS and JavaScript code.
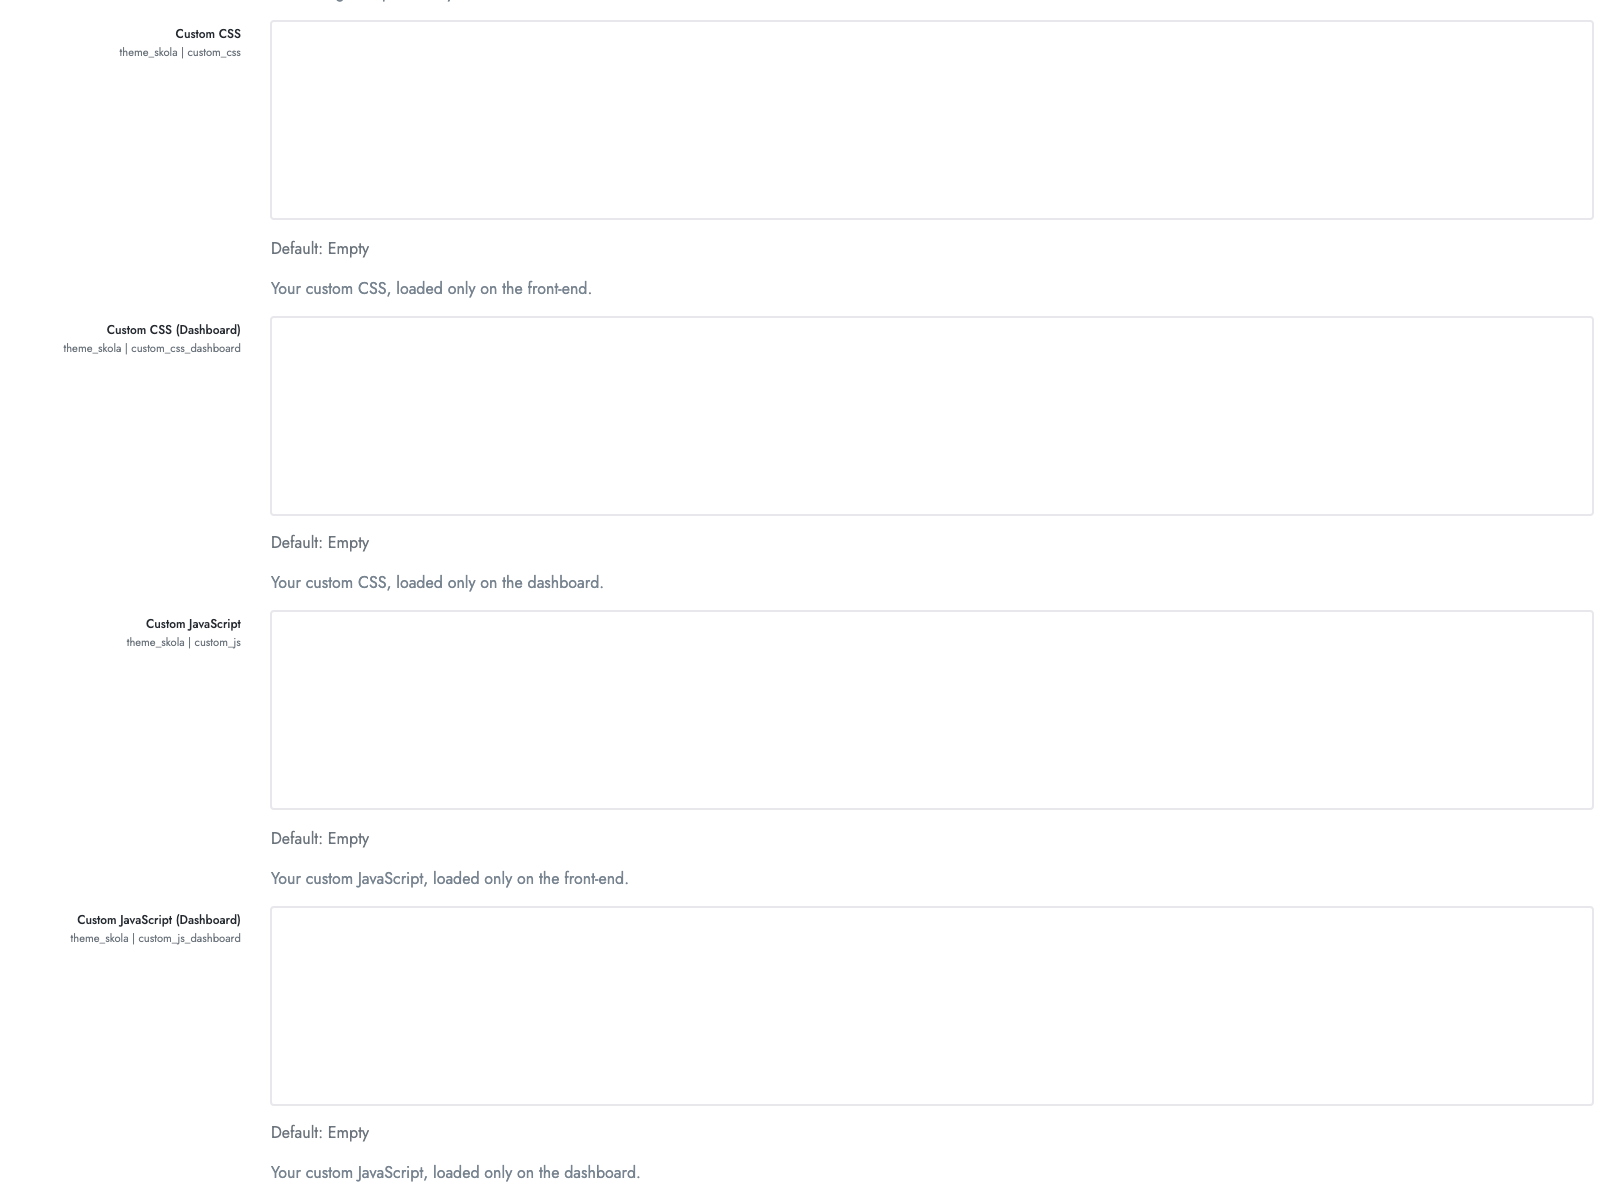
The fields provided via the Skola theme settings panel (Site administration > Appearance > Skola > Advanced) are:
- Custom CSS - styles applied to the Skola frontend theme
- Custom CSS Dashboard - styles applied to the Skola dashboard theme
- Custom JavaScript - JavaScript applied to the Skola frontend theme
- Custom JavaScript Dashboard - JavaScript applied to the Skola dashboard theme
When using custom CSS via these fields, please do not include the style tag, as this is provided as a wrapper by default.
When using custom JavaScript via these fields, please do not include the script tag, as this is provided as a wrapper by default.
If you prefer to include your custom CSS files via a hard-coded file, rather than via the Theme Settings, you can edit the custom.css file located at: /theme/Skola/style/custom.css.
Please note that your custom.css file may be overwritten when updating Skola theme. For this purpose, we recommend backing up your custom.css file before updating Skola theme, in case you need to
restore it after the update.
If you are experiencing trouble, or otherwise have a question or concern beyond the scope of this help file, you may reach us via any of the following means.
We endeavour to respond to all enquiries within 24 hours, Monday to Sunday.
Statement of Support
We will always do our best to leave you satisfied after any support correspondence. We shall provide support for reasonable questions pertaining to the installation and setup of the theme, queries regarding use of the theme's features, and
reports of bugs or technical issues with the product. We aim to respond to all enquiries in a timely fashion, often within 24 hours, Monday to Sunday. We ask that you are patient and polite in exchange for this generous service. Regrettably,
we are unable to provide modification or customization services free of charge.
FAQ
Q. Do you offer installation services?
A. Yep! Get in touch at https://createdbycocoon.com/contact
Q. What if I need customization services? ... do you offer customization services?
A. Yep! Get in touch at https://createdbycocoon.com/contact
Q. Can I pay you for a custom project? What is your hourly rate?
A. Yep! Get in touch at https://createdbycocoon.com/contact